Roofing

A drawing of gutter guards being installed on a house showcasing their benefits.

What Are Rain Gutters For? Essential Home Maintenance Explained

Rain gutters protect your home by collecting rainwater and diverting it away from the roof and foundation. This prevents basement flooding, soil erosion, and structural damage. In this article, you’ll learn more about what are rain gutters for, and how they maintain your home.

Key Takeaways

  • Rain gutters are essential for managing rainwater, protecting homes from structural damage, basement flooding, and mold growth by directing water away from foundations.

  • Regular maintenance of gutters and downspouts is crucial to prevent clogs, leaks, and associated costly repairs, ensuring the longevity and efficiency of the gutter system.

  • Gutter guards can reduce cleaning frequency and extend the lifespan of gutters by preventing debris accumulation, which is particularly beneficial in environments prone to ice dams and heavy rainfall.

Understanding Rain Gutters

An illustration showing various rain gutters and their functions, explaining what are rain gutters for.

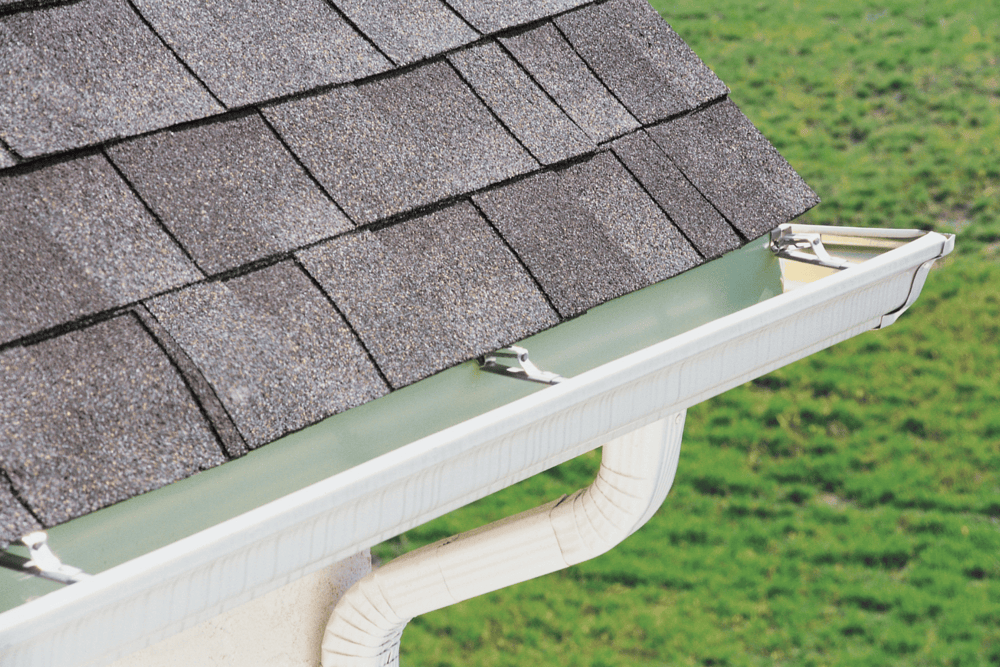
Rain gutters, more than just metal or plastic channels along your roof’s edge, are crucial for your home. They collect and channel rainwater from the roof to the ground. This simple mechanism prevents water from pooling around your foundation, avoiding serious structural issues.

The primary purpose of rain gutters is to gutters divert water away from your house. This helps prevent a myriad of problems such as basement flooding, soil erosion, and water damage to the walls and foundation. Moreover, well-maintained gutters prevent water splashes that carry dirt onto your siding, keeping your home looking clean and well-kept.

Styles of gutters include hidden ones integrated into the roof structure, offering a sleek, less visible way to manage rainwater. No matter the style, maintaining gutters is crucial. Regular cleaning and inspections ensure efficiency and protect your home from water damage.

Importance of Rain Gutters for Home Protection

A cartoon showing a house protected by rain gutters, highlighting their importance for home protection.

Rain gutters are essential for managing water flow from your roof during storms. Without them, rainwater can accumulate on your roof, leading to potential rot and deterioration of roofing materials. This could result in expensive repairs or even a complete roof replacement.

Gutters prevent basement leaks and foundation settlement by directing water away, thus protecting the foundation from water exposure. This maintains structural integrity and prevents mold development in moist environments. Improper drainage due to a lack of gutters can lead to soil erosion around your home, damaging your landscape and further compromising your foundation.

Gutters also help avoid significant repair costs by preventing rainwater overflow onto siding or foundation issues. The potential costs for water damage restoration can range from $1,200 to $5,300, a significant financial burden that most homeowners would prefer to avoid. Preventing stagnant water, gutters contribute to pest control, making them indispensable for home maintenance.

How Rain Gutters Protect Your Foundation

One of the most critical functions of rain gutters is to protect your home’s foundation. By diverting rainwater away from the base of your home, gutters prevent water from collecting around the foundation. This is crucial because water that pools near the foundation can weaken the structural support of your home.

Without gutters, rainwater can saturate the ground around your foundation, causing instability and damage. This can lead to foundation cracks and water intrusion, causing severe structural issues and costly repairs. Properly functioning gutters and downspouts maintain your home’s structural integrity and minimize maintenance costs.

Effective gutter maintenance prevents basement flooding from water pooling near the foundation. By directing rainwater away, gutters maintain a dry, stable foundation, protecting your home from water damage and costly repairs.

Preventing Roof and Fascia Damage

An illustration depicting damage caused to roofs and fascia due to lack of rain gutters.

Rain gutters collect and channel water from your roof, preventing potential leaks in your attic and upper rooms. Properly functioning gutters prevent rainwater accumulation on your roof, avoiding leaks and damage to roofing materials.

By diverting water from the roofline, gutters preserve the aesthetic and structural integrity of your home. Clogged gutters can overflow and damage the fascia boards. Regular maintenance, including cleaning, reduces the risk of fascia damage and costly repairs.

Gutter downspouts reduce the risk of water damage to roofs, siding, and windows by efficiently redirecting water. In colder climates, gutter guards prevent ice dams by ensuring free water flow. Regular maintenance further minimizes the risk of ice dams, preventing roof and structural damage.

The Role of Downspouts in a Gutter System

A gutter system includes gutters and downspouts, both essential for effective water management. Downspouts direct water away from your home, preventing damage to the foundation and other structural components. Without functioning downspouts, rainwater can cause issues like corrosion and mold growth.

Magnum 4”x3” downspouts, for example, can divert twice as much water compared to traditional downspouts, making them an excellent choice for homes in areas with heavy rainfall. By efficiently channeling rainwater away, downspouts maintain the structural integrity and longevity of your property.

Benefits of Installing Gutter Guards

A drawing of gutter guards being installed on a house showcasing their benefits.


Gutter guards can significantly reduce the frequency of gutter cleaning, allowing maintenance once a year or less. This saves time and ensures gutters remain clear and functional.

Gutter guards enhance efficiency, reliability, and longevity by blocking debris and minimizing clogs. This prevents water overflow and damage to the fascia and foundation. Quality gutter guards extend the service life of gutters by preventing corrosion and damage from debris accumulation, making them a worthwhile investment. If you want to protect your home, consider how to install gutter guards effectively.

Gutter guards also protect against ice dams in colder climates by ensuring free water flow. This is crucial for homes in harsh winter areas, as ice dams can cause significant roof and structural damage.

Types of Gutters: Materials and Styles

An illustration comparing different materials and styles of gutters.

Several materials and styles are available when choosing gutters. Aluminum gutters are the most common, known for their durability and decades-long lifespan. They offer a cost-effective option for homeowners seeking reliable gutter installation.

Copper gutters are a premium choice, known for their longevity of over 50 years. Though more expensive to have gutters installed, their aesthetic appeal and durability make them a worthwhile investment for long-lasting solutions.

Vinyl gutters, suitable for dry climates, have a lifespan of up to 20 years but are prone to UV damage. Seamless gutters, constructed without seams, are less likely to leak compared to traditional sections. This style is popular for its sleek appearance and reduced maintenance needs.

When selecting gutters, consider the climate, budget, and aesthetic preferences to ensure the best fit for your home.

Regular Maintenance for Functioning Properly

Regular maintenance ensures gutters function properly and protect your home from water damage. Keeping gutters clean avoids common problems like clogs and overflows. Cleaning and inspecting your gutters at least twice a year, in spring and fall, is recommended.

Effective maintenance prevents water damage and significantly extends the lifespan of gutters. Regular maintenance addresses common gutter concerns and ensures long-term functionality. Factors like extreme weather and installation quality can affect gutter longevity, making regular upkeep essential.

Investing time in maintenance helps homeowners avoid costly repairs and ensures gutters provide optimal protection. Well-maintained gutters are key to a strong, durable home, safeguarding against water damage and structural issues.

Alternatives to Traditional Gutters

While traditional gutters are common for managing rainwater, alternatives exist. Rain chains, for example, use linked cups or chains to channel water from roofs to gardens or collection areas. They add a decorative element while managing water flow.

However, alternatives like rain chains might not manage large volumes of water as effectively as traditional gutters. Drip edges, ground gutters, and other debris are other options but may not offer the same level of protection and efficiency.

When considering alternatives, weigh their effectiveness against your home’s specific needs and climate.

When Might You Not Need Gutters?

Some scenarios might not require gutters. Homes with steeply pitched roofs or in dry climates, for example, may not need them. Here, the natural roof slope allows rainwater to flow away without additional drainage systems.

Gutters might be unnecessary for homes on naturally sloped ground, where water drains away from the foundation. While not generally required by law, assess your home’s specific conditions to determine if gutters are necessary. Consulting a professional can help you make an informed decision.

Summary

Rain gutters are an indispensable part of home maintenance, providing essential protection against water damage, foundation issues, and costly repairs. By understanding the importance of gutters and ensuring they are properly maintained, homeowners can safeguard their homes from potential water-related problems.

At Waddle Exteriors, we have seen the benefits of well-maintained gutters firsthand. Whether you’re considering new gutters, installing gutter guards, or exploring alternatives, taking proactive steps to manage rainwater effectively is crucial. With the right knowledge and maintenance, your gutters can provide long-lasting protection for your home.

Frequently Asked Questions

What are the main functions of rain gutters?

Rain gutters channel rainwater away from the roof and foundation, preventing water pooling and protecting your home from potential water damage. This crucial function helps maintain the structural integrity of your property.

Why are gutters important for home protection?

Gutters are crucial for protecting your home by managing water flow from the roof, which prevents water damage and potential foundation issues. Properly functioning gutters can save you from costly repairs in the long run.

How do gutter guards benefit my gutter system?

Gutter guards significantly enhance your gutter system by reducing cleaning frequency, preventing clogs, and extending the lifespan of your gutters. This results in less maintenance and fewer repairs, ensuring efficient water flow.

What types of materials are available for gutters?

Gutters are commonly made from materials like aluminum, copper, and vinyl, each offering unique advantages in terms of durability and suitability for various climates. Choosing the right material is essential for ensuring effective drainage and longevity.

Are there alternatives to traditional gutters?

Yes, alternatives to traditional gutters include rain chains, drip edges, and ground gutters, though they may be less effective in handling large volumes of water. Consider your specific needs when choosing a solution.


Illustration depicting the concerns of ponding water on flat roofs.

Top Strategies to Mitigate Ponding Water on Flat Roofs

Ponding water on flat roofs can cause structural damage and leaks if not addressed. This guide details what ponding is, why it’s problematic, and practical strategies to mitigate it effectively.

Key Takeaways

  • Ponding water on flat roofs poses significant risks such as leaks, structural damage, and reduced roof lifespan; prompt mitigation is essential.

  • Effective strategies to combat ponding include using tapered insulation, installing additional drains, and applying reflective coatings to improve drainage and durability.

  • Regular maintenance and professional inspections are crucial for early detection and resolution of ponding issues, minimizing future costly repairs.

Top Strategies to Mitigate Ponding Water on Flat Roofs

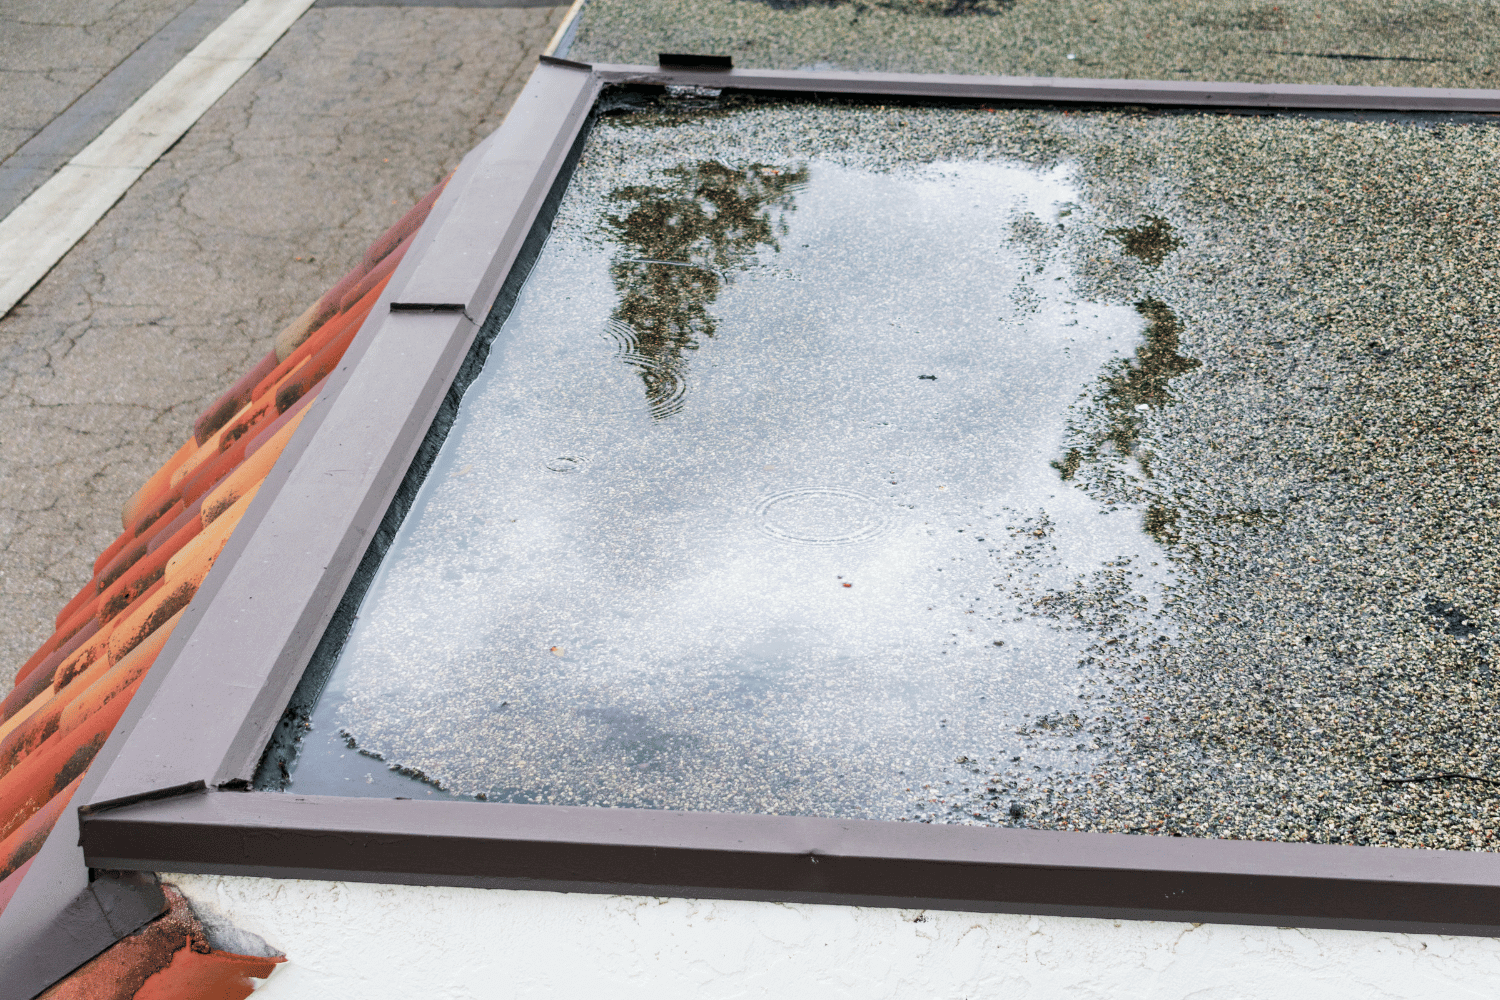
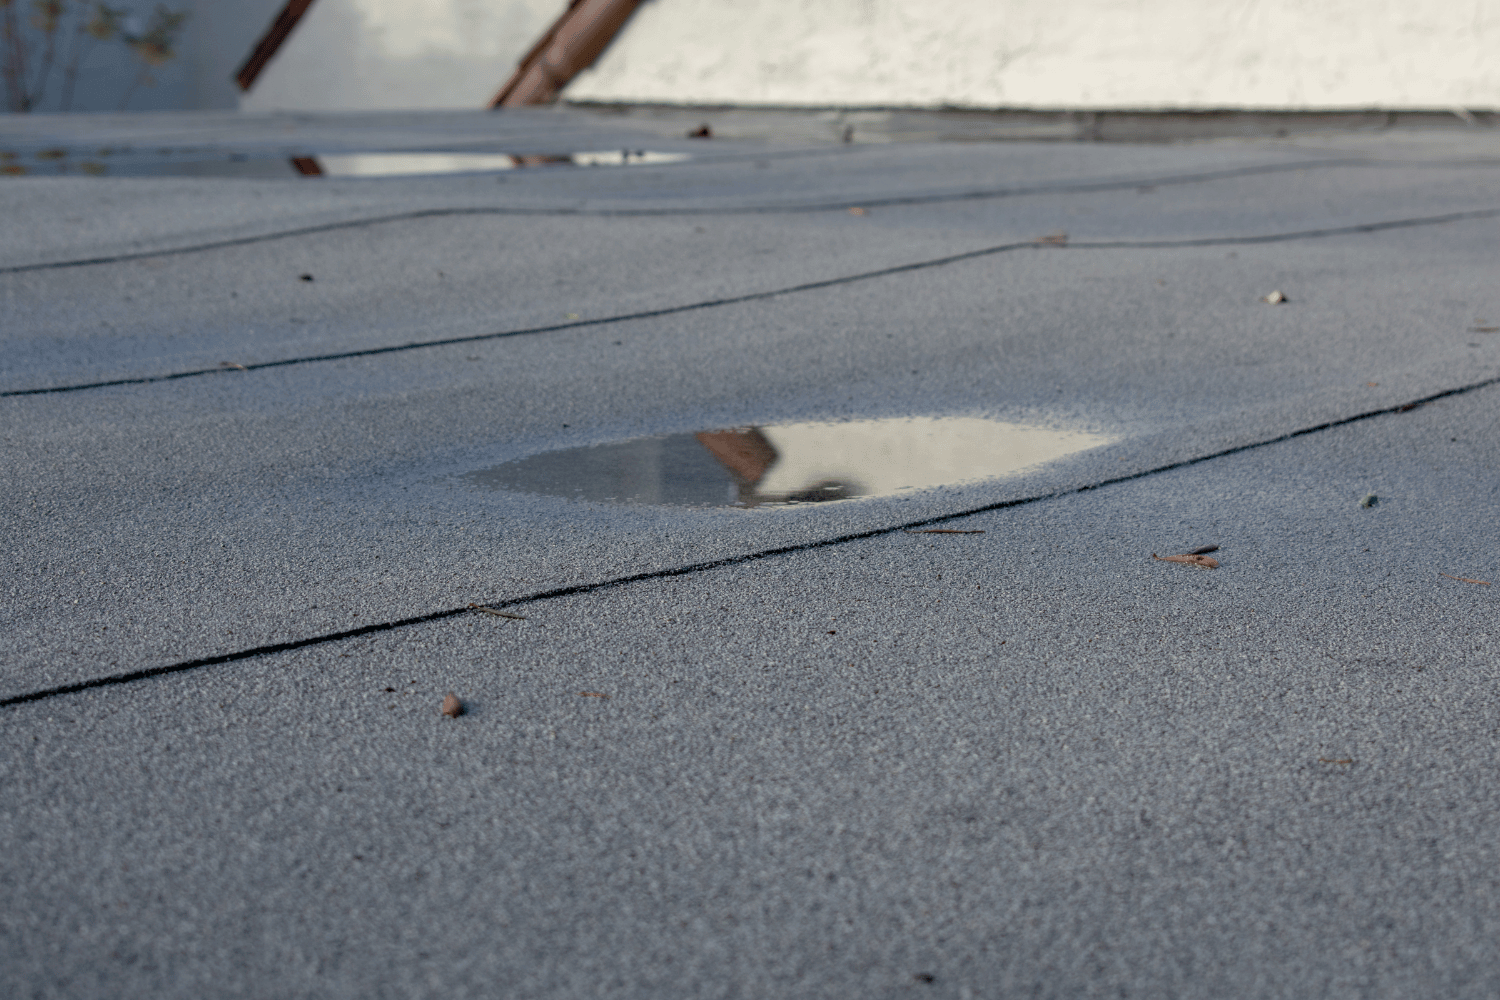
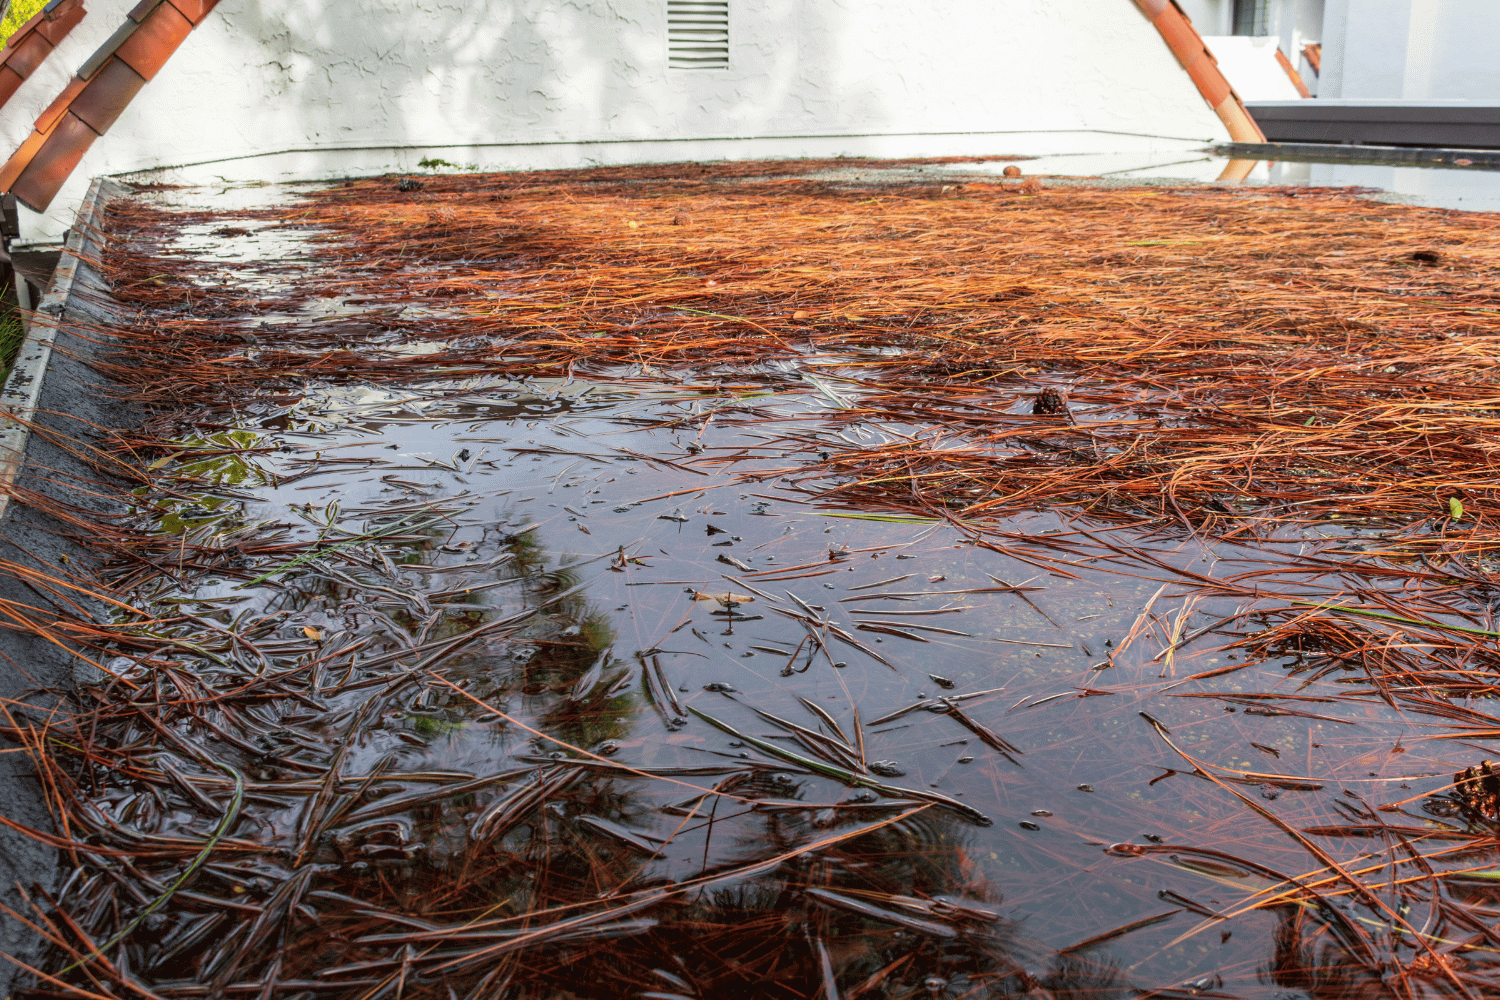
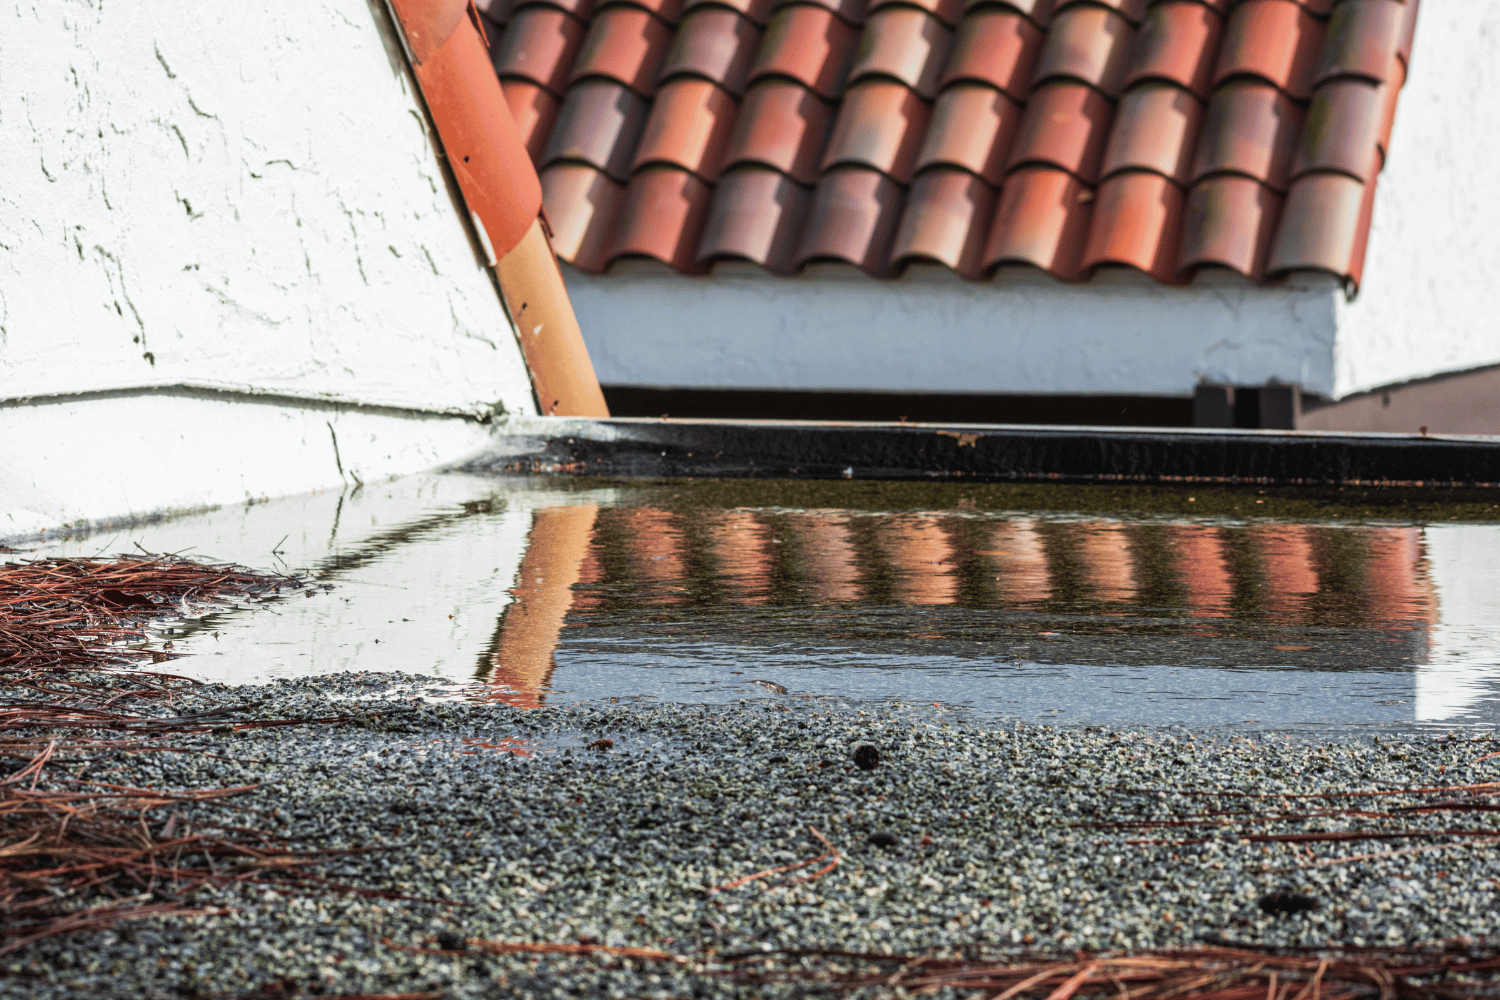
A flat roof with visible ponding water.

Ponding water on flat roofs, which accumulates and remains stagnant for over 48 hours, poses a significant concern for property owners. It can lead to extensive long-term damage, compromising the building’s structural integrity and the durability of the roof membrane. Addressing and mitigating ponding water issues promptly is crucial for maintaining the health of flat roof systems.

Using sprayed insulation foam can create a proper slope on flat roofs, facilitating drainage and reducing water accumulation. Products like Gaco’s insulation foam are effective in correcting low areas, preventing ponding. Additionally, applying roof coatings such as acrylic, silicone, or urethane can enhance the roof surface’s durability and mitigate the impact of ponding water.

Protecting the flat roof system against water penetration helps maintain property value and avoid costly repairs. Regular maintenance, professional inspections, and the strategies mentioned can help property owners manage and prevent water ponding on flat roofs.

Introduction

Ponding water, or incidental water, refers to rainwater that collects in puddles on flat roof surfaces and fails to drain effectively. Regular inspection and timely intervention are crucial as ponding water occurs, signaling potential risks to a building’s roofing integrity.

Silicone coatings can help mitigate the effects of ponding water on flat roofs, ensuring the longevity and durability of the roof system.

Why Ponding Water is a Concern for Flat Roof Systems

Illustration depicting the concerns of ponding water on flat roofs.

Ponding water on flat roofs presents several significant risks that should not be ignored. Prolonged exposure to stagnant water can lead to severe leaks and structural damage, threatening the overall integrity of the building. Water accumulation can cause the sagging roof deck, increasing the risk of a complete roof collapse. The continuous wetting and drying cycle can also cause roofing materials to crack and degrade over time, further compromising the roof system.

Monitoring ponding water issues and addressing them promptly is essential. Water that remains on the roof for more than 48 hours after rainfall indicates a problem requiring professional examination. If left unaddressed, these issues can void warranties and lead to more extensive and expensive repairs.

Reflective roof coatings, such as acrylic, can reduce cooling demands and mitigate the urban heat island effect, providing protection against the sun’s harmful UV rays. These coatings enhance the roof’s energy efficiency and durability, making them valuable in combating ponding water.

Common Causes of Ponding Water on Flat Roofs

Diagram showing common causes of ponding water on flat roofs.

Understanding the common causes of ponding water on flat roofs is crucial for prevention. Poor roof design is a primary factor, leading to inadequate slopes and drainage systems. Even well-constructed roofs can experience ponding due to structural sagging or insufficient drainage.

Blocked drains and gutters, preventing water from flowing off the roof, and crushed insulation, creating low spots that trap water, are other contributing factors. These issues can lead to significant water accumulation and potential damage if not addressed promptly.

Poor Roof Design

Poor roof design is a leading cause of ponding water on flat roof systems. Structural irregularities, such as deformed joists or beams, and incompatible architectural plans can result in inadequate slopes and poor drainage. A proper drainage system with the correct number and placement of drains is essential to prevent standing water.

Building owners should have a structural engineer examine the roof design for irregularities and recommend necessary adjustments to ensure adequate slope and drainage. Addressing these design flaws early can prevent future water accumulation and extend the roof’s lifespan.

Blocked Roof Drains and Gutters

Blocked roof drains and gutters are another common cause of ponding water on flat roofs. Debris such as leaves, twigs, and other objects can obstruct drains, preventing rainwater from flowing off the roof. Additionally, roof modifications like skylights or smoke hatches can impede drainage, exacerbating the problem.

Regular maintenance is essential to keep drain areas clear of debris and ensure proper drainage. Keeping drains and gutters clean can prevent water from pooling near low points and potentially leaking into the building.

Crushed Insulation

Crushed insulation significantly contributes to ponding water on flat roofs. High foot traffic and heavy rooftop equipment can compress insulation, creating indentations that trap water. These low spots can hold water during rainstorms, leading to prolonged accumulation and potential damage to the roof structure.

Property owners can address this issue by adding more insulation underneath or changing their insulation strategy to promote better water flow and prevent ponding. Ensuring the roof surface remains even and well-insulated is key to mitigating this problem.

The Impact of Ponding Water on Roofing Materials
Visual representation of the impact of ponding water on roofing materials.

Ponding water can devastate roofing materials. Prolonged exposure to standing water can lead to leaks, cracks, and overall degradation. The added weight of ponding water can also weaken the roof’s structural components, leading to sagging or even collapse.

The continuous cycle of wetting and drying can cause roofing materials to deteriorate prematurely, reducing their lifespan and increasing the risk of leaks and structural damage. Addressing ponding water issues promptly is crucial for maintaining the roof system’s integrity.

Vegetation Growth

Vegetation growth is a common consequence of ponding water on flat roofs. Stagnant water provides an ideal environment for plant growth, which can damage the roof system and lead to costly repairs. If left unchecked, vegetation can embed roots into roofing materials, causing further deterioration and compromising the roof’s structural integrity.

Regular inspections and maintenance can help identify and remove unwanted vegetation, preventing further damage and ensuring the roof remains in good condition.

Algae and Mold Development

Stagnant water on flat roofs is a breeding ground for mold and algae, compromising the roofing system’s integrity. Algae growth can further weaken the roof structure, leading to additional damage and potentially costly repairs.

Addressing ponding water issues promptly and ensuring proper drainage can prevent algae and mold development. Regular inspections and cleaning help maintain the roof’s health and prevent these problems from escalating.

Effective Solutions to Fix Ponding Water Issues

An illustration of effective solutions to fix ponding water issues.

Addressing ponding water issues promptly is crucial to prevent leaks, mold, and other costly damages. Effective solutions include installing additional roof drains, using tapered insulation, and performing regular maintenance to ensure proper drainage and reduce the risk of water accumulation.

Implementing these strategies can help property owners extend the lifespan of their flat roofs and maintain their structural integrity. The team at Waddle Exteriors emphasizes the importance of prompt action and offers long-lasting, tailored solutions.

Installing Additional Roof Drains

Installing additional roof drains enhances the drainage capacity, helping to prevent water from pooling and reducing the risk of damage to roofing materials.

Ensuring proper positive drainage can extend the lifespan of roofs and maintain their structural integrity. This simple yet effective solution can make a significant difference in preventing ponding water issues related to roof drainage.

Tapered Insulation

Tapered insulation promotes effective water flow toward drains, mitigating ponding issues and ensuring proper drainage.

Common slopes for tapered insulation are typically 1% and 2% grades, which help redirect water flow and reduce the risk of water accumulation near drains and scuppers. This solution not only prevents ponding water but also extends the roof’s lifespan by maintaining its structural integrity.

Regular Maintenance

Regular maintenance is vital to prevent ponding water on flat roofs. Inspecting and cleaning drain areas regularly ensures proper drainage and reduces the risk of water pooling near low points.

Even the best materials can fail without proper maintenance, so vigilance and prompt issue resolution are essential. Regular maintenance helps maintain the roof’s health and prevent costly repairs down the line.

Professional Help for Persistent Ponding Water Problems

Persistent ponding water problems require professional intervention. Building owners should monitor and analyze any water build-up that remains after 48 hours, indicating a need for professional help.

Professional contractors can identify the source of ponding water issues and prescribe effective solutions. Choosing a skilled roofer minimizes future ponding risks and ensures the roof system’s longevity.

How Waddle Exteriors Can Assist You

Waddle Exteriors offers specialized solutions to effectively address and resolve ponding water issues on flat roofs. With over 40 years of experience, their team provides comprehensive services, including roof inspection, repair, replacement, and installation.

Customer reviews highlight Waddle Exteriors’ helpful assistance, efficient communication, and quality workmanship, making projects seamless and smooth. Collaborating with GAF, a top US industry leader in roofing materials, they ensure quality and durability in all their roofing projects.

Summary

Addressing ponding water on flat roofs is crucial for maintaining the structural integrity and longevity of the roof system. Understanding the causes, impacts, and effective solutions for ponding water can help property owners take proactive measures to mitigate this issue.

By implementing strategies such as installing additional drains, using tapered insulation, and maintaining regular roof inspections, property owners can prevent water accumulation and extend the lifespan of their roofs. Remember, prompt action and professional help are key to resolving persistent ponding water problems and ensuring a healthy roof system.

Frequently Asked Questions

What is ponding water on flat roofs?

Ponding water is the accumulation of stagnant water on flat roofs for over 48 hours, which can jeopardize the roof’s integrity and structural stability. It is essential to address this issue promptly to prevent potential damage.

What causes ponding water on flat roofs?

Ponding water on flat roofs is primarily caused by poor roof design, blocked drains and gutters, and crushed insulation. Addressing these issues is essential to prevent water accumulation and potential damage.

How can I prevent ponding water on my flat roof?

To prevent ponding water on your flat roof, install additional roof drains, utilize tapered insulation to facilitate proper water flow, and conduct regular maintenance to ensure that drains remain clear.

What are the risks of ignoring ponding water on flat roofs?

Ignoring ponding water poses significant risks, including leaks, structural damage, material deterioration, and even roof collapse, leading to expensive repairs and a shortened roof lifespan. It is crucial to address these issues promptly to ensure the longevity and safety of the roof.

How can Waddle Exteriors assist with ponding water issues?

Waddle Exteriors can assist with ponding water issues through comprehensive roof inspection, repair, replacement, and installation services, ensuring a durable roofing solution. Their specialized approach guarantees effective resolution of such water concerns.


An illustration showing maintenance activities for a new roof emphasizing regular inspections.

Top Tips for Efficient Installation of Roof

Need to install a new roof? This guide provides clear steps to help you navigate the entire installation of roof process, from preparation to the final inspection.

Key Takeaways

  • Start with a thorough evaluation of your existing roof to determine if it needs repair or full replacement before installation.

  • Set a realistic budget considering the costs of new roofing materials, installation, and potential repairs to avoid surprises later.

  • Prioritize safety by using proper gear and consider hiring professional contractors for expertise, efficiency, and post-installation support.

Preparing for Your Roof Installation

An illustration depicting the preparation for roof installation, showcasing tools and materials.

Before commencing the roof installation, laying the groundwork is essential. Effective planning and preparation underpin a successful roofing project. Begin by evaluating whether your current roof requires a full replacement or just repairs. Understanding its current state will clarify the steps ahead.

Next, set a realistic budget for your new roof. Knowing the costs involved can help avoid unexpected financial strain.

Finally, select roofing materials that suit your needs and local climate for durability and efficiency. Here are the preparatory steps in detail.

Evaluating Your Existing Roof

Start by thoroughly inspecting your existing old roof. Look for signs of water damage, discoloration, mold, and check for damaged or missing shingles. Extensive damage or leaks may indicate the need for a replacement, but some issues can be resolved with targeted repairs.

Also, consider the age of your roof. Most roofing materials, such as asphalt shingles, last about 20-30 years. If your roof is aging or shows significant wear, consult a professional roofing contractor for a detailed assessment and advice on the best course of action.

Finally, verify with local authorities if a permit is required for your project to avoid legal complications later.

Budgeting for Your New Roof

Budgeting is vital when preparing for a new roof. The average replacement cost is around $8,000, but this varies based on home size, roofing material, and labor costs. Obtain multiple estimates from different contractors to ensure a fair price.

Also, consider the return on investment. A new roof can increase your home’s resale value, often recouping about 60% of its cost, making it a valuable investment.

Remember, repair costs can range from $400 to $2,000 depending on damage extent. Include these potential expenses in your budget to avoid surprises.

Choosing the Right Roofing Materials

Selecting the right roofing materials is crucial for your roof’s success and longevity. Consider your budget, location, and style preferences. Asphalt shingles are popular for their affordability and ease of replacement, making them ideal for many homeowners.

Clay tile roofs offer durable protection and can extend your roof’s lifespan significantly, although they are more expensive. Metal roofs are known for their durability and energy efficiency but also come at a higher cost.

Assess your specific needs and local climate to make an informed decision. The right material can significantly impact your roof’s performance and longevity.

The Roof Installation Process Explained

A cartoon illustrating the roof installation process highlightin different stages.

Familiarizing yourself with the roof installation process helps manage expectations and ensures smooth progress. For an average-sized home (around 3,000 sq ft), this process typically takes two days to one week, depending on complexity and underlying issues.

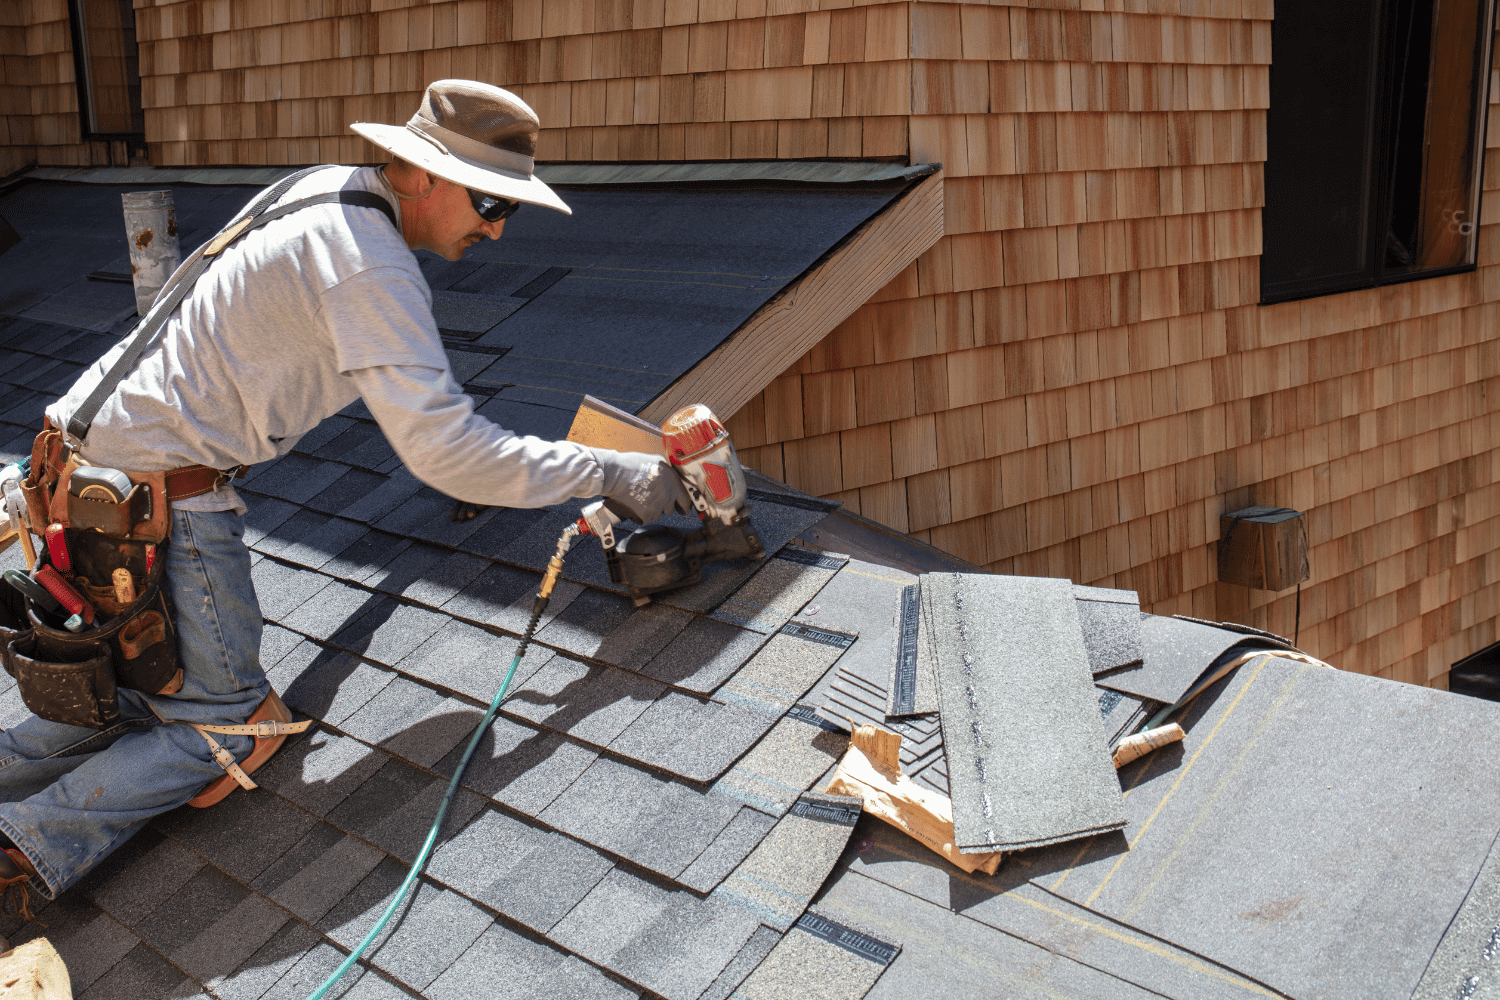
The process starts with removing old roofing materials, then inspecting and repairing the roof decking. Next, install the drip edge and underlayment to protect against water infiltration. Install new roofing materials from the bottom up. Finally, add flashing and vents, followed by a thorough inspection and cleanup.

Let’s delve into each of these steps to provide a clear understanding of what happens during a roof installation.

Removing Old Roofing Material

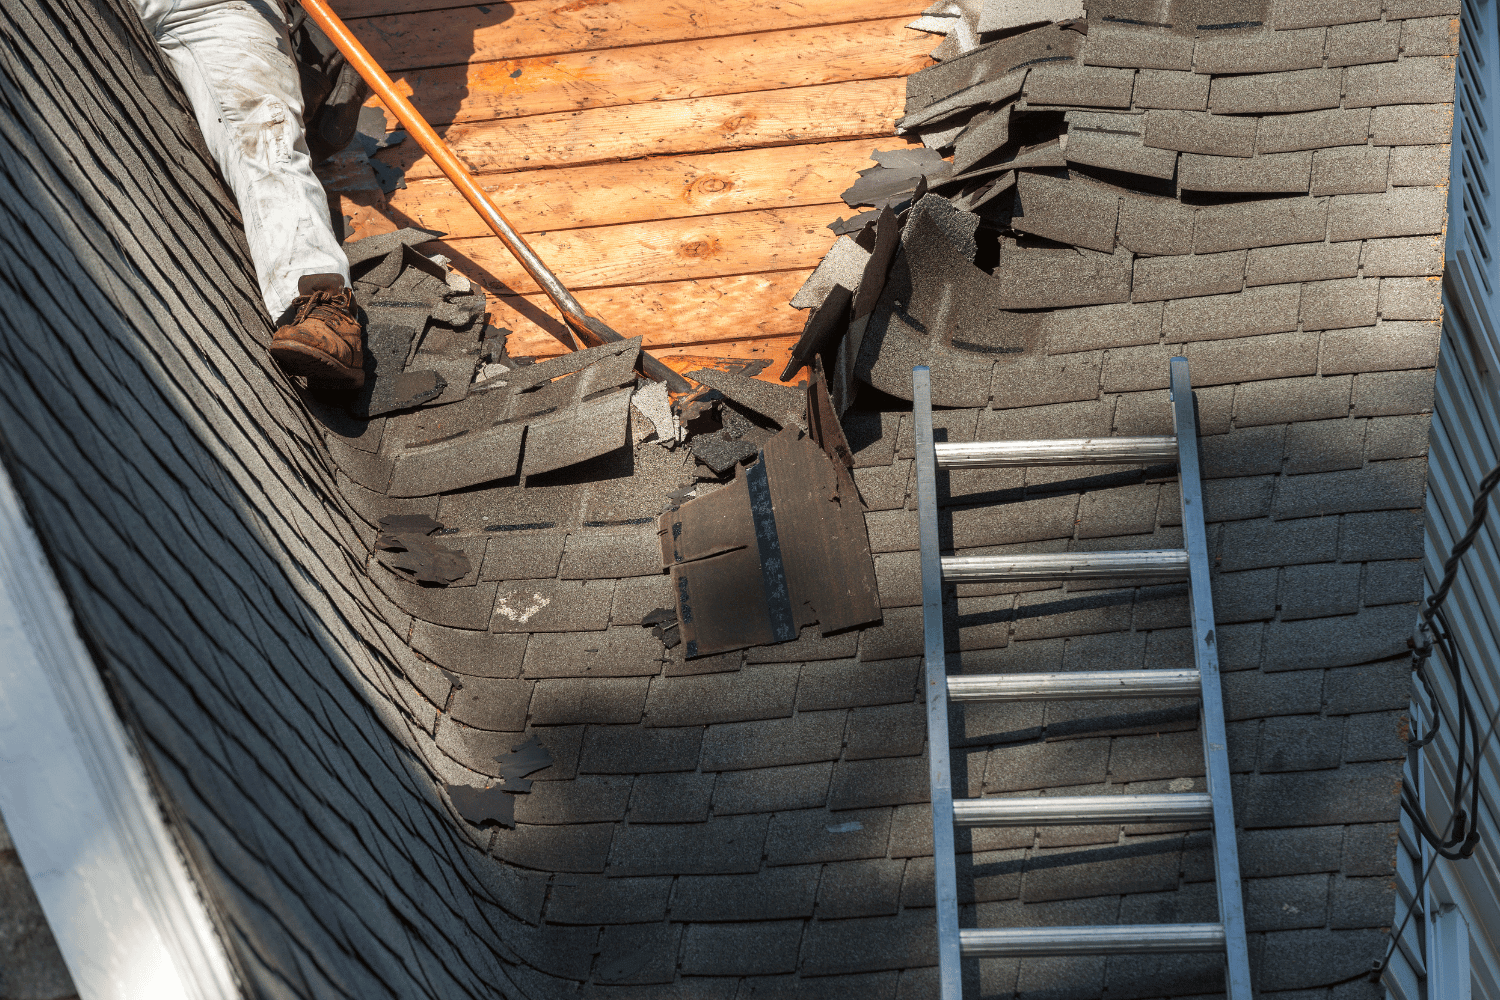
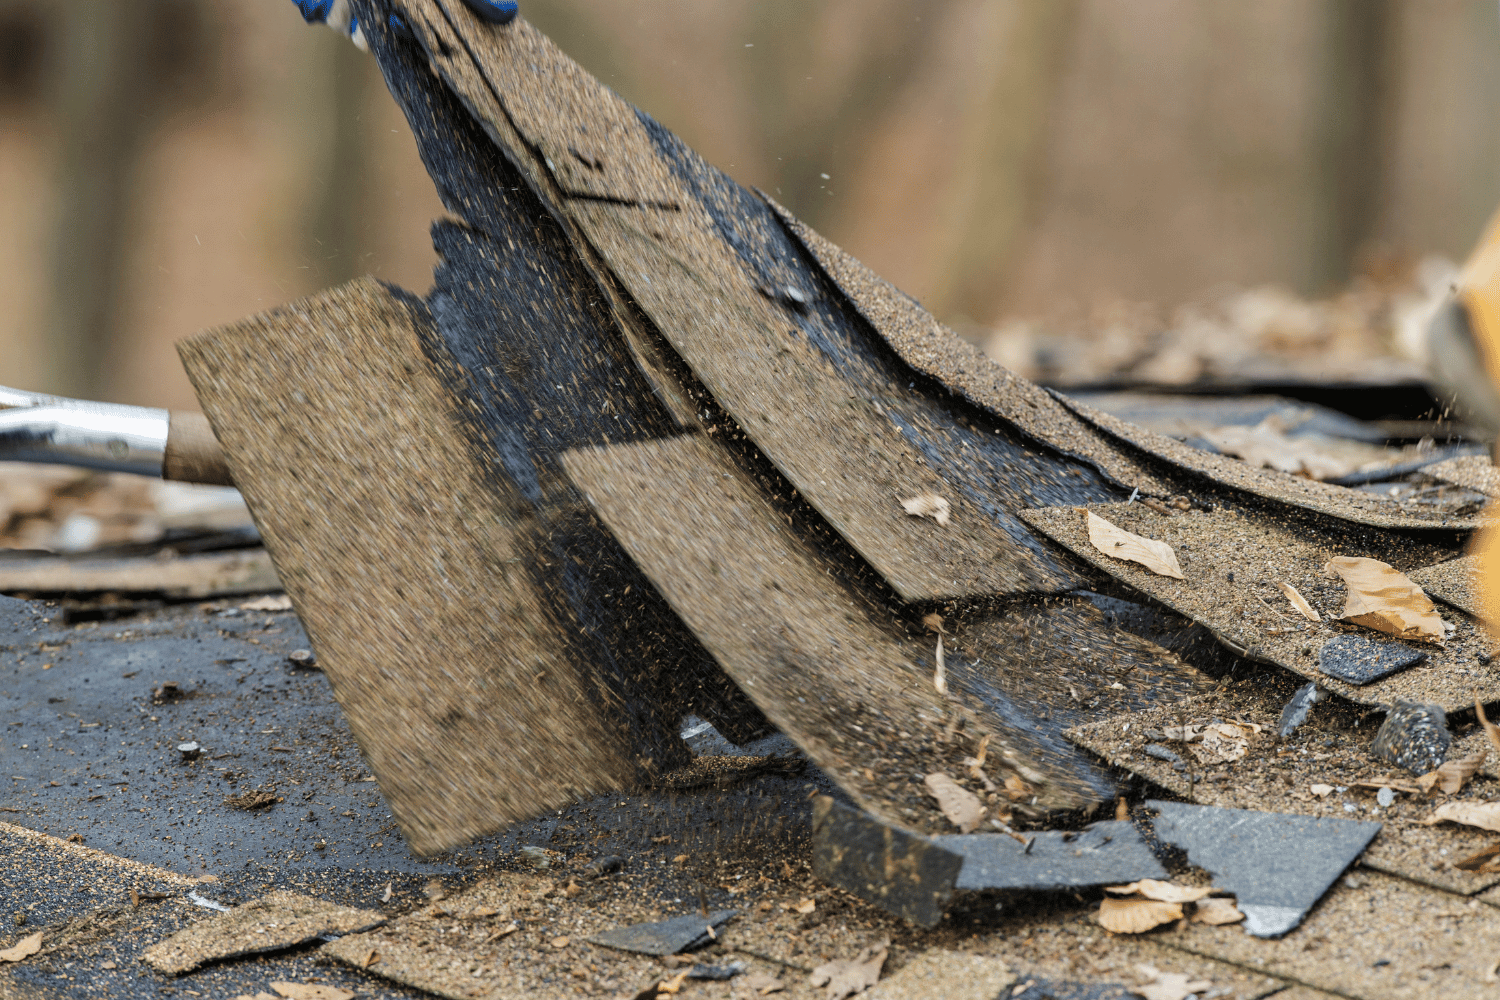
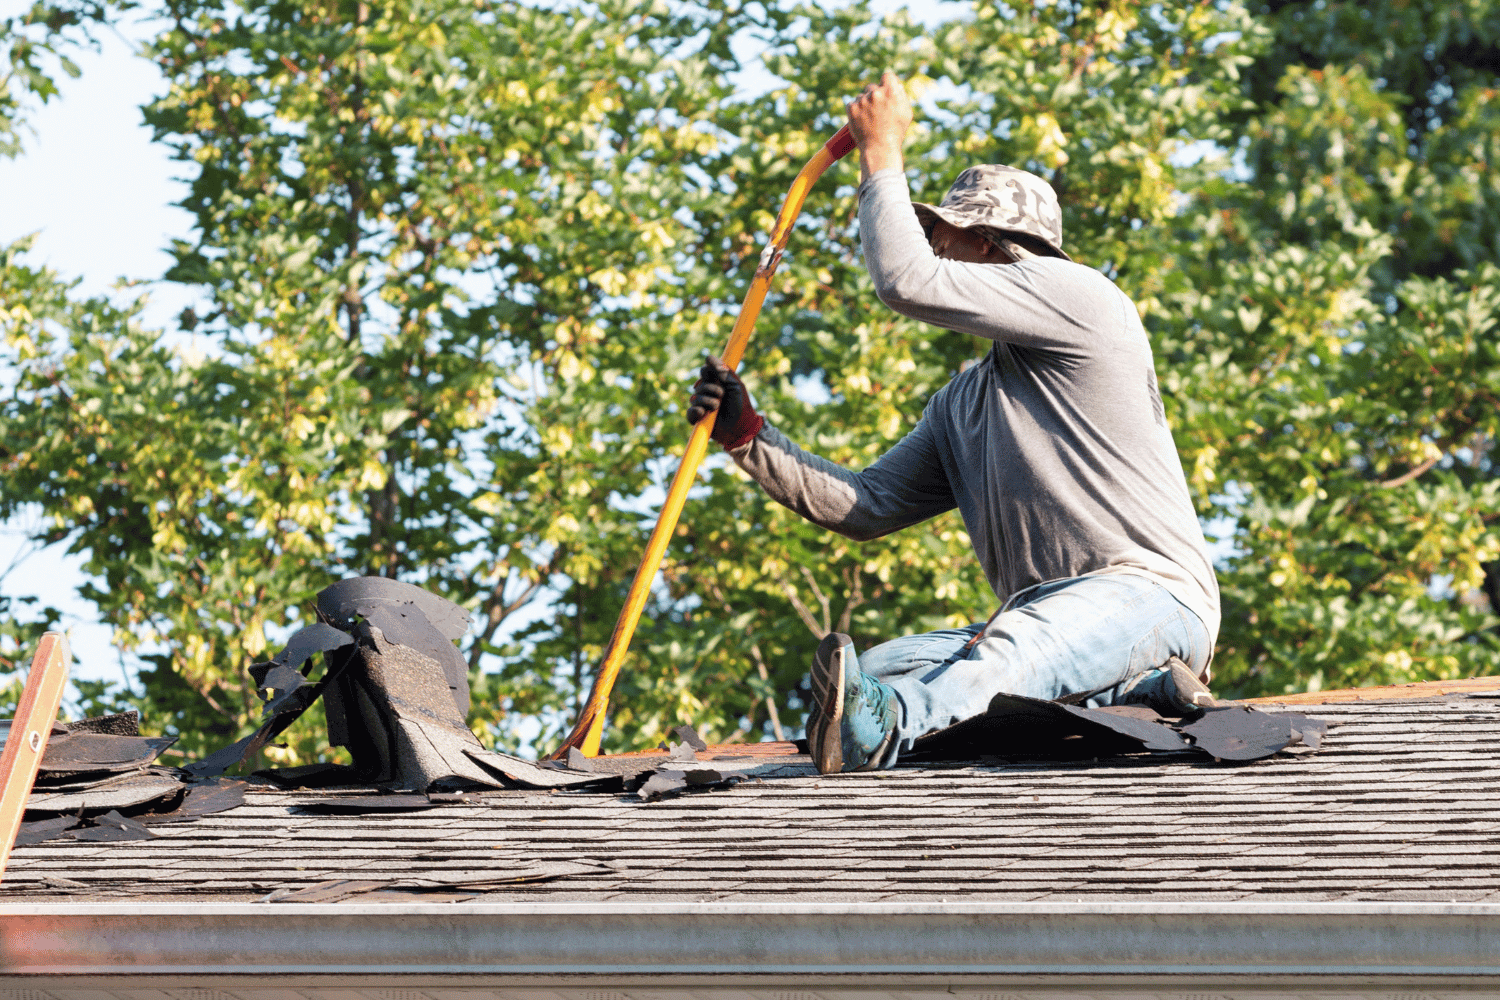
The first step is to remove all old roofing materials, known as a roof tear-off, to ensure a clean, solid foundation for the new roof. Tools like a roofing tear-off shovel or shingle fork can make this process more efficient.

For metal roofs, a pry bar or drill is typically used for removal. Ensure all old shingles and debris are completely cleared before moving on.

Inspecting and Repairing the Roof Decking

After removing the old roofing material, inspect the roof decking to ensure structural integrity. Address any water damage or rot immediately. Replace damaged decking with materials like CDX plywood or OSB of the same thickness, typically 1/2 inch.

Ensure the roof decking is clean and free of debris to provide a solid base for the new roof after necessary repairs.

Installing the Drip Edge

Install a drip edge to protect the fascia and ensure proper water drainage. On the lower portion of the roof, it should be installed before the underlayment; on the sides, after the underlayment.

Secure the drip edge by driving nails through its top into the decking every few feet. Proper installation ensures water is diverted away from your home, preventing potential damage.

Laying Down Underlayment

Underlayment acts as a barrier to prevent water infiltration and protect the roof decking. It should cover the entire surface, be nailed or stapled in place, and overlap at the edges by at least two inches.

On warm days, the underlayment may stick to the clean decking without fasteners. Ensure it lies flat to avoid ripples or lumps that could affect the final appearance of the roofing shingles.

Installing New Roofing Material

Install the new roofing materials, starting from the bottom and working upwards to ensure proper alignment and water flow. Seal each nail head with roof sealant to prevent leaks.

For added protection, install shingles up to the front wall to align with dormer flashing. Finalize ridge caps to ensure a waterproof finish and complete the roofing process.

Adding Flashing and Vents

Flashing protects areas where the roof intersects with vertical structures, preventing water leaks. Proper installation and sealing around vents are essential to ensure no water infiltration.

Seal each nail head when installing new shingles around vents to prevent potential leaks, ensuring your new roof’s durability and efficiency.

Final Inspection and Cleanup

Conduct a thorough final inspection to ensure all elements of the roof installation are correctly completed. Verify installation accuracy, check for defective materials, and seal all exposed nails on vents and stack flashing to prevent leaks.

After the inspection, clean up all old roofing materials, stray nails, and debris from the roof and surrounding areas, leaving your property in pristine condition.

Safety Precautions During Roof Installation

An illustration of safety precautions during roof installation, showing a professional roofer in safety gear.

Safety should always be prioritized during roof installation. Implementing guardrails or safety netting can reduce the hazards of falls and falling materials. Additionally, securing and marking skylights can prevent accidents.

Hiring skilled roofers ensures effective risk management due to their expertise and use of proper safety equipment. Here are specific safety measures to take during a roofing project.

Using Proper Safety Gear

Using proper safety gear is crucial during roof installation. Recommended safety gear includes gloves, protective eyewear, safety harnesses, and kneepads.

Personal protective equipment (PPE) such as hard hats, safety glasses, and slip-resistant shoes are also essential.

Managing Risks of Falling Debris

Managing risks of falling debris is crucial for safety during roof installation. Vibrations from roofing work can dislodge items on walls or ceilings, so remove fragile decorations beforehand.

Prioritize safety precautions to protect yourself and your property.

Benefits of Hiring Professional Roofing Contractors

Hiring professional roofing contractors offers numerous benefits, making your project smoother and more efficient. Professionals bring expertise, experience, and the right equipment for a high-quality installation. They also provide convenience, increased safety, and peace of mind.

They handle complex structures with steep angles, dormers, pitch changes, or chimneys, making them invaluable for challenging projects. Here are the specific benefits of hiring professionals.

Expertise and Experience

Waddle Exteriors, with over 40 years of experience, collaborates with top manufacturers like GAF to deliver high-quality installations. This blend of expertise and partnerships greatly enhances customer satisfaction.

Warranty and Post-Installation Support

Understanding warranty details and post-installation support is essential before signing a contract. Waddle Exteriors ensures homeowners register their warranties to guarantee coverage.

They also conduct thorough post-completion inspections to ensure proper execution of their work.

How to Maintain Your New Roof

An illustration showing maintenance activities for a new roof, emphasizing regular inspections.

Maintenance is key to prolonging your new roof’s lifespan and preventing costly repairs. Proper upkeep can significantly extend its life and prevent minor issues from escalating.

Many roofing services offer workmanship warranties covering installation-related issues, providing ongoing support to keep roofs in optimal condition through regular inspections.

Here are the specific steps to maintain your new roof.

Regular Inspections

Regular inspections are vital for maintaining your roof’s integrity. Inspect your roof at least twice a year to identify wear and tear early, such as damaged shingles or rusted flashing. If you’re uncomfortable with this task, hiring a professional can ensure a thorough assessment.

Regular inspections prevent costly repairs by catching potential problems early. Look for issues like cracked caulk, missing shingles, or signs of decay such as moss or algae. Using binoculars can help inspect from the ground, minimizing risks.

Cleaning and Debris Removal

Keeping the roof clean and free from debris prevents water accumulation and associated damage. Regularly clearing leaves and debris prevents moss and algae growth, protecting the roof’s integrity.

Using soft washing techniques is recommended for cleaning roofs to avoid damage while effectively removing algae and moss. Proper drainage is crucial for roof performance, and regular cleaning helps maintain this.

Summary

Installing a new roof is a significant undertaking that requires careful planning and execution. From evaluating your existing roof and budgeting for the project to choosing the right materials and understanding the installation process, each step is crucial to ensure a successful outcome. By following the detailed guide provided, homeowners can navigate the complexities of roof installation with confidence and ease.

The benefits of hiring professional roofing contractors, coupled with proper maintenance practices, can extend the lifespan of your roof and safeguard your investment. Regular inspections and debris removal are simple yet effective ways to keep your roof in top condition. With the knowledge gained from this guide, you’re well-equipped to undertake your roofing project and maintain your new roof for years to come.

Frequently Asked Questions

What are the key steps in the roof installation process?

The key steps in installing a roof are removing the old materials, repairing the decking, and then laying down new underlayment and roofing material. Don’t forget the flashing and vents, followed by a thorough final inspection and cleanup to ensure everything’s in top shape!

How often should I inspect my roof?

You should inspect your roof at least twice a year to catch any issues like damaged shingles or rusted flashing before they turn into bigger problems. Staying proactive can save you a lot of headaches down the line!

What are the benefits of hiring a professional roofing contractor?

Hiring a professional roofing contractor guarantees quality workmanship and safety, plus you get warranties and support after the job is done. It’s a smart choice for peace of mind!

How can I maintain my new roof?

To keep your new roof in top shape, make sure to inspect it regularly and clear away any debris. Keeping an eye out for things like missing shingles or moss can save you from bigger problems down the line.

What types of roofing materials should I consider?

When considering roofing materials, asphalt shingles, clay tiles, and metal roofs are great options. Your choice should reflect your budget, location, and personal style.


An illustration showcasing Waddle Exteriors approach to new construction roofing

Top Tips for Roofing for New Construction Projects

Looking to understand roofing for new construction? This article provides a comprehensive overview of the process, key considerations, material choices, and potential challenges. Whether you’re building a home or a commercial property, learn how to ensure your new roof is both durable and compliant with building codes.

Key Takeaways

  • New construction roofing is a distinct process that integrates seamlessly with the initial building design, requiring precise coordination to avoid delays and additional costs.

  • Key considerations for new construction roofing projects include selecting appropriate materials based on local climate, rigorous budget planning, adherence to safety standards, and compliance with local regulations.

  • Hiring professional roofing contractors ensures proper installation, safety, and adherence to industry standards, ultimately resulting in a high-quality, long-lasting roof.

Understanding New Construction Roofing

An illustration showing different types of roofing materials used in new construction roofing.

New construction roofing refers to the installation of roofing materials on new buildings, a process distinct from roof replacement. Unlike roof replacement, which involves tearing off existing materials from an old roof, new construction roofing adds layers to brand-new structures, working hand-in-hand with ongoing construction projects. This difference determines the methods and timing within the construction timeline.

Roof replacement involves removing old materials, whereas new construction roofing integrates seamlessly into the initial building design. This phase typically occurs simultaneously with other construction activities, requiring precise coordination to ensure everything aligns perfectly. Misunderstanding this process can cause delays and increased costs, highlighting the importance of grasping the unique aspects of new construction roofing.

Recognizing these differences aids in appreciating the unique needs and challenges of new construction roofing projects. The goal is not just to install a roof but to do so in a way that complements the building’s overall design and structural integrity. This approach ensures a long-lasting, aesthetically pleasing, and functional roof that stands the test of time.

Key Considerations for New Construction Roofing Projects

When embarking on a new construction roofing project, several key considerations come into play. One of the foremost is the selection of roofing materials, which should be tailored to the local climate conditions. Choosing the right roofing materials enhances the longevity, maintenance needs, and visual appeal of the building. For instance, an asphalt shingle roof might be ideal for residential properties, while flat roofing materials could be more suitable for commercial buildings.

Budget planning is another critical aspect. Financial readiness involves considering both upfront costs and long-term maintenance, as well as potential future expansions. Safety measures, such as fall protection and weather planning, safeguard workers and prevent accidents during roof installation. Compliance with local building codes and regulations ensures the project’s legality and structural integrity.

Moreover, future-proofing your roof design can accommodate potential expansions and the integration of new technologies. Energy-efficient roofing options, for example, can help reduce indoor temperatures and lower utility costs. Proper roof ventilation and effective drainage prevent moisture buildup and water damage, while also enhancing energy efficiency.

Considering these factors ensures a well-rounded and successful new construction roofing project.

Challenges in New Construction Roofing

New construction roofing projects come with their own set of challenges, distinct from those encountered in roof replacement projects. Safety is a paramount concern, given the hazardous working conditions involved. Hiring professional roofing contractors who follow safety standards and practices mitigates these risks.

Next, we will delve into the specific challenges faced in residential and commercial roofing projects.

Residential Roofing Challenges

Residential new construction roofing often involves dealing with various framing issues. Common problems include improperly angled Bird’s Mouth cuts, imprecise rafter lengths, unsupported roof sheathing, and drainage issues. For instance, imprecise rafter lengths can lead to rafters not seating properly on supporting members, compromising the roof’s stability. Effective communication with contractors ensures the roof framing is ready for installation and helps identify potential framing problems early.

Another critical aspect is the installation of roof crickets to prevent standing water, which can lead to significant roof damage over time. Proper drainage is essential to maintain the roof’s longevity.

Additionally, homeowners must consider the various residential roofing styles, such as Dutch gable, dormer, intersecting/overlaid hip, and hip and valley, to match their aesthetic preferences and functional needs.

Commercial Roofing Challenges

Commercial roofing projects present their own unique set of challenges, particularly in addressing drainage and structural considerations. Proper drainage is essential to prevent water pooling, which can lead to leaks and structural damage. Effective drainage systems are crucial for the roof’s longevity and safety. Additionally, the structural requirements must consider load-bearing capacities and comply with local building codes to ensure safety and compliance.

Early involvement of roofing professionals is recommended once the roof is sheeted to address any specific challenges effectively. This proactive approach identifies and mitigates potential issues early, ensuring a smooth and efficient roofing process for commercial buildings.

The New Construction Roofing Process

An illustration of the new construction roofing process, highlighting the steps involved.

The new construction roofing process involves several critical steps, from initial planning and design to installation and final inspection. Each phase requires attention to detail and coordination with other construction crews to seamlessly integrate the construction roof into the overall building structure.

Let’s explore these phases in more detail.

Initial Planning and Design

The initial planning and design phase of a new construction roofing project is crucial for its success. This phase requires in-depth planning to ensure compatibility with the building’s design. Architectural considerations play a significant role in selecting suitable roofing materials, as they must align with the overall aesthetic and structural requirements of the building. Choosing roofing materials ahead of time can prevent delays related to stock availability, ensuring a smooth workflow.

Additionally, a thorough inspection of the building envelope is necessary to inform roofing decisions and identify any potential issues that need to be addressed before proceeding. Roofing work should start only after the contract is approved and signed, ensuring all parties agree on the project’s scope and expectations.

Installation Phase

During the installation phase, adequate time should be allocated to avoid rushing the project and compromising quality. Coordination with other construction crews is vital to maintain workflow and ensure that roofing tasks do not interfere with other ongoing activities. For example, Waddle Exteriors Roofing has dedicated commercial and residential roofing crews to ensure effective collaboration and timely completion of roofing projects.

Roofing work can begin upon contract approval, with professionals working quickly and safely without interrupting other on-site crews. Selecting roofing materials early can help avoid delays and ensure a smooth installation phase.

Final Inspection and Quality Assurance

The final inspection and quality assurance phase is crucial in ensuring that the roofing project meets all required standards and specifications. This process involves a comprehensive walkthrough to identify installation issues and verify that all roofing requirements have been met. Post-installation inspections ensure proper work execution, providing assurance of quality and peace of mind for the property owner.

Waddle Exteriors conducts thorough inspections post-completion to ensure that all aspects of the roofing project have been properly executed. Final inspections guarantee correct installation and high-quality standards, ensuring a long-lasting and reliable roof.

Choosing the Right Roofing Materials for New Construction

An illustration displaying various roofing materials suitable for new construction, emphasizing their benefits.

Choosing the right roofing materials for new construction impacts the roof’s durability, maintenance needs, and aesthetic appeal. Various roofing materials are available, including metal, flat, asphalt, and wood roofing, each with its own set of advantages and disadvantages. Residential or steep-slope roofing often features several common options. These include asphalt shingles, stone-coated metal shingles, standing seam metal, metal panels, and tile.

When budgeting for roofing materials, it’s important to consider both initial installation roof cost and potential long-term maintenance expenses. Balancing upfront costs with long-term savings helps you make an informed decision that provides the best value for your investment. For example, metal roofs can last up to 50 years, offering significant long-term savings despite higher initial costs.

Additionally, the aesthetic value of a roof should align with the architectural style of the home and personal preferences. Whether you prefer the classic look of wood shingles or the modern appeal of metal roofing, the right choice can enhance the overall curb appeal of your property.

Carefully evaluating options and considering durability, cost, and aesthetics helps you select the best roofing material for your new construction project.

Benefits of Hiring Professional Roofing Contractors

An illustration depicting the advantages of hiring professional roofing contractors for new construction roofing.

Hiring professional roofing contractors for your new construction project offers numerous benefits, ensuring a successful and stress-free experience. Experienced professionals from a roofing company bring expertise and knowledge to the table, ensuring proper installation and adherence to industry standards. This expertise helps identify and resolve roofing issues quickly, preventing minor problems from escalating into major ones.

Hiring a professional contractor ensures the work will be done correctly and safely, providing peace of mind. Professionals use specialized tools and safety materials, minimizing risks during installations. Hiring professionals also saves time, as they efficiently complete tasks without the delays of DIY efforts.

Reputable contractors also provide warranties on both materials and workmanship, protecting homeowners in case of issues. They maintain relationships with suppliers, allowing them to source materials cost-effectively and pass savings onto clients. Hiring professional roofing contractors ensures a high-quality, durable, and aesthetically pleasing roof for your new construction project, as well as reliable roof repairs.

Waddle Exteriors’ Approach to New Construction Roofing

An illustration showcasing Waddle Exteriors' approach to new construction roofing.

Waddle Exteriors has been a trusted name in the roofing industry since 1978, offering over 40 years of experience in roof consultations. As a multifaceted exterior solutions provider, Waddle Exteriors offers a comprehensive range of services, including residential roofing, roof inspection, and roof restoration. Their collaboration with GAF, a leading manufacturer of roofing materials, ensures high-quality products for every project.

Waddle Exteriors’ commitment to quality and service is reflected in their customer satisfaction rating of 4.9 based on 465 reviews. Customers report having a seamless and smooth experience, particularly appreciating their communication and quality workmanship. Waddle Exteriors provides support throughout the roofing process, including guidance in finding optimal financing choices tailored to roofing projects.

Their approach to roofing involves meticulous planning, expert installation, and thorough post-installation inspections. Choosing Waddle Exteriors ensures top-notch roofing services that meet the highest standards of quality and durability.

Summary

In summary, new construction roofing is a complex but essential aspect of building a new home or commercial property. By understanding the process, considering key factors, addressing challenges, and selecting the right materials, you can ensure a successful roofing project. Hiring professional roofing contractors like Waddle Exteriors offers numerous benefits, from expert installation to quality assurance. With over 40 years of experience and a commitment to excellence, Waddle Exteriors is your trusted partner for all your roofing needs.

Frequently Asked Questions

What makes new construction roofing different from roof replacement?

New construction roofing differs from roof replacement as it entails the installation of roofing materials on newly built structures, whereas roof replacement requires the removal and replacement of existing roofing materials on older buildings.

Why is selecting the right roofing material important?

Selecting the right roofing material is crucial as it influences the roof’s durability, maintenance requirements, and aesthetic value, tailored to the local climate and architectural design. A well-chosen roofing material ensures long-term performance and satisfaction.

What are some common residential roofing challenges?

Common residential roofing challenges include framing issues, improper drainage, and the necessity for effective communication with contractors to guarantee correct installation. Addressing these challenges is essential for ensuring the longevity and integrity of your roof.

How does Waddle Exteriors ensure quality in their roofing projects?

Waddle Exteriors ensures quality in their roofing projects by conducting thorough post-installation inspections, which confirm the proper execution of their work. This commitment to quality provides clients with peace of mind regarding the durability and reliability of their roofs.

What benefits do professional roofing contractors offer?

Professional roofing contractors provide expertise, ensuring quality workmanship and safety, while also saving you time and offering warranties on both materials and labor. Their access to cost-effective sourcing of materials further enhances the value of their service.


Illustration of a house with a damaged roof after a storm

Essential Roof Storm Damage Tips for Homeowners

After a storm, your roof might have suffered damage that needs immediate attention. Inspecting for storm damage promptly can prevent further issues like leaks or structural problems. This article covers how to spot damage, what steps to take, and when to call a professional.

Key Takeaways

  • Conduct a thorough inspection of your roof and attic after a storm to identify visible and hidden damage. This includes checking for shingle concerns, leaks, and other signs of wear.

  • Filing an insurance claim promptly and documenting all storm damage with photos and videos can streamline the claims process and ensure coverage for necessary repair.

  • Hiring a licensed and insured roofing contractor with a strong reputation and good warranty is crucial for ensuring quality repairs and maintaining your roof’s integrity.

Essential Roof Storm Damage Tips for Homeowners

Illustration of a house with a damaged roof after a storm

Post-storm, begin by visually inspecting your roof for any damage. This can be done by walking around the perimeter of your house. Be on the lookout for apparent signs such as missing or damaged shingles. Additionally, scrutinize gutters, vents, and windows for any dents, cracks, or broken glass. High winds can remove or tear shingles, leaving the underlayment or roof deck exposed, which can lead to more severe issues if not addressed.

Examine your attic and ceilings for leaks and water spots, as they may reveal concealed damage that isn’t immediately obvious from the outside. Ignoring small issues like shingles that are missing can lead to major problems like leaks or even roof collapse. Routine inspections and timely repairs contribute significantly to maintaining a sturdy roof.

Introduction

Storms can severely damage your home’s roof, leading to an array of issues, ranging from minor to serious structural damage. Addressing storm damage promptly with storm damage roof repair is not just about fixing a few broken shingles; it’s about ensuring the structural integrity of your home and preventing water infiltration that can lead to interior damage, mold, and rot. The roof, after all, is your home’s primary defense against the elements.

Maintaining a well-kept roof is essential for preserving your home’s curb appeal and resale value. By understanding the types of storm damage, knowing how to identify them, and taking prompt action, you can protect your investment and avoid costly repairs down the line. This guide will help you navigate the complexities of storm damage and equip you with the knowledge to keep your home safe and secure.

Identifying Roof Storm Damage

Illustration of a roof with missing shingles and water damage

Post-storm, it’s vital to carry out a comprehensive inspection of your roof to spot any apparent signs of damage like missing or shingles that are damaged. Walk around the perimeter of your house and visually assess the roof. Look for any signs of roof damage, including dents and cracks in the gutters, vents, and windows.

Don’t limit your inspection to the exterior; also examine your attic and ceilings for leaks and water spots, which might suggest concealed damage that’s not immediately noticeable. Ignoring small roof issues like missing shingles can lead to major problems like leaks or even roof collapse. Addressing these issues without delay is crucial to averting further damage.

In addition, some roofing companies now perform drone roof inspections along with property evaluations to detect storm-related damage that might be missed during a traditional inspection. Utilizing technology can provide a more comprehensive assessment of your roof’s condition, ensuring that no damage goes unnoticed.

Types of Storm Damage

Illustration of various types of storm damage on a roof

Different types of damage can be inflicted on your roof by storms, each demanding unique repair strategies. High winds can cause wind damage, such as removing or tearing shingles, leaving the underlayment or roof deck exposed and susceptible to further damage. Strong winds can also pull apart loose roof shingles or break overhanging tree limbs, causing debris to fall onto the roof.

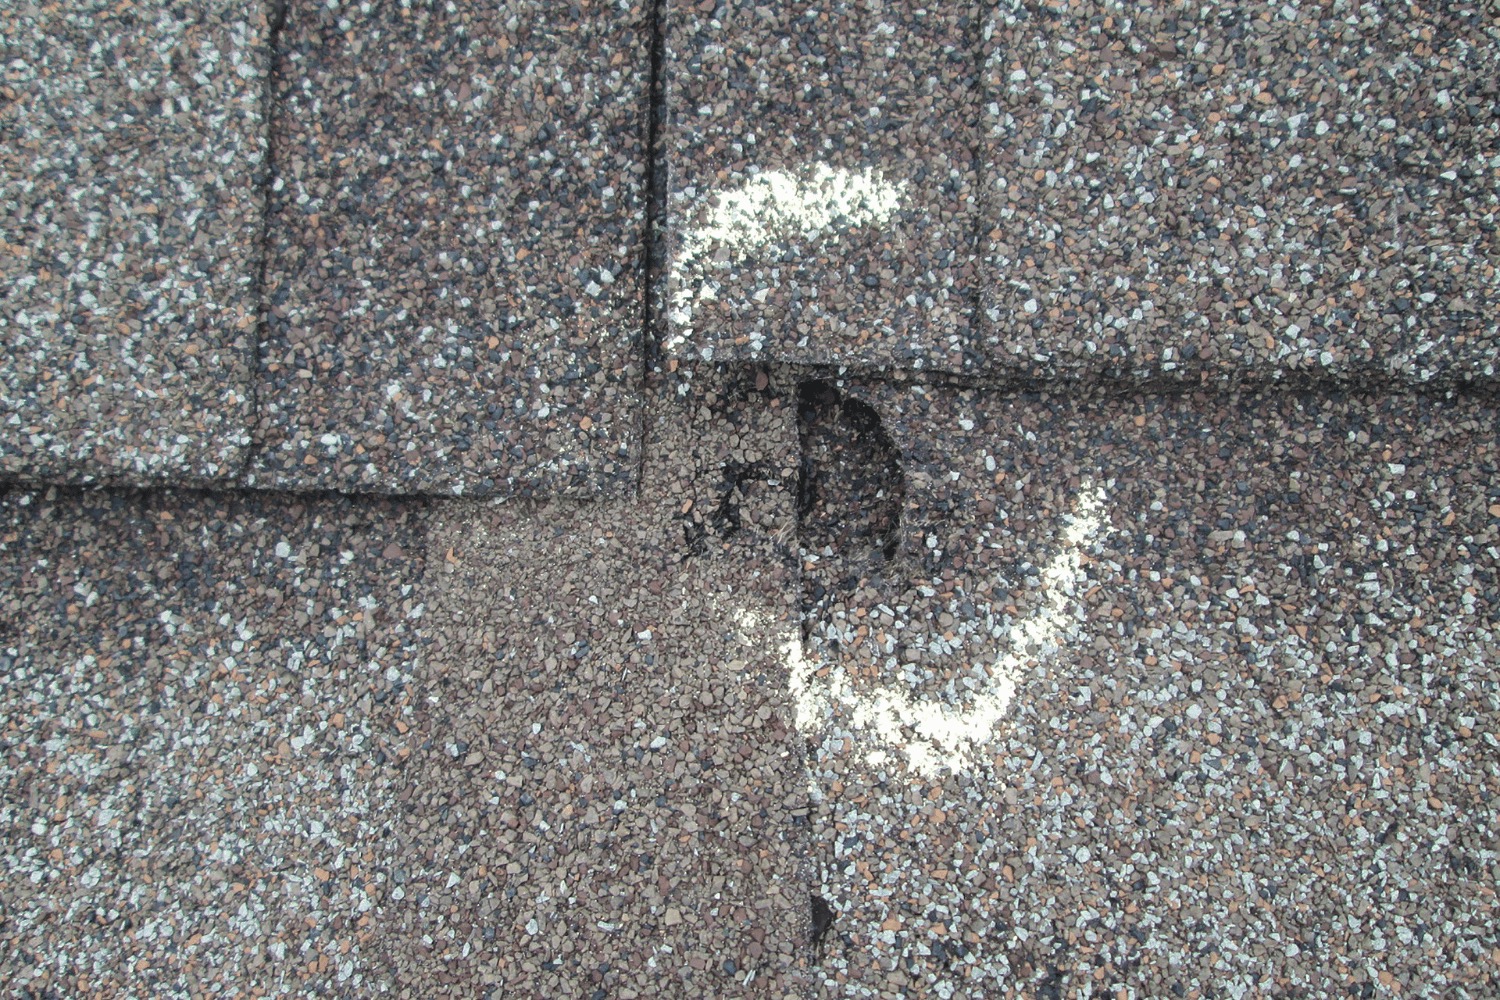
Hailstorms can be particularly damaging, as hailstones can cause hail damage by cracking asphalt shingles, puncturing metal roofs, and leaving dents in shingles. Heavy rains can wash away granules on the surface of roof shingles, reducing their effectiveness and leading to water damage. Standing water due to improper drainage can also cause significant issues, especially in uneven areas.

Snow and ice present their own set of challenges, including:

  • Snow buildup can penetrate through leaks in the roof as it melts, causing moisture damage.

  • Ice can form along irregular roofing material, allowing meltwater to seep into the home’s interior.

  • Debris like branches can dent or impact shingles, making the roof vulnerable to moisture.

Understanding these different types of storm damage is crucial for effective roof maintenance and storm damage repair.

Immediate Actions to Take After a Storm

Illustration of a homeowner documenting storm damage for insurance claim

After the storm subsides, prioritize the following steps:

  1. Contact an expert for an onsite inspection.

  2. Reach out to your insurance company if you suspect storm damage.

  3. Take detailed photographs or videos of the damage from multiple angles to use as documentation for insurance claims and repair assessments.

  4. If possible, use drone footage as additional proof of the storm damage when filing an insurance claim.

Implement temporary repairs like:

  • Covering damaged areas with tarps to prevent further water infiltration

  • Spreading a waterproof tarp over the damage

These temporary fixes can help mitigate further damage. 

Even in the absence of visible damage, it’s advisable to get a professional to inspect your roof and siding. Some damage may not be immediately apparent but can cause significant issues over time. Addressing these problems early can save you from more extensive and costly repairs later.

Temporary Repairs You Can Do Yourself

Illustration of temporary roof repairs being performed by a homeowner

While waiting for professional repairs, there are several temporary measures you can take to protect your roof from further damage. Here are some steps you can follow:

  1. Stock up on emergency repair materials like tarps 

  2. Spread a waterproof tarp over the damaged area.

  3. Secure the edges of the tarp to prevent rainwater from getting underneath.

  4. This can provide a temporary barrier against water infiltration.

When to Consider Roof Repair vs. Replacement

Determining whether to opt for roof repair or replacement can be a difficult decision. Here are some factors to consider:

  • If the storm damage is minor and localized to a single section, consider roof repair.

  • If the damage is severe and affects multiple areas, roof replacement might be advisable.

  • The age of your roof is also a significant factor; most shingle roofs last between 15-20 years, so replacing is recommended if the roof is over 20 years old.

If your roof is less than 10 years old, you might prefer to repair rather than replace. Roof replacement is more expensive upfront compared to repairs, but it can be more cost-effective in the long run if your roof requires frequent repairs. Weighing these factors can help you make an informed decision about your roof’s future.

The need for a roof replacement can be indicated by the frequency of repairs over a short time span. If you find yourself constantly patching up your roof, it might be time to invest in a new one. A professional roofing contractor can provide a thorough assessment and recommend the best course of action based on your roof’s condition.

Navigating the Insurance Claim Process

While filing an insurance claim for storm damage may seem overwhelming, comprehending the steps involved can simplify the process. Here are the steps to follow:

  1. Contact your homeowners insurance provider immediately if significant damage is found.

  2. Familiarize yourself with your policy and rights before filing a claim.

  3. Document the damage by recording the date of the storm and taking photos of any visible damage.

  4. Search online for news stories about the storm for additional proof if required.

Request an insurance adjuster to inspect the damage and ensure your chosen contractor is present during the inspection. The adjuster will evaluate the damage and approve or deny the claim based on their findings. Once a claim is approved, insurance companies typically send two payments: one for materials and one after repairs are complete. No additional payment should be made until all repairs are completed and a city inspection is passed.

Preparing for the Insurance Adjuster’s Visit

To ensure a hassle-free claims process, it’s vital to prepare well for the insurance adjuster’s visit. Here are some steps to follow:

  1. Record the date of the storm.

  2. Take photos of visible damage to help during the adjuster’s visit.

  3. The adjuster will inspect the damage and approve or deny the claim based on the findings.

  4. Having thorough documentation ready can make the inspection process more efficient and increase the likelihood of your claim being approved.

It’s also beneficial to have your chosen contractor present during the adjuster’s inspection to provide an expert opinion and ensure that all damage is accurately assessed. This collaborative approach can help avoid any discrepancies and ensure that you receive the appropriate coverage for the repairs needed.

Common Mistakes to Avoid During the Claims Process

The claims process can be complex, with certain common pitfalls that homeowners should beware of. Timely action is crucial when filing an insurance claim for storm damage. Delaying the claim process can result in the insurance company denying the claim due to time limits. Make sure to contact your insurance provider promptly and provide all necessary documentation to support your claim.

If your storm damage claim is denied, don’t hesitate to ask for a second insurance adjuster to inspect the roof or have an engineer provide proof to the insurance company. Seeking a second opinion can often lead to a different outcome, ensuring that you receive the coverage you deserve.

Choosing a Professional Roofing Contractor

For quality repairs and a seamless process, choosing the right roofing contractor is imperative. Here are some tips to help you make the right choice:

  1. Hire a licensed, insured roofing company with a strong warranty for any repair work.

  2. Check if the contractor is licensed and insured, and inquire about their safety measures and insurance coverage.

  3. It’s also recommended to get quotes from at least three certified roofing contractors to compare pricing and services.

Ask for references from past customers to gauge the contractor’s reliability and ensure they provide a clear written estimate that includes materials, labor, and tax. A reputable roofing contractor should offer a solid warranty on their work and have a portfolio of past projects with positive reviews. This due diligence can help you find a trustworthy professional who will deliver high-quality repairs.

The Importance of Regular Roof Inspections

Routine roof inspections are a preventative step to detect potential issues before they escalate into major problems. Inspections can help uncover problems such as loose shingles, damaged flashing, or clogged gutters. Conducting inspections twice a year can prevent 95% of roofing issues, saving homeowners from costly repairs.

Professional roof inspections can also reveal hidden problems that untrained eyes might miss. Maintaining proper roof inspections ensures the compliance of roofing material warranties and enhances energy efficiency by assessing both insulation and ventilation. Regular inspections, especially for older roofs, are key to extending the lifespan of your roofing system.

Summary

In summary, addressing storm damage promptly is crucial to maintaining the integrity of your roof and protecting your home from further damage. Conduct thorough inspections, understand the types of storm damage, and take immediate action to prevent issues from worsening. Temporary repairs can provide a quick fix until professional help arrives, and knowing when to repair versus replace your roof can save you money in the long run.

Navigating the insurance claim process and choosing a professional roofing contractor are essential steps to ensure quality repairs and appropriate coverage. Regular roof inspections play a vital role in identifying potential issues early and maintaining the effectiveness of your roofing system. By following these guidelines, you can keep your home safe and secure, come rain or shine.

Frequently Asked Questions

What should I do immediately after a storm to check for roof damage?

After a storm, conduct a visual inspection of your roof by walking around your house and checking for missing or damaged shingles, as well as inspecting gutters, vents, and windows for dents or cracks. Also, inspect your attic and ceilings for leaks and water spots.

How can I temporarily repair my roof after a storm?

You can temporarily repair your roof after a storm by using a waterproof tarp to cover damaged areas. This will help prevent further damage to your home.

When should I consider replacing my roof instead of repairing it?

You should consider replacing your roof instead of repairing it if the damage is severe and affects multiple areas, or if your roof is over 20 years old. Frequent repairs over a short period may also indicate the need for a new roof.

How can I prepare for the insurance adjuster’s visit?

Make sure to document the date of the storm, take photos of any damage, and prepare thorough documentation. It’s also helpful to have your chosen contractor present during the inspection.

Why are regular roof inspections important?

Regular roof inspections are important because they can help identify potential issues early, prevent major problems, maintain warranty compliance, and enhance energy efficiency by assessing insulation and ventilation.


Benefits of architectural shingles

3 Tab vs Architectural Shingles: Which is Best for Your Roof?

Stuck between 3 tab vs architectural shingles? We’ll compare their differences to help you choose the best option for your roof.

Key Takeaways

  • Architectural shingles offer superior durability, better wind resistance, and enhanced aesthetic appeal compared to more budget-friendly 3-tab shingles.

  • While 3-tab shingles are cost-effective and easier to install, they typically have a shorter lifespan and may require more frequent maintenance and replacements.

  • The choice between 3-tab and architectural shingles should be based on factors such as budget, climate, aesthetic preferences, and long-term value, with architectural shingles generally recommended for their extended lifespan and performance.

3 Tab vs Architectural Shingles: Which is Best for Your Roof?

Comparison of 3-tab and architectural shingles

When it comes to asphalt shingles, the main choices are 3-tab shingles and architectural shingles. The debate over which is better has been ongoing in the US, with homeowners and roofing experts weighing in on the pros and cons of each option. Grasping the disparities between these two types of shingles is paramount for a knowledgeable decision on your roofing project.

3-tab shingles are composed of a fiberglass base, coated with asphalt and ceramic granules, and are known for their flat, uniform appearance with three tabs on each strip. They are typically less expensive to install but may require more frequent repairs and replacements compared to architectural shingles.

On the other hand, architectural shingles, also known as laminate or dimensional shingles, are made from higher-quality materials, resulting in a thicker, sturdier product.

Choosing between architectural shingles and 3-tab shingles often depends on the specific needs of your home, its location, and your overall situation.

Here are some factors to consider when making your decision:

  • Architectural shingles are generally more durable and can withstand harsh weather conditions better than 3-tab shingles.

  • Architectural shingles have a more dimensional and aesthetically pleasing appearance compared to the flatter look of 3-tab shingles.

  • 3-tab shingles are typically more budget-friendly and can be a good option for those with financial constraints.

  • If you live in an area with high winds or frequent storms, architectural shingles may be a better choice due to their higher wind resistance.

Ultimately, the decision comes down to weighing the benefits and drawbacks of each shingle type to determine which best suits your roofing needs.

Introduction

The right roofing material can significantly enhance your home’s curb appeal and energy efficiency. Different roofing materials offer varying levels of durability, impacting the roof’s lifespan and performance. Comprehending the advantages and disadvantages of various roofing options, including other roofing materials, is key to making a decision that fits your needs and expectations.

Roofing materials have evolved over time, enhancing their construction quality and performance. Today, the main choices when exploring asphalt shingles are 3-tab shingles and architectural shingles. The ongoing debate between these two options highlights the importance of considering factors such as curb appeal, wind resistance, warranties, lifespan, and cost. Whether you are looking for a cost-effective solution or a long-lasting, aesthetically pleasing roof, understanding the differences between these shingles will help you make the best decision for your home.

Understanding 3 Tab Shingles

Three tab shingles, also known as 3-tab shingles, are a popular choice among homeowners due to their cost-effectiveness and straightforward design. These asphalt shingles lay flat and feature three tabs on each shingle strip, giving them a uniform appearance. Composed of asphalt, adhesive, and an outer layer of ceramic granules over a fiberglass backing, 3-tab shingles are an economical option for those looking to save on their roofing project.

3-tab shingles may be less expensive to install, but they often require more frequent repairs and replacements compared to architectural shingles. As a result, architectural shingles may offer cost savings in the long run. When designing a new asphalt shingle roof, it’s vital to comprehend the traits and makeup of 3-tab shingles to ascertain if they fulfill your particular needs.

Advantages of 3 Tab Shingles

One of the primary advantages of 3-tab shingles is their cost-effectiveness, making them an attractive option for budget-conscious homeowners. Their lightweight and thin material composition contributes to ease of installation, saving time and labor costs. In mild climates, where extreme weather conditions are less of a concern, 3-tab shingles offer a practical and economical roofing solution.

For those looking to complete a roofing project without breaking the bank, 3-tab shingles provide an affordable option that still offers reliable protection and performance. Some benefits of 3-tab shingles include:

  • Affordable price

  • Easy installation

  • Reliable protection

  • Popular choice for many homeowners

Disadvantages of 3 Tab Shingles

Despite their affordability, 3-tab shingles come with several disadvantages. They have a shorter lifespan compared to architectural shingles, which can be a significant drawback for homeowners looking for a long-term roofing solution. Additionally, 3-tab shingles are generally rated to withstand winds up to 60 miles per hour, making them less suitable for windy climates.

Another limitation of 3-tab shingles is their design options. They are available in one shape and size, with a flat complexity, limiting their aesthetic appeal. For homeowners seeking a more visually interesting roof, the limited design options of 3-tab shingles may be a disadvantage.

Exploring Architectural Shingles

Benefits of architectural shingles

Architectural shingles, also known as laminate or dimensional shingles, are a popular choice for homeowners seeking a more durable and aesthetically pleasing roofing option. They offer the following benefits:

  • Made from higher-quality materials

  • Feature a heavy fiberglass mat base

  • Multiple layers bonded with adhesive

  • Ceramic-coated mineral granules embedded in water-resistant asphalt

  • Thicker and sturdier construction

  • Enhanced performance and longevity

Architectural shingles have several advantages over 3-tab shingles:

  • They use stronger adhesives and have more packed and finer external granules, contributing to their superior durability.

  • They are about 50 percent heavier, adding to their robustness and ability to withstand harsh weather conditions.

  • These shingles often mimic the looks of slate or cedar wood shakes, adding to their aesthetic appeal.

Benefits of Architectural Shingles

Architectural shingles offer several benefits, making them a preferred choice for many homeowners. Their enhanced durability and water resistance are significant advantages, thanks to the tightly packed granules and laminated construction. The contoured design helps slow water off the roof, preventing gutters from being overwhelmed.

Furthermore, architectural shingles can mimic the appearance of more expensive materials like wood or slate, enhancing curb appeal and adding value to your home. Their ability to cover minor imperfections in the roof deck due to their thickness and dimensional design is another benefit that makes them a popular choice for roof replacements.

Drawbacks of Architectural Shingles

Despite their numerous benefits, architectural shingles also have some drawbacks. One of the main disadvantages is their higher cost compared to 3-tab shingles, making them a less budget-friendly option. The higher-quality materials used in their construction result in a thicker, sturdier, and heavier product, which may require additional structural support for the roof.

Architectural shingles can also be damaged by severe weather and debris, and repairing them can be more expensive than repairing 3-tab shingles due to their higher cost. Homeowners need to weigh these factors when deciding whether architectural shingles are the right choice for their roofing project.

Comparing Durability and Longevity

When it comes to durability and longevity, architectural shingles outperform 3-tab shingles. Regular 3-tab shingles can last anywhere from 10 to 25 years, depending on maintenance and climatic conditions. In contrast, architectural shingles generally have a longer lifespan, averaging about 18 to 20 years, and can last up to 50 years with proper maintenance.

The primary distinctions in lifespan stem from the superior quality materials and construction of architectural shingles. These shingles typically use stronger and higher quality materials, contributing to their enhanced durability and weather resistance. The extra weight of architectural shingles also adds to their increased durability and longevity.

Wind and Weather Resistance

Superior wind and weather resistance of architectural shingles

Architectural shingles provide superior wind and weather resistance compared to 3-tab shingles. 3-tab shingles can typically withstand wind speeds of up to 60-70 mph. In contrast, architectural shingles generally have higher wind resistance, capable of withstanding wind speeds between 80 and 120 mph, with some specialized installations reaching up to 130 mph.

Various elements contribute to the enhanced wind resistance and water resistance of architectural shingles, including:

  • Thickness

  • Composition

  • Laminated construction

  • Tightly packed granules

In regions with severe weather, architectural shingles are recommended for their superior durability and ability to protect the home.

Aesthetic Differences

Aesthetic differences between 3-tab and architectural shingles

Aesthetic differences between 3-tab and architectural shingles are significant. 3-tab shingles tend to have a flat and one-dimensional look, which may not be as visually appealing as architectural shingles. The multi-layered construction of architectural shingles creates shadows and depth, adding dimension to the roof that 3-tab shingles do not provide.

3-tab shingles are available in a variety of colors and styles, with over 30 color options. However, architectural shingles offer even more customization in colors, textures, shading, and shapes. They can also mimic the appearance of more expensive roofing materials like tile or wood, adding to the home’s upscale appearance.

Cost Considerations

Cost considerations for architectural shingles

Architectural shingles are usually priced higher than 3-tab shingles when considering the cost. The difference in cost reflects the variation in quality and performance between the two types. Architectural shingles generally cost about 25% more than 3-tab shingles. For homeowners on a tight budget, 3-tab shingles are usually chosen due to their lower cost. The cost of a 3-tab shingle roof is approximately $4.00 per square foot, while an architectural shingle roof costs around $5.86 per square foot.

3-tab shingles may have lower installation costs, but they typically require earlier repairs and replacements compared to architectural shingles. This is due to their thinner composition and shorter lifespan. For those prioritizing budget, 3-tab shingles are typically cheaper, though they may not last as long.

When considering the architectural shingles cost, it’s important to note that architectural shingles typically are 20% to 50% more expensive but offer better long-term value due to their extended lifespan and durability.

Installation Process

The installation process for architectural shingles is generally easier compared to 3-tab shingles. Architectural shingles are easier to install, requiring fewer tools and less hassle. However, their extra weight can affect the ease of installation, requiring careful handling.

On the other hand, 3-tab shingles require precise alignment during installation to ensure a uniform appearance, which might require more time and precision, increasing labor costs. Guaranteeing correct installation is key for the performance and durability of the roofing materials, irrespective of the shingle type.

Warranty and Maintenance

Architectural shingles generally come with longer warranties compared to 3-tab shingles. While 3-tab shingles typically have warranties ranging from 20 to 30 years, lifespan architectural shingles often come with warranties of at least 30 years, with opportunities for longer periods, such as 50 years or even lifetime warranties in some cases.

In terms of maintenance, both 3-tab and architectural shingles require regular upkeep to maximize their lifespan. Usual maintenance suggestions encompass:

  • Twice-a-year roof inspections

  • Cleaning gutters and downspouts

  • Pruning tree branches

  • Eliminating debris

  • Sealing the flashing

  • Washing off dirt and algae

Proper maintenance ensures the durability and performance of your roofing materials, potentially delaying the need for a roof replacement over time.

Choosing the Right Shingle for Your Home

Choosing the right shingle for your home involves considering various factors, including personal preferences, budget, and specific situational needs. Investment in top-notch roofing materials is advised to steer clear of forthcoming expenditures on repairs and replacements. In mild climates, 3-tab shingles can last between 12 to 15 years, though this is shorter compared to the lifespan of architectural shingles.

For homeowners seeking a more aesthetically pleasing and long-lasting roofing option, architectural shingles are often the preferred choice due to their higher quality and broader color range. To choose architectural shingles for your home, consider scheduling a free roof inspection. Waddle Exteriors offers complimentary consultations and estimates to assist in the decision-making process.

Why Waddle Exteriors Recommends Architectural Shingles

Waddle Exteriors advocates for architectural shingles due to their bolstered durability and preeminent quality in comparison to standard shingles. Emphasizing the use of high-quality materials for roof installations, Waddle Exteriors collaborates with General Aniline & Film, a leading US manufacturer of roofing materials, to ensure superior quality for their customers.

Waddle Exteriors prides itself on providing the best customer service possible, with a customer satisfaction rating of 4.9 out of 5 based on 465 reviews. Their commitment to customer satisfaction and use of high-quality products make architectural shingles the recommended choice for homeowners seeking a reliable and aesthetically pleasing roofing solution.

Summary

In summary, the choice between 3-tab and architectural shingles depends on various factors, including budget, aesthetic preferences, and specific situational needs. While 3-tab shingles offer a cost-effective solution with ease of installation, they have a shorter lifespan and lower wind resistance. On the other hand, architectural shingles provide enhanced durability, superior wind and weather resistance, and a more visually appealing appearance, albeit at a higher cost.

For homeowners looking for a long-term roofing solution that combines durability, aesthetics, and performance, architectural shingles are the recommended choice. Waddle Exteriors stands by this recommendation, offering high-quality installations and exceptional customer service. Choose the roofing material that best suits your needs and enjoy the peace of mind that comes with a well-protected and visually appealing home.

Frequently Asked Questions

How long do 3-tab shingles typically last?

3-tab shingles typically last anywhere from 10 to 25 years, depending on maintenance and climate. So, their lifespan can vary based on these factors.

What are the main differences between 3-tab and architectural shingles?

Architectural shingles are more durable, longer-lasting, and offer a more dimensional appearance compared to 3-tab shingles. Consider architectural shingles for better longevity and aesthetics.

Are architectural shingles worth the higher cost?

Yes, architectural shingles are worth the higher cost because of their enhanced durability, longer lifespan, and superior aesthetic appeal.

What maintenance is required for both 3-tab and architectural shingles?

Regular maintenance for both 3-tab and architectural shingles includes biannual roof inspections, gutter and downspout clearing, tree branch trimming, debris removal, flashing sealing, and dirt and algae cleaning. These tasks will help ensure the longevity and effectiveness of your roof.

Why does Waddle Exteriors recommend architectural shingles?

Waddle Exteriors recommends architectural shingles due to their enhanced durability and superior quality, ensuring high customer satisfaction through collaboration with General Aniline & Film.


icedam

Preventing Ice Dams on Your Roof

Ice Dams

Ice dams are a problem that can occur during the winter when snow and ice build up on roofs. As the weather gets colder, the water in the snow and ice freezes, creating a dam that prevents melting water from draining properly. This can lead to leaks and flooding, which can damage your home and belongings. While ice dams are most commonly found in cold climates, they can also occur in areas that experience warm winters followed by quick dumps of snow. If you live in an area where ice dams are a possibility, there are a few things you can do to prevent them. First, make sure your gutters are clean and free of debris. Clogged gutters can cause water to back up and freeze, so it’s important to keep them clear. You should also insulate your attic to help keep heat from escaping through the roof. Finally, be sure to shovel any snow off your roof as soon as possible after a storm. By taking these precautions, you can help prevent ice dams from forming and causing damage to your home.
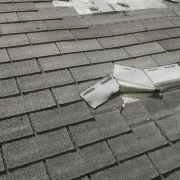
Preventing Ice Dams on Your Roof

Causes of Ice Dams

As anyone who has dealt with an ice dam can attest, they are a frustrating and damaging problem. Ice dams form when heat escapes from the home and melts the snow on the roof. The water then flows down to the edge of the roof where it refreezes, creating a dam that prevents melted snow from draining off the roof. As more snow melts, the dam grows larger and larger, eventually causing water to back up under shingles and leak into the home. Ice dams can cause extensive damage to roofs, walls, and ceilings, and they are a leading cause of wintertime water damage. Fortunately, there are a few things that homeowners can do to prevent ice dams from forming in the first place. One is to make sure that the attic is properly insulated so that heat does not escape. Another is to keep gutters clear of debris so that melting snow can drain freely. Finally, it is important to regularly remove snow from the roof to prevent a buildup of ice and snow. By taking these precautions, homeowners can help protect their homes from the damaging effects of ice dams.

Signs You Have an Ice Dams

One of the best ways to know if you have ice dams is to look for icicles. If you see icicles, it may be a sign that water is leaking through your roof and freezing as it runs down your gutters or eaves. Another way to tell if you have ice dams is to look for spots on your ceiling or walls where the paint is bubbling or peeling. This can be an indication that water is seeping through cracks in your roof and causing damage to your home. If you suspect you have ice dams, it’s important to have them removed as soon as possible. Otherwise, they can cause extensive damage to your roof and home.

Do Icicles Mean Poor Insulation?

Most people think that if their house has icicles, it means that their insulation is poor. But that’s not always the case. Icicles can form for a variety of reasons, and often have nothing to do with insulation. For example, if the temperature outside is very cold and the sun is shining on your roof, the heat from the sun can cause the snow to melt. As the water runs down your roof, it will refreeze when it reaches the edge of your roofline, creating an icicle. Another common cause of icicles is improper ventilation in your attic. If warm air from your house escapes into your attic, it can cause the snow on your roof to melt. This melting snow will then run down your roof and refreeze when it reaches the edge of your roofline, creating an icicle. Icicles can also be caused by a leaking gutter. If water leaks from your gutter and onto your roof, it can freeze and create an icicle. So, while icicles may be pretty to look at, they can actually be a sign of a problem with your home. If you have icicles, it’s important to have a professional inspect your home to determine the cause and make sure that any problems are fixed.

Putting Salt on a Roof

In the winter, it’s important to take steps to prevent ice dams from forming on your roof. One method that is sometimes used is to sprinkle salt on the roof. However, this can actually be counterproductive and potentially damage your roof. The salt can eat away at the shingles, causing them to deteriorate prematurely. In addition, it can also promote the growth of moss and algae, which can further damage the roof. For these reasons, it’s best to avoid using salt on your roof and instead focus on other methods of ice removal.

Preventive Measures for Ice Dams

As we all know, winter weather can be brutal on our homes. One of the biggest dangers is the formation of ice dams, which can cause extensive damage to roofs and gutters. Ice dams occur when melting snow refreezes at the edge of the roof, forming a dam that prevents future melting snow from draining off the roof. As the dam grows, it can block gutters and force water back up under shingles, eventually leading to serious leaks.

Fortunately, there are a few preventive measures that you can take to help reduce the risk of ice dams forming in your home. First, make sure that your gutters are clean and free of debris. This will allow melting snow to drain freely off the roof. Second, keep the attic well-ventilated to prevent heat from rising and melting snow on the roof. Third, insulate your attic floor to help reduce heat loss through the ceiling. And finally, if you do get an ice dam, don’t try to remove it yourself; hire a professional to do it safely. By taking these simple steps, you can help protect your home from the damaging effects of ice dams.

Illustration of various types of storm damage on a roof

Storm Season in Iowa

Storm season in Iowa can be a time of year filled with anxiety and fear. The danger of being caught in a severe thunderstorm or tornado is real, and the potential for damage to property and even loss of life is very real. However, there are steps that Iowa residents can take to prepare for storm season and minimize the risks. The first step is to stay informed about the weather conditions. Watch the news or check the National Weather Service website for updates on severe weather warnings. When a severe thunderstorm or tornado watch is issued, take shelter immediately and stay tuned to a local radio or television station for updates. If possible, have an NOAA Weather Radio on hand to receive updates even if power is lost. If you are caught in a severe storm, remember to stay away from windows and doors, and if possible, get to an interior room on the lowest level of your home. By following these simple steps, you can help ensure that you and your family stay safe during Iowa’s storm season.

Number of Tornadoes Iowa Have a Year

According to the National Weather Service, Iowa averages around 50 tornadoes each year. While that may seem like a lot, it’s actually relatively low compared to other states in the Midwest. For example, Illinois sees an average of 120 tornadoes per year, while Nebraska has about 70. Of course, the number of tornadoes can fluctuate from year to year, and some parts of the state are more prone to them than others. For example, the northwestern corner of Iowa is particularly vulnerable to severe weather, and it’s not uncommon for that area to see several tornadoes in a single season. Thankfully, most of Iowa’s tornadoes are relatively weak, and only a handful cause any significant damage or injuries each year. Still, it’s always important to be prepared for severe weather, no matter where you live.

The Danger of Storm

A storm is a meteorological event characterized by the presence of wind, thunder, lightning, and heavy precipitation. Storms can occur at any time of year, but they are most common in the spring and summer months. While storms can be spectacular to watch, they can also be very dangerous. Strong winds can damage property and cause power outages, while heavy rains can lead to flooding. Lightning strikes can injure or kill people, and hailstones can cause serious injuries. For these reasons, it is important to take steps to protect yourself and your property from storms. When a storm is a forecast, make sure to secure loose objects around your home and bring any valuable items inside. If possible, avoid traveling during a storm. If you must go out in bad weather, drive slowly and be on the lookout for dangerous conditions such as downed power lines or flooded roads. By taking precautions and staying safe, you can minimize the impact of storms on your life.

Storms that Cause the Most Damage

Weather-related natural disasters cause billions of dollars in damage every year. The three storms that have caused the most damage in the United States are hurricanes, wildfires, and floods.

Hurricanes are massive storms that can span hundreds of miles and last for days. They usually form over warm ocean waters and have very strong winds and heavy rains. When a hurricane makes landfall, it can cause severe damage to homes, businesses, and infrastructure. In addition, hurricanes often cause widespread power outages and flooding. As a result, they can have a major impact on communities and can take months or even years to recover from.

While hurricanes are typically associated with coastal areas, wildfires can occur anywhere there is dry vegetation. Wildfires are typically started by lightning strikes or human activity, and they can spread rapidly through forests or other dry areas. Wildfires can cause significant damage to property and vegetation, and they also pose a threat to human safety. In addition, wildfire smoke can travel long distances and impact air quality for many people.

Floods are another type of storm that can cause extensive damage. Floods occur when there is too much water in an area, and they can be caused by heavy rains or snowmelt. Floodwaters can damage homes, businesses, and infrastructure, and they can also contaminate drinking water supplies. In addition, floods often lead to road closures and power outages. As a result, they can have a major impact on communities and can be very difficult to recover from.

Most Common Natural Disaster in Iowa

The most common natural disaster in Iowa is flooding. Flooding can occur when rivers overflow their banks, when dams or levees fail, or when heavy rains cause surface water to pool. Flash floods can occur with little or no warning, making them particularly dangerous. Flooding can damage homes and businesses, disrupt transportation and communication networks, and contaminate water supplies. It can also lead to injuries and fatalities. While floods cannot be completely prevented, there are steps that can be taken to reduce the risks posed by flooding. These include maintaining healthy watersheds, constructing flood-resistant buildings, and developing evacuation plans. By taking these measures, Iowans can help to protect themselves and their property from the devastation of floods.

Is Iowa a Good Place To Live?

There are many factors to consider when deciding if a place is good to live. For some people, access to amenities and a fast-paced lifestyle are important, while others prioritize a slower pace and close-knit community. Iowa has a lot to offer residents, no matter what their priorities are. The state is home to dozens of colleges and universities, as well as a thriving arts and culture scene. Des Moines, the state capital, is a hub of activity, with plenty of shopping, dining, and entertainment options. Iowa is also known for its beautiful scenery, with rolling hills and farmland dotting the landscape. Plus, the cost of living in Iowa is relatively affordable, making it an attractive option for families. In short, Iowa is a great place to live for people of all backgrounds and interests.

Choosing right shingle color

Are There Different Grades of Asphalt Shingles?

When it comes to asphalt shingles, there are three main grades: economy, standard, and premium. Economy shingles are the most basic and affordable option. They are typically thin and lightweight, making them easy to install. However, they also have a shorter lifespan and are less resistant to wind and other elements. Standard shingles are a step up in terms of quality, and they offer a good balance of price and performance. They are thicker and more durable than economy shingles, and they can last up to 20 years. Premium shingles are the most expensive option, but they offer the best protection against wind, hail, and other weather conditions. They are also the heaviest and most difficult to install. As a result, they are typically used on commercial buildings and high-end homes. When choosing asphalt shingles for your home, it is important to consider your budget and your needs. Economy shingles may be sufficient for some homes, while others may require the added protection of premium shingles.

Are There Different Grades of Asphalt Shingles?

Best Grade of Asphalt Shingles

Asphalt shingles are one of the most popular roofing materials on the market and for good reason. They are durable, easy to install, and relatively inexpensive. However, not all asphalt shingles are created equal. The grade of asphalt shingle you choose will have a big impact on performance and longevity. Here are a few things to keep in mind when choosing the best grade of asphalt shingle for your home.

The top layer of an asphalt shingle is exposed to the elements, so it needs to be able to withstand strong UV rays, wind, and rain. Therefore, it is important to choose a shingle with a strong top layer. The bottom layer is less exposed, so it does not need to be as tough. However, it still needs to be able to support the weight of the top layer. The middle layer is where the two layers are bonded together. This layer needs to be strong and flexible in order to prevent the layers from separating. When choosing an asphalt shingle, be sure to ask about the quality of each layer.

In general, thicker shingles are more durable than thinner ones. However, they are also heavier and more difficult to install. If you choose a thinner shingle, be sure to select one that is designed for high-traffic areas or areas with high winds. Also keep in mind that different grades of asphalt shingles vary in price, so be sure to compare prices before making your final decision. By taking the time to choose the best grade of asphalt shingle for your home, you can rest assured that your roof will provide years of protection against the elements.

Qualities of Asphalt Shingles

Asphalt shingles are made from a variety of materials, including fiberglass or organic matting, that are saturated with asphalt and then coated with ceramic granules. The type of material used will affect the cost, weight, and lifespan of the shingle. For example, fiberglass shingles are lighter and more wind-resistant than organic shingles, but they are also more expensive. Asphalt shingles are available in a wide range of colors and styles to suit any taste. With so many options to choose from, it’s easy to find asphalt shingles that will complement the style of your home or business.

Longevity of Asphalt Shingles

Many homeowners wonder how long their asphalt shingles will last before they need to be replaced. The answer to this question depends on a number of factors, including the quality of the shingles, the climate, and the level of maintenance. In general, however, asphalt shingles can last between 15 and 30 years. With proper care and maintenance, they may even last longer. Asphalt shingles are a great choice for those who want an affordable and easy-to-maintain roof. When installed by a professional, they can provide years of trouble-free service.

Class 4 Shingles

Class 4 shingles are the heaviest and most durable type of asphalt shingle. They are designed for use in homes in areas that experience high winds and severe weather conditions. Class 4 shingles are made with multiple layers of asphalt and reinforcement materials, making them much thicker than standard shingles. This extra protection comes at a higher price tag, but it is well worth the investment for homeowners in vulnerable areas. Class 4 shingles have a higher wind resistance rating and can withstand winds up to 130 miles per hour. They are also more resistant to impact damage from hail, debris, and other objects. For maximum protection, Class 4 shingles should be installed by a professional roofing contractor.

Lowest Slope of Asphalt Shingles

One thing to keep in mind when installing asphalt shingles is the minimum slope. The minimum slope is the lowest angle that the shingles can be installed at and still function properly. If the shingles are installed at too low of a slope, they will not shed water effectively and could lead to leaks. For most homes, a minimum slope of 4:12 is recommended. This means that for every 12 inches of horizontal distance, the shingles should rise at least 4 inches. In some cases, a steeper slope may be required depending on the climate and the type of asphalt shingle used. By following the minimum slope requirements, you can help ensure that your asphalt shingles will function properly for years to come.

Shingles that Roofers Recommends

There are several types of shingles that roofers recommend to their customers. Asphalt shingles are the most popular type of shingle, and they are available in a variety of colors and styles. Metal shingles are another popular option, and they offer a long-lasting and durable solution for roofing. Tile shingles are also an option, and they can provide a unique look to your home. If you are looking for a shingle that is fire-resistant, you may want to consider slate or clay shingles. No matter what type of shingle you choose, it is important to work with a reputable roofer to ensure that your new roof will be installed correctly.

Hiring a professional roofing contractor.

5 Most Common Roofing Problems

Your roof is one of the most important components of your home, so it’s important to keep it in good condition. Unfortunately, roofs are susceptible to a variety of problems, from severe weather damage to simple wear and tear. Here are five of the most common roofing problems that homeowners face:

1. Missing or damaged shingles: Over time, shingles can become loose or cracked, which can cause water damage to your roof decking. Regularly inspecting your shingles and replacing them as needed can help prevent this problem.

2. Leaks: Leaks are one of the most common roofing problems, and they can be caused by a variety of factors, including missing or damaged shingles, clogged gutters, and ice dams. If you suspect you have a leak, it’s important to have it repaired as soon as possible to prevent further damage.

3. Ice dams: Ice dams form when water from melting snow refreezes at the edge of your roof, creating a dam that prevents additional melting snow from draining properly. Ice dams can cause extensive damage to your roof and should be removed as soon as possible.

4. Condensation: Condensation can form on your roof when warm air from inside your home escapes and comes into contact with the cold surface of your roof. This can cause mold and mildew to grow, which can lead to health problems for you and your family. proper ventilation can help prevent condensation from forming on your roof.
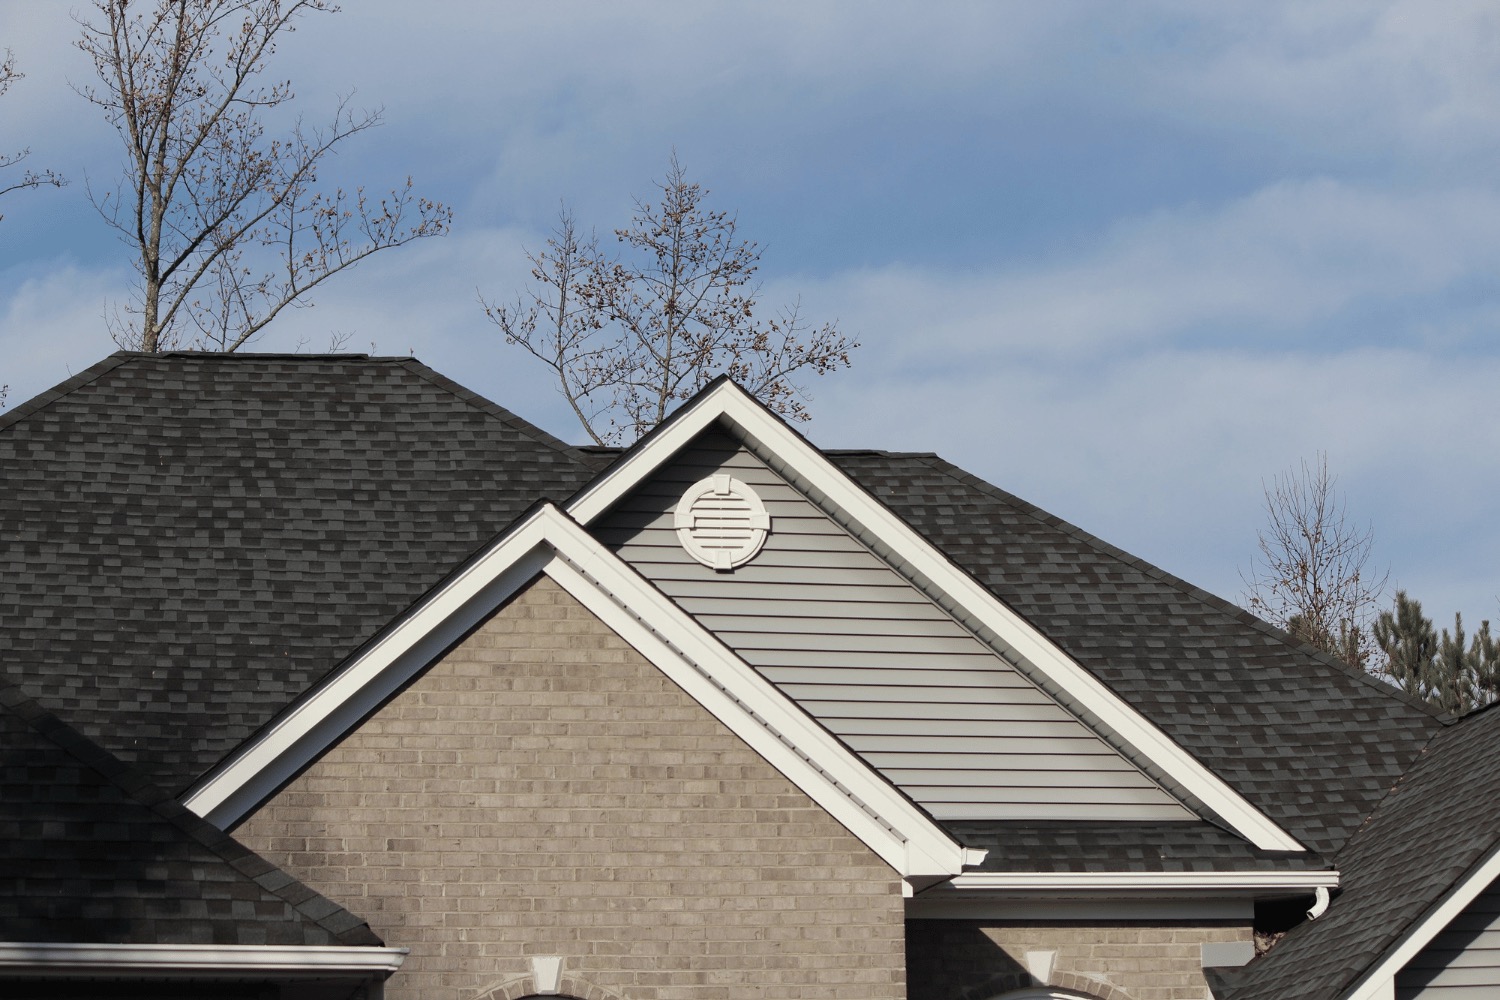
5 Wear and tear: Like any other part of your home, roofs succumb to wear and tear over time. As your roof ages, it will become more vulnerable to leaks and other problems. Regular maintenance and repairs can help extend the life of your roof. [If you’re unsure how to properly maintain your roof,] Speak with a professional roofing contractor for more information.

Checking Rood Problems

There are a few different ways to check for roof problems. First, take a look at the shingles. If any are cracked, loose, or missing, that’s a sign that there may be a problem. Second, check the gutters. If they’re filled with debris, that can prevent proper drainage and lead to problems like leaks or even collapse. Finally, have a professional inspection once every few years to catch any problems before they become serious. By following these simple steps, you can help keep your roof in good condition and protect your home from potential damage.

Most Vulnerable Part of the Roof

The most vulnerable part of the roof is the edge. The edge is the point where the roof meets the gutters and where the shingles are most likely to be damaged or torn off. The shingles at the edge of the roof are also more likely to be loose or missing, allowing water to seep underneath. Furthermore, the edge of the roof is exposed to more extreme weather conditions, such as high winds and heavy rain. As a result, it is important to have a strong, well-sealed edge on your roof in order to protect your home from water damage.

Common Cause of Roof Leaks

The most common cause of roof leaks is improper installation or repair of the roofing materials. If the flashing around the chimney, skylights, or vents is not properly installed, it can allow water to seep in and cause damage to the interior of the home. In addition, if shingles are missing or damaged, they can also allow water to enter the home. It is important to have a professional roofer inspect the roof periodically to ensure that it is in good condition and that any potential problems are repaired promptly. By taking these steps, you can help avoid costly repairs and prolong the life of your roof.
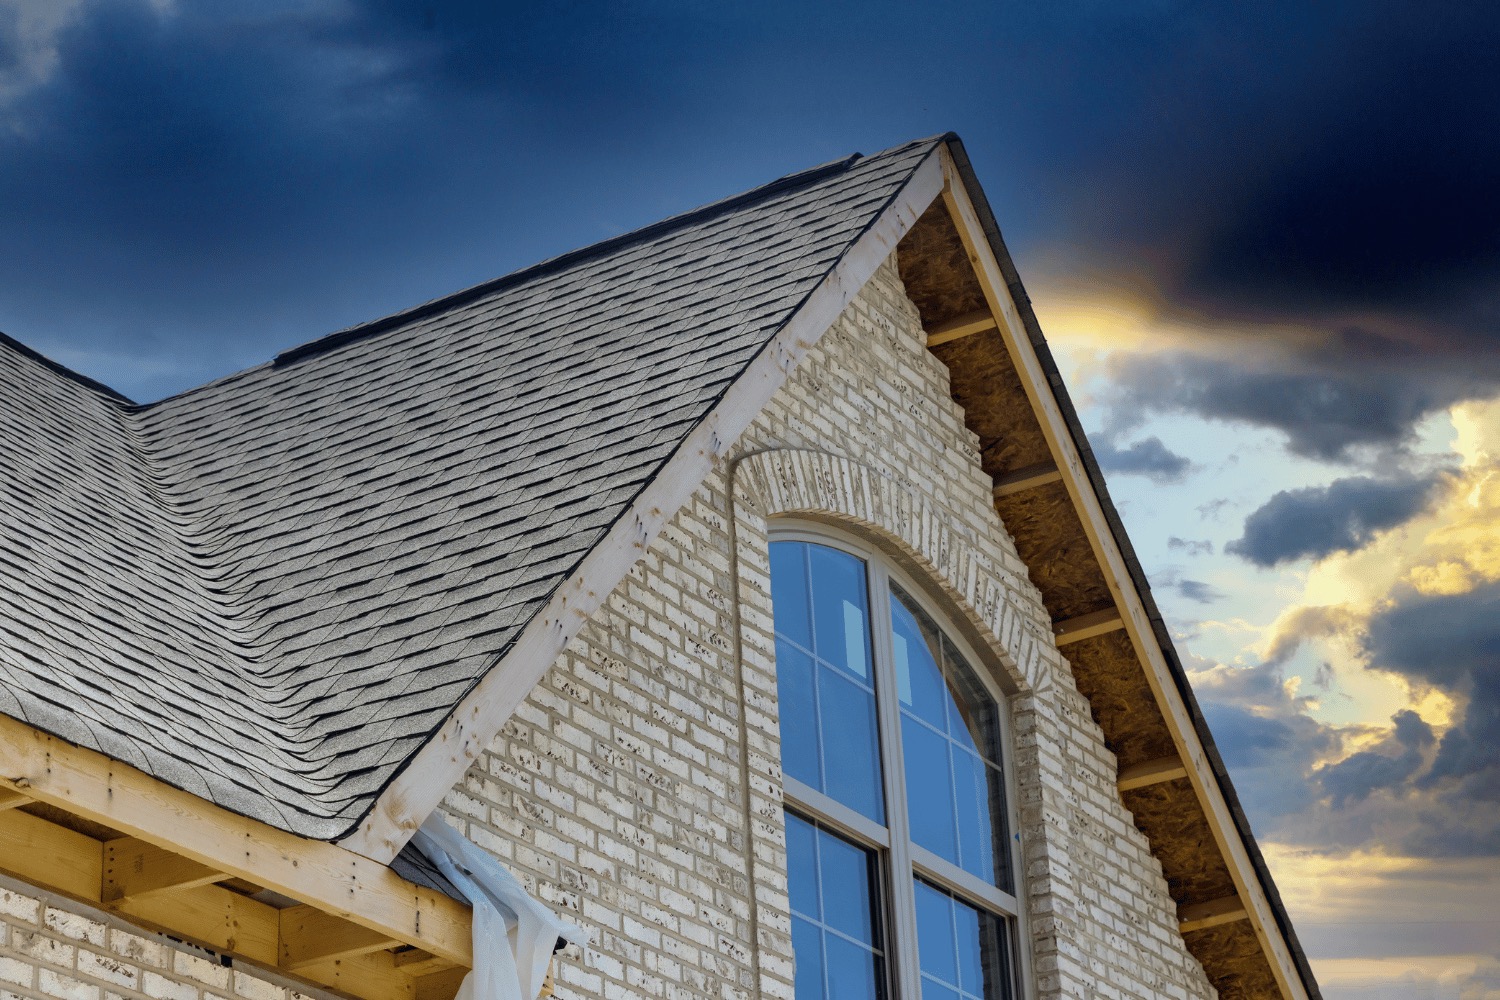
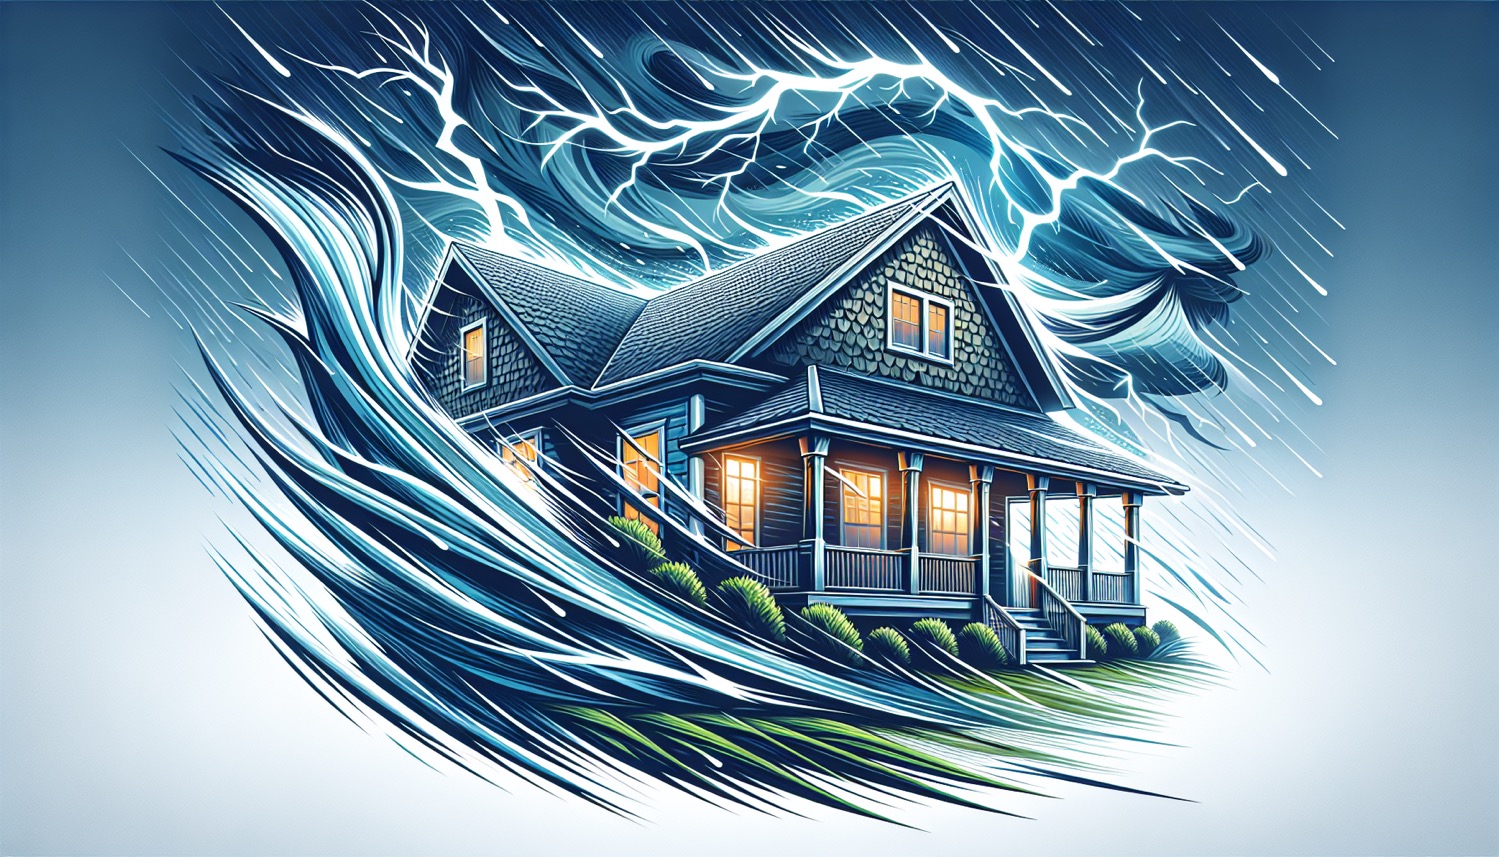
Can You Seal a Roof Leak From the Inside?

If your roof is leaking, you may be wondering if you can seal the leak from the inside. The answer is yes, but it’s important to take a few things into consideration before you do. First, it’s important to determine the source of the leak. If the leak is coming from a crack or hole in the roof, you’ll need to patch it from the outside. However, if the leak is coming from around a vent pipe or Chimney, you may be able to seal it from the inside. Second, you’ll need to decide what type of sealant to use. There are many different types of sealants on the market, so it’s important to choose one that is compatible with your roofing material. Lastly, you’ll need to take into account the amount of damage that has been done. If the leak has caused extensive damage to your ceiling, it’s best to consult with a professional before attempting to seal it yourself. In most cases, sealing a roof leak from the inside is a viable option, but it’s important to proceed with caution.

How to Prevent Roof Problems

The roof can also be one of the most expensive parts of a house to maintain. With that in mind, here are four tips to help prevent roof problems:

1. Keep gutters clean and well-maintained. Clogged gutters can cause water to back up and damage shingles or even the structure of the roof itself.

2. Inspect the roof regularly for signs of damage. If you spot any missing or damaged shingles, have them repaired or replaced as soon as possible.

3. Trim trees and shrubs around the house. Overhanging branches can damage shingles in high winds, and falling leaves can clog gutters and downspouts.

4. Be proactive about repair and maintenance. If you catch problems early, they will be much easier and less expensive to fix than if you wait until they become major issues.

By following these tips, you can help to prolong the life of your roof and prevent costly repairs down the road.

Roof Improvements

There are a few things you can do to help prolong the lifespan of your roof and keep it in good condition. One is to have it inspected regularly by a professional roofer. This will help to identify any potential problems early on, before they have a chance to cause major damage. Another key step is to remove any debris, such as dead leaves or branches, that may have accumulate on the surface of the roof. This can prevent water from pooling and eventually causing leaks. Finally, be sure to trim back any overhanging branches from trees near your home. These can rub against the roof during high winds, causing wear and tear over time. By taking these simple steps, you can help to keep your roof in good shape for years to come.