Essential Roof Storm Damage Tips for Homeowners
After a storm, your roof might have suffered damage that needs immediate attention. Inspecting for storm damage promptly can prevent further issues like leaks or structural problems. This article covers how to spot damage, what steps to take, and when to call a professional.
Key Takeaways
-
Conduct a thorough inspection of your roof and attic after a storm to identify visible and hidden damage. This includes checking for shingle concerns, leaks, and other signs of wear.
-
Filing an insurance claim promptly and documenting all storm damage with photos and videos can streamline the claims process and ensure coverage for necessary repair.
-
Hiring a licensed and insured roofing contractor with a strong reputation and good warranty is crucial for ensuring quality repairs and maintaining your roof’s integrity.
Essential Roof Storm Damage Tips for Homeowners

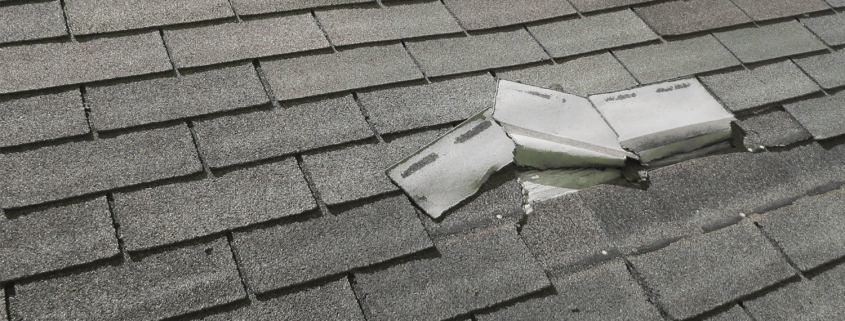
Post-storm, begin by visually inspecting your roof for any damage. This can be done by walking around the perimeter of your house. Be on the lookout for apparent signs such as missing or damaged shingles. Additionally, scrutinize gutters, vents, and windows for any dents, cracks, or broken glass. High winds can remove or tear shingles, leaving the underlayment or roof deck exposed, which can lead to more severe issues if not addressed.
Examine your attic and ceilings for leaks and water spots, as they may reveal concealed damage that isn’t immediately obvious from the outside. Ignoring small issues like shingles that are missing can lead to major problems like leaks or even roof collapse. Routine inspections and timely repairs contribute significantly to maintaining a sturdy roof.
Introduction
Storms can severely damage your home’s roof, leading to an array of issues, ranging from minor to serious structural damage. Addressing storm damage promptly with storm damage roof repair is not just about fixing a few broken shingles; it’s about ensuring the structural integrity of your home and preventing water infiltration that can lead to interior damage, mold, and rot. The roof, after all, is your home’s primary defense against the elements.
Maintaining a well-kept roof is essential for preserving your home’s curb appeal and resale value. By understanding the types of storm damage, knowing how to identify them, and taking prompt action, you can protect your investment and avoid costly repairs down the line. This guide will help you navigate the complexities of storm damage and equip you with the knowledge to keep your home safe and secure.
Identifying Roof Storm Damage

Post-storm, it’s vital to carry out a comprehensive inspection of your roof to spot any apparent signs of damage like missing or shingles that are damaged. Walk around the perimeter of your house and visually assess the roof. Look for any signs of roof damage, including dents and cracks in the gutters, vents, and windows.
Don’t limit your inspection to the exterior; also examine your attic and ceilings for leaks and water spots, which might suggest concealed damage that’s not immediately noticeable. Ignoring small roof issues like missing shingles can lead to major problems like leaks or even roof collapse. Addressing these issues without delay is crucial to averting further damage.
In addition, some roofing companies now perform drone roof inspections along with property evaluations to detect storm-related damage that might be missed during a traditional inspection. Utilizing technology can provide a more comprehensive assessment of your roof’s condition, ensuring that no damage goes unnoticed.
Types of Storm Damage

Different types of damage can be inflicted on your roof by storms, each demanding unique repair strategies. High winds can cause wind damage, such as removing or tearing shingles, leaving the underlayment or roof deck exposed and susceptible to further damage. Strong winds can also pull apart loose roof shingles or break overhanging tree limbs, causing debris to fall onto the roof.
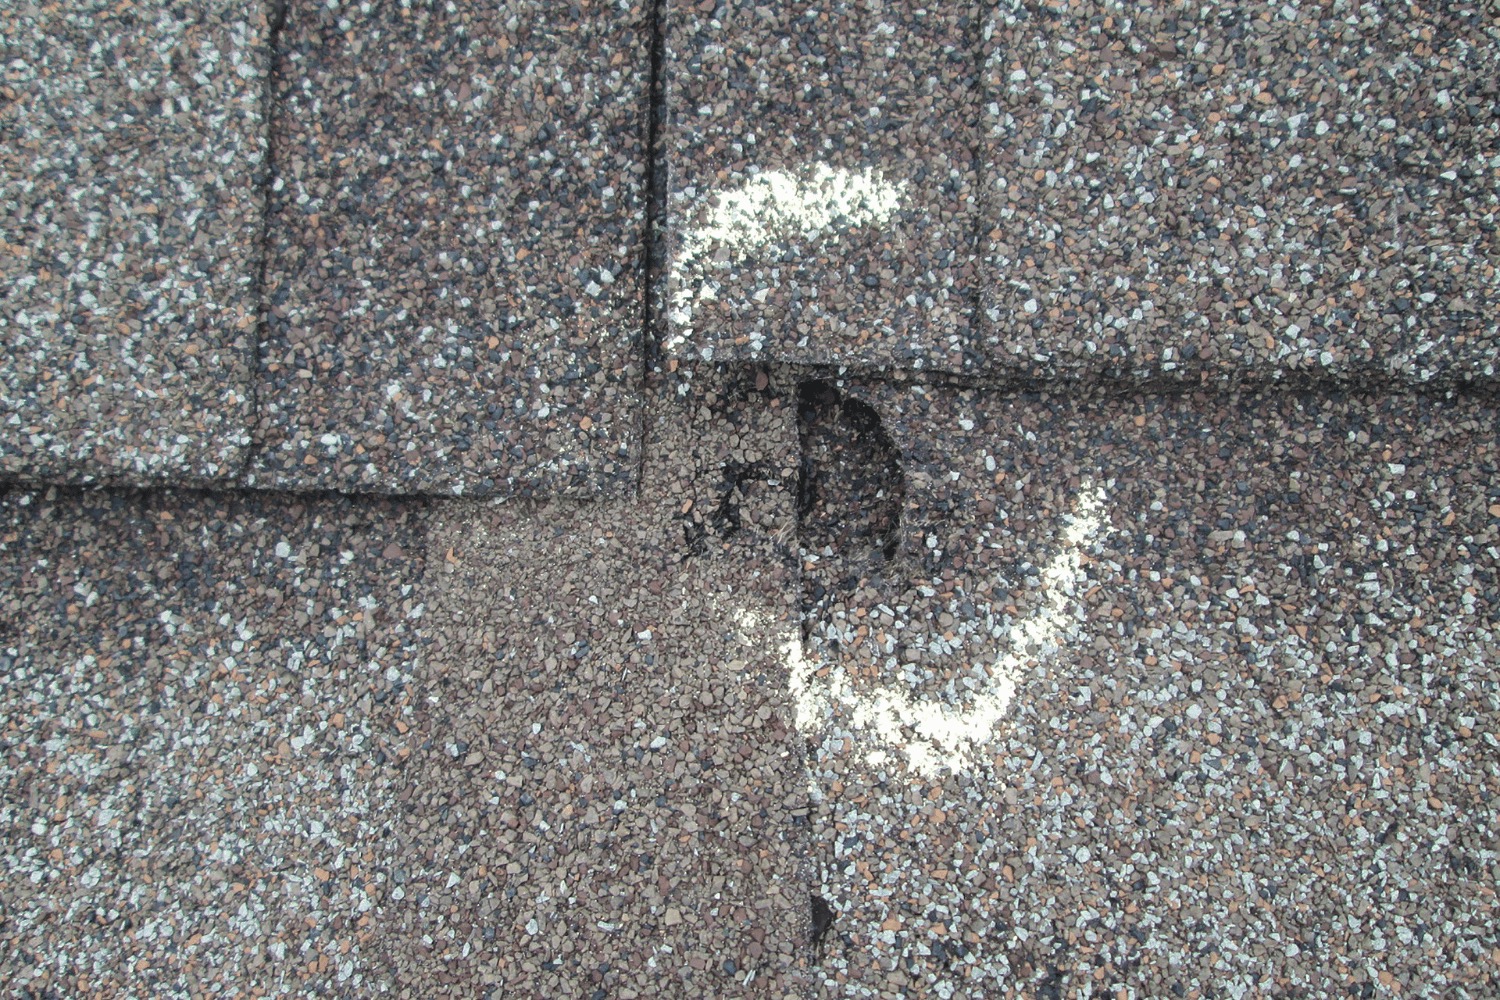
Hailstorms can be particularly damaging, as hailstones can cause hail damage by cracking asphalt shingles, puncturing metal roofs, and leaving dents in shingles. Heavy rains can wash away granules on the surface of roof shingles, reducing their effectiveness and leading to water damage. Standing water due to improper drainage can also cause significant issues, especially in uneven areas.
Snow and ice present their own set of challenges, including:
-
Snow buildup can penetrate through leaks in the roof as it melts, causing moisture damage.
-
Ice can form along irregular roofing material, allowing meltwater to seep into the home’s interior.
-
Debris like branches can dent or impact shingles, making the roof vulnerable to moisture.
Understanding these different types of storm damage is crucial for effective roof maintenance and storm damage repair.
Immediate Actions to Take After a Storm
After the storm subsides, prioritize the following steps:
-
Contact an expert for an onsite inspection.
-
Reach out to your insurance company if you suspect storm damage.
-
Take detailed photographs or videos of the damage from multiple angles to use as documentation for insurance claims and repair assessments.
-
If possible, use drone footage as additional proof of the storm damage when filing an insurance claim.
Implement temporary repairs like:
-
Covering damaged areas with tarps to prevent further water infiltration
-
Spreading a waterproof tarp over the damage
These temporary fixes can help mitigate further damage.
Even in the absence of visible damage, it’s advisable to get a professional to inspect your roof and siding. Some damage may not be immediately apparent but can cause significant issues over time. Addressing these problems early can save you from more extensive and costly repairs later.
Temporary Repairs You Can Do Yourself

While waiting for professional repairs, there are several temporary measures you can take to protect your roof from further damage. Here are some steps you can follow:
-
Stock up on emergency repair materials like tarps
-
Spread a waterproof tarp over the damaged area.
-
Secure the edges of the tarp to prevent rainwater from getting underneath.
-
This can provide a temporary barrier against water infiltration.
When to Consider Roof Repair vs. Replacement
Determining whether to opt for roof repair or replacement can be a difficult decision. Here are some factors to consider:
-
If the storm damage is minor and localized to a single section, consider roof repair.
-
If the damage is severe and affects multiple areas, roof replacement might be advisable.
-
The age of your roof is also a significant factor; most shingle roofs last between 15-20 years, so replacing is recommended if the roof is over 20 years old.
If your roof is less than 10 years old, you might prefer to repair rather than replace. Roof replacement is more expensive upfront compared to repairs, but it can be more cost-effective in the long run if your roof requires frequent repairs. Weighing these factors can help you make an informed decision about your roof’s future.
The need for a roof replacement can be indicated by the frequency of repairs over a short time span. If you find yourself constantly patching up your roof, it might be time to invest in a new one. A professional roofing contractor can provide a thorough assessment and recommend the best course of action based on your roof’s condition.
Navigating the Insurance Claim Process
While filing an insurance claim for storm damage may seem overwhelming, comprehending the steps involved can simplify the process. Here are the steps to follow:
-
Contact your homeowners insurance provider immediately if significant damage is found.
-
Familiarize yourself with your policy and rights before filing a claim.
-
Document the damage by recording the date of the storm and taking photos of any visible damage.
-
Search online for news stories about the storm for additional proof if required.
Request an insurance adjuster to inspect the damage and ensure your chosen contractor is present during the inspection. The adjuster will evaluate the damage and approve or deny the claim based on their findings. Once a claim is approved, insurance companies typically send two payments: one for materials and one after repairs are complete. No additional payment should be made until all repairs are completed and a city inspection is passed.
Preparing for the Insurance Adjuster’s Visit
To ensure a hassle-free claims process, it’s vital to prepare well for the insurance adjuster’s visit. Here are some steps to follow:
-
Record the date of the storm.
-
Take photos of visible damage to help during the adjuster’s visit.
-
The adjuster will inspect the damage and approve or deny the claim based on the findings.
-
Having thorough documentation ready can make the inspection process more efficient and increase the likelihood of your claim being approved.
It’s also beneficial to have your chosen contractor present during the adjuster’s inspection to provide an expert opinion and ensure that all damage is accurately assessed. This collaborative approach can help avoid any discrepancies and ensure that you receive the appropriate coverage for the repairs needed.
Common Mistakes to Avoid During the Claims Process
The claims process can be complex, with certain common pitfalls that homeowners should beware of. Timely action is crucial when filing an insurance claim for storm damage. Delaying the claim process can result in the insurance company denying the claim due to time limits. Make sure to contact your insurance provider promptly and provide all necessary documentation to support your claim.
If your storm damage claim is denied, don’t hesitate to ask for a second insurance adjuster to inspect the roof or have an engineer provide proof to the insurance company. Seeking a second opinion can often lead to a different outcome, ensuring that you receive the coverage you deserve.
Choosing a Professional Roofing Contractor
For quality repairs and a seamless process, choosing the right roofing contractor is imperative. Here are some tips to help you make the right choice:
-
Hire a licensed, insured roofing company with a strong warranty for any repair work.
-
Check if the contractor is licensed and insured, and inquire about their safety measures and insurance coverage.
-
It’s also recommended to get quotes from at least three certified roofing contractors to compare pricing and services.
Ask for references from past customers to gauge the contractor’s reliability and ensure they provide a clear written estimate that includes materials, labor, and tax. A reputable roofing contractor should offer a solid warranty on their work and have a portfolio of past projects with positive reviews. This due diligence can help you find a trustworthy professional who will deliver high-quality repairs.
The Importance of Regular Roof Inspections
Routine roof inspections are a preventative step to detect potential issues before they escalate into major problems. Inspections can help uncover problems such as loose shingles, damaged flashing, or clogged gutters. Conducting inspections twice a year can prevent 95% of roofing issues, saving homeowners from costly repairs.
Professional roof inspections can also reveal hidden problems that untrained eyes might miss. Maintaining proper roof inspections ensures the compliance of roofing material warranties and enhances energy efficiency by assessing both insulation and ventilation. Regular inspections, especially for older roofs, are key to extending the lifespan of your roofing system.
Summary
In summary, addressing storm damage promptly is crucial to maintaining the integrity of your roof and protecting your home from further damage. Conduct thorough inspections, understand the types of storm damage, and take immediate action to prevent issues from worsening. Temporary repairs can provide a quick fix until professional help arrives, and knowing when to repair versus replace your roof can save you money in the long run.
Navigating the insurance claim process and choosing a professional roofing contractor are essential steps to ensure quality repairs and appropriate coverage. Regular roof inspections play a vital role in identifying potential issues early and maintaining the effectiveness of your roofing system. By following these guidelines, you can keep your home safe and secure, come rain or shine.
Frequently Asked Questions
What should I do immediately after a storm to check for roof damage?
After a storm, conduct a visual inspection of your roof by walking around your house and checking for missing or damaged shingles, as well as inspecting gutters, vents, and windows for dents or cracks. Also, inspect your attic and ceilings for leaks and water spots.
How can I temporarily repair my roof after a storm?
You can temporarily repair your roof after a storm by using a waterproof tarp to cover damaged areas. This will help prevent further damage to your home.
When should I consider replacing my roof instead of repairing it?
You should consider replacing your roof instead of repairing it if the damage is severe and affects multiple areas, or if your roof is over 20 years old. Frequent repairs over a short period may also indicate the need for a new roof.
How can I prepare for the insurance adjuster’s visit?
Make sure to document the date of the storm, take photos of any damage, and prepare thorough documentation. It’s also helpful to have your chosen contractor present during the inspection.
Why are regular roof inspections important?
Regular roof inspections are important because they can help identify potential issues early, prevent major problems, maintain warranty compliance, and enhance energy efficiency by assessing insulation and ventilation.

