Tag Archive for: damaged roof shingles

An illustration depicting the basics of shingle removal. 1

The Best Methods for Efficient Shingle Removal

Wondering if it’s time for shingle removal? This article guides you through recognizing signs of damaged shingles, gathering the right tools, and following a step-by-step shingle removal process to protect your home from water damage.

Key Takeaways

  • Old roof shingles showing signs like curling, cracking, or missing granules need to be removed to prevent water damage.

  • Using the right tools, such as roofing shovels and safety gear, is essential for effective and safe shingle removal.

  • Proper preparation and disposal of roofing debris are crucial for a smooth shingle removal process and a stable foundation for new shingles.

Understanding the Basics of Shingle Removal

An illustration depicting the basics of shingle removal.

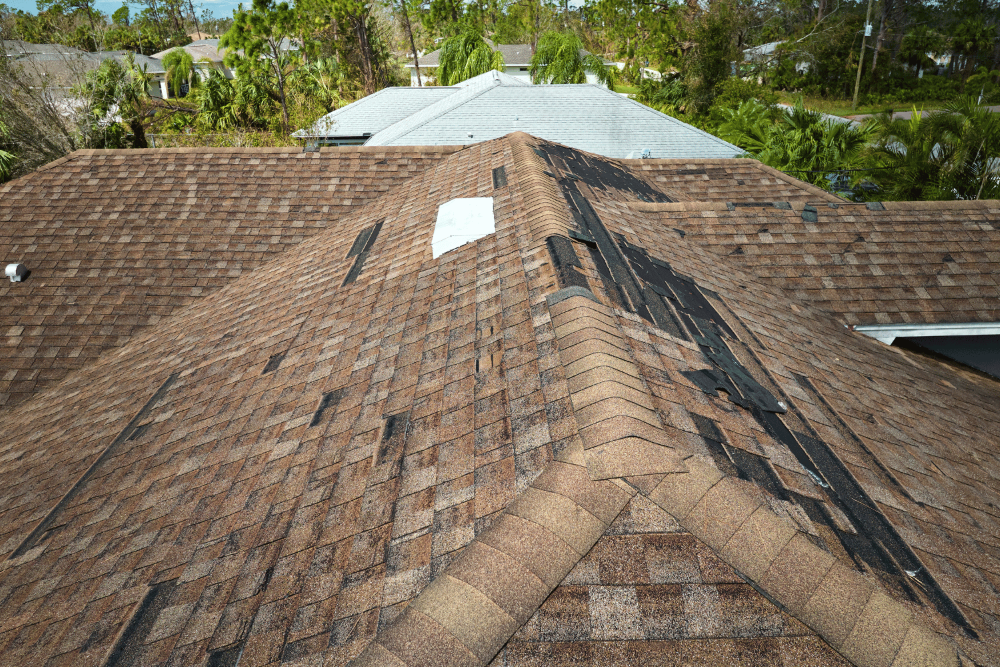
Regularly removing and replacing roof shingles extends the life of your roof and protects your home from water damage. Over time, old roof shingles can show signs of wear, such as curling, cracking, and missing granules. Curling shingles indicate aging and can become brittle, making them more likely to be blown off during high winds. If you find shingles have blown off your roof, it’s a clear sign they have deteriorated and need replacement.

The age of your roof is another critical factor to consider. Most roofs that are older than 14-20 years are likely due for replacement, even if they don’t show obvious signs of wear. Missing granules on shingles can also indicate deterioration, leading to accelerated wear from UV damage. Understanding these basics helps you recognize when it’s time to remove the shingles and start the re-roofing process.

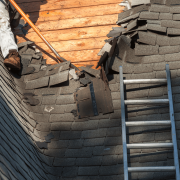
The shingle removal process, often referred to as a roofing tear-off, involves stripping away the old shingles to create a clean surface for the new ones. This process not only ensures a stable foundation for the new shingles but also allows for the inspection and repair of any hidden damage to the roof deck.

Carefully removing the existing shingles prevents further damage and extends the overall lifespan of your roof.

Signs It’s Time to Remove Your Roof Shingles

An illustration showing signs that indicate it's time to remove roof shingles.

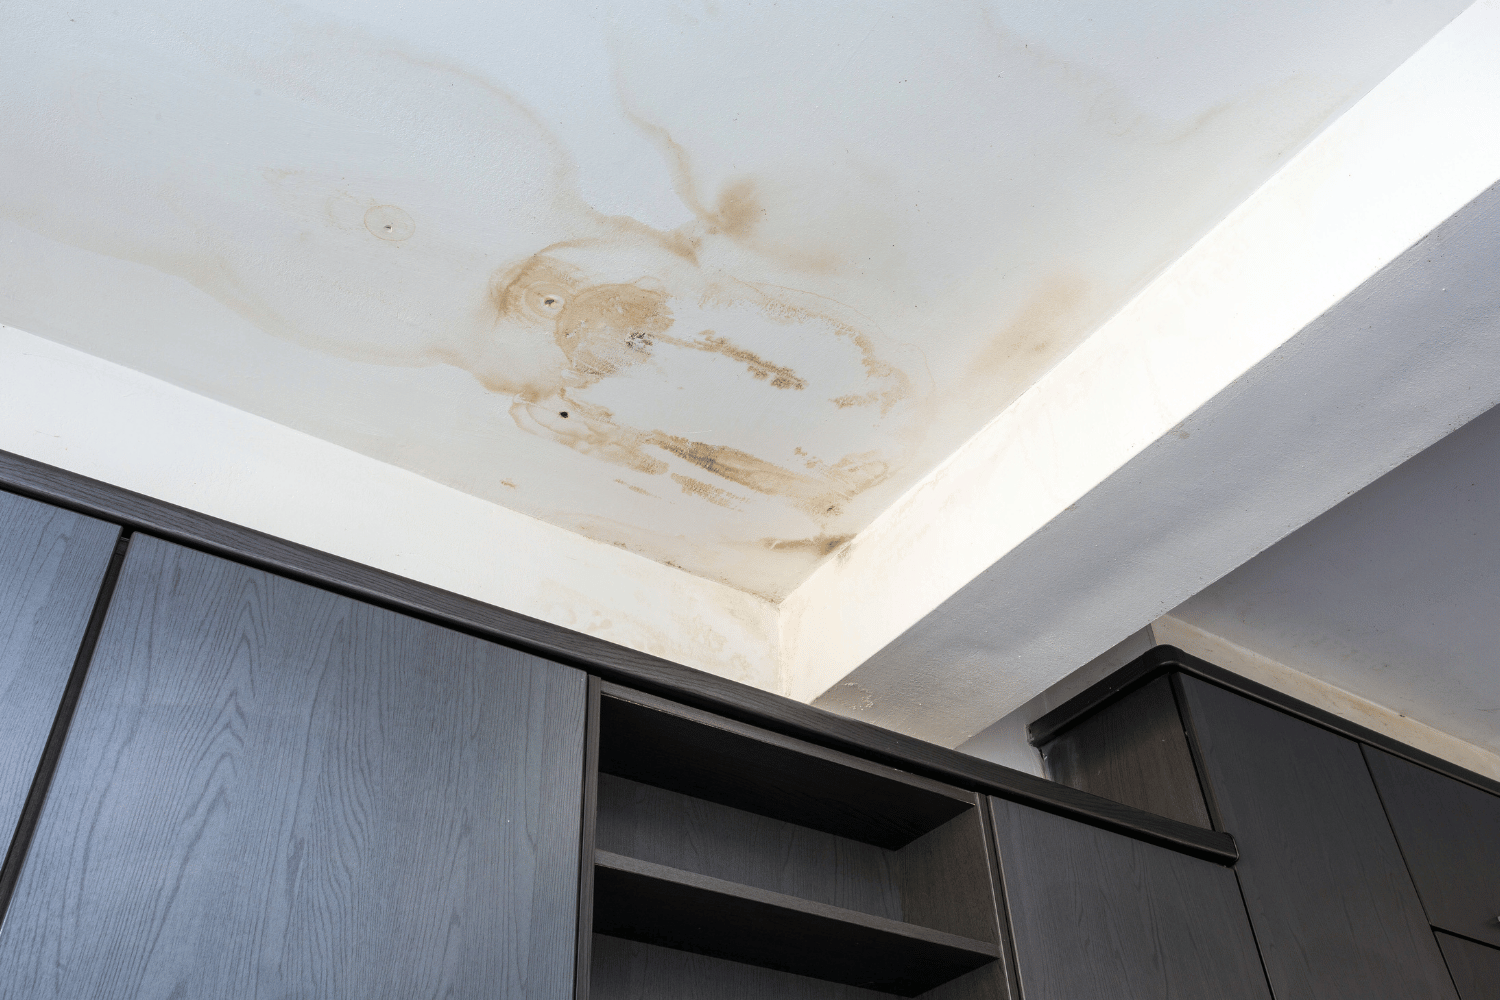
Certain signs suggest it’s time to remove and replace your roof shingles. Water damage inside your home is one of the most telling signs that your roof may need attention. When water penetrates the roofing materials, it can cause significant damage to the interior of your house, leading to costly repairs.
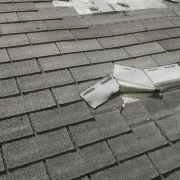
Before:

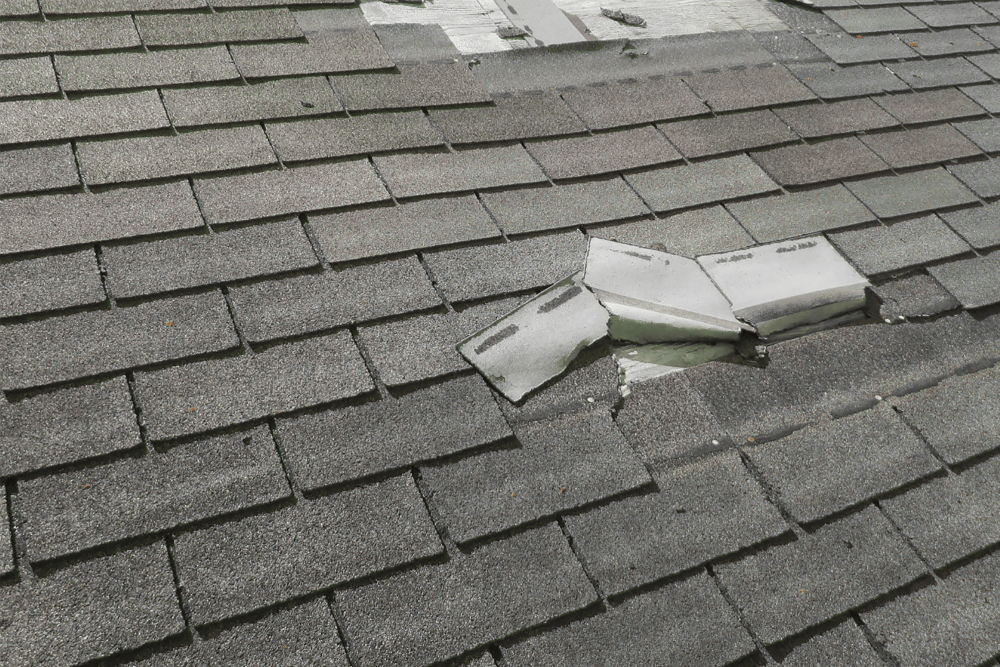
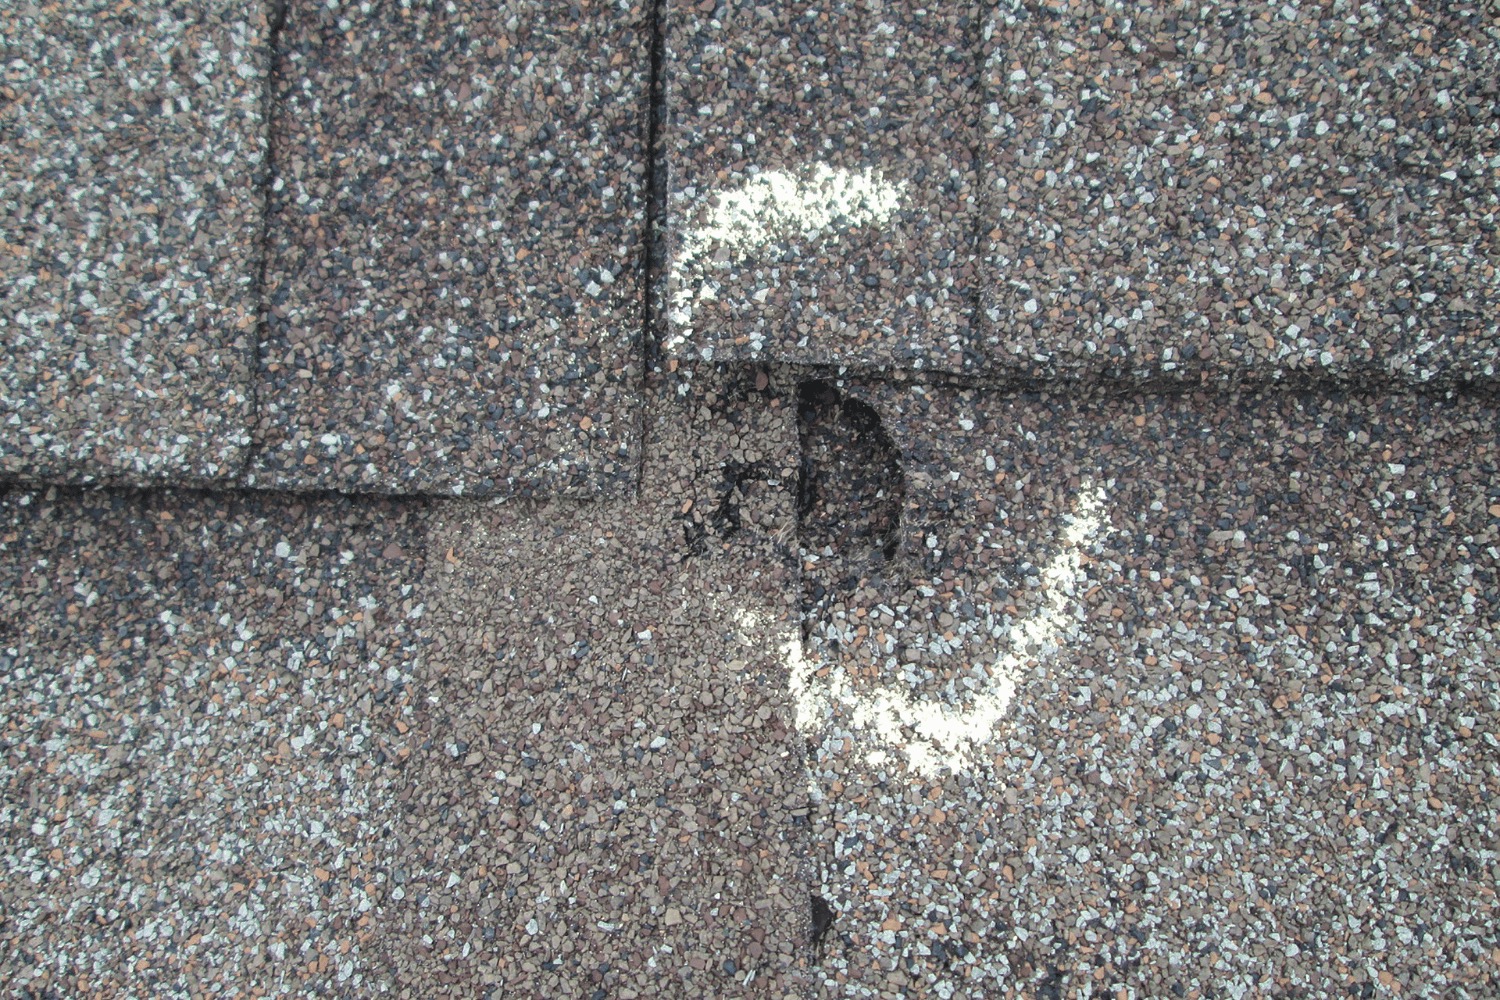
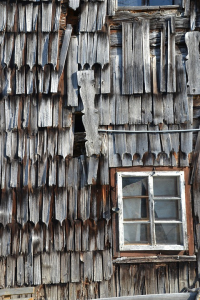
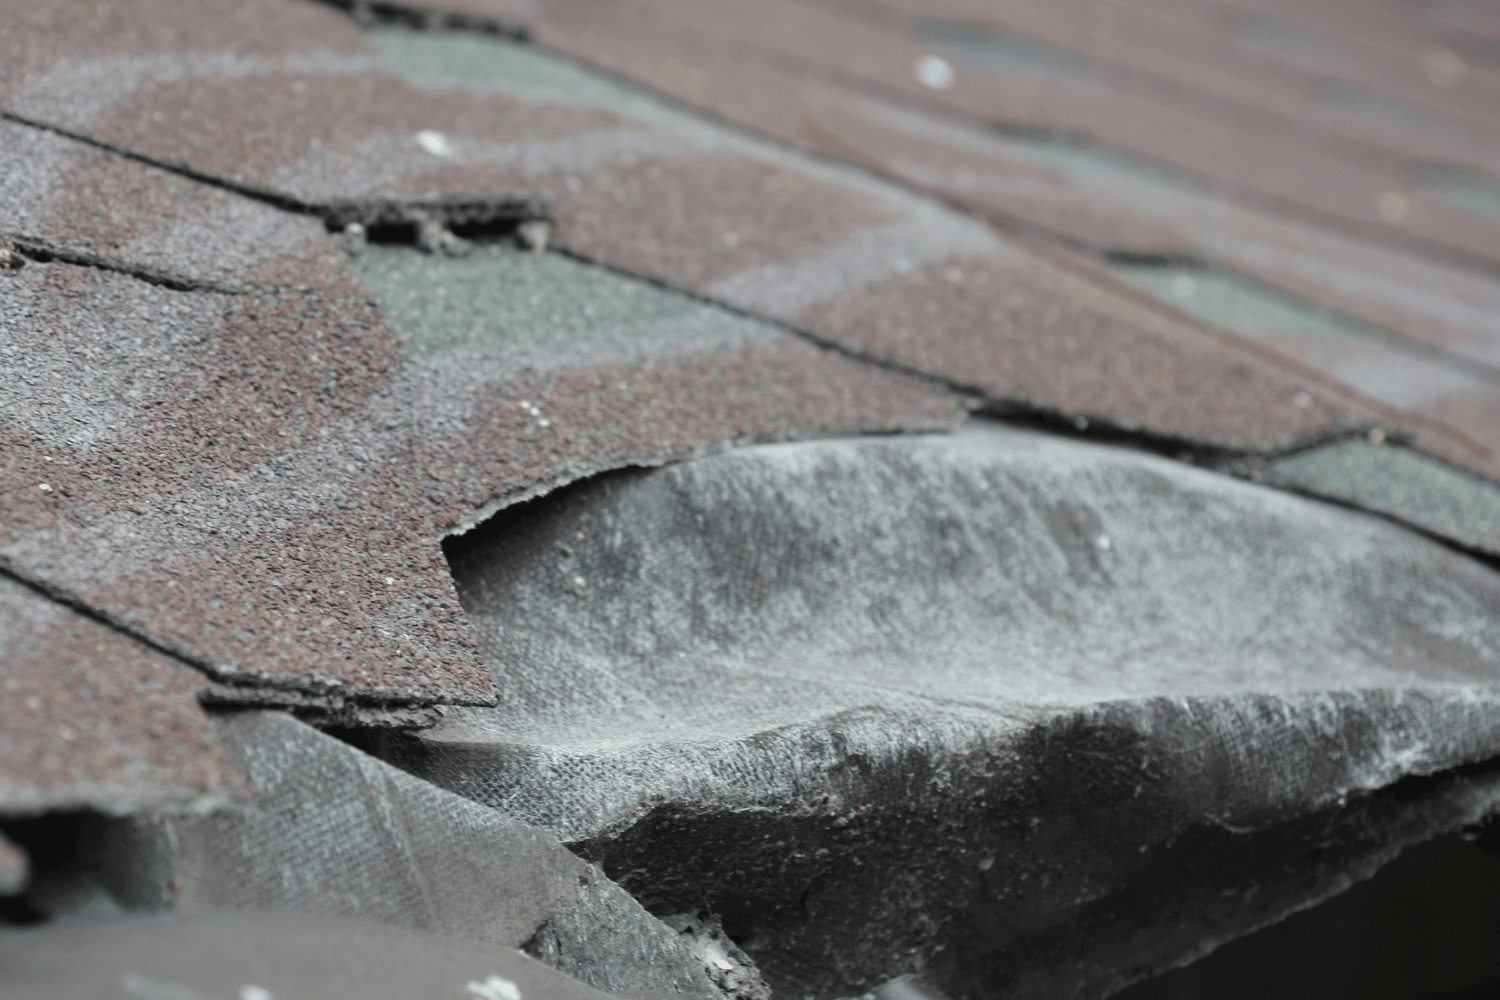
Other indicators include curled or cracked shingles, missing granules, and exposed underlayment. Curled or cracked shingles are often the result of aging and exposure to the elements, making them less effective at protecting your home. Missing granules can lead to accelerated wear from UV damage, and exposed underlayment means the shingles are no longer providing adequate protection.

After:

Other indicators include:

  • Curled or cracked asphalt shingles, which are often the result of aging and exposure to the elements, making them less effective at protecting your home.

  • Missing granules, which can lead to accelerated wear from UV damage.

  • Exposed underlayment, which means the shingles are no longer providing adequate protection.

Extensive moss growth on shingles can also signal the need for shingle removal. Moss can lift the shingles, allowing water to seep underneath and cause damage. Removing old shingles ensures a stable foundation for new roofing materials, helping to prevent further deterioration and potential leaks. Noticing any of these signs means it’s time to consider a roofing tear-off and prepare for a new roof.

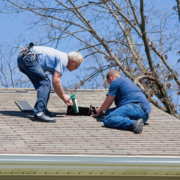
Tools You’ll Need for Shingle Removal

Having the right tools ensures a smooth and efficient shingle removal process. Key tools include a roofing shovel for removing shingles, a pry bar for extracting nails, and adjustable roof jacks for securing your position while you work. These tools help you carefully remove the shingles without damaging the underlying materials.

Safety equipment is also crucial. A good safety harness with hooks will protect you from falls, and work gloves will shield your hands from sharp edges and debris. Additionally, a straight claw hammer is useful for driving nails or prying out staples in hard-to-reach areas, while a garden fork can assist in prying off shingles during the removal process.

Proper disposal tools are necessary to manage the removed shingles and other debris. Setting up a trash container to collect the roofing debris will help keep the work area clean and safe. A broom magnet is handy for collecting stray nails from the yard, ensuring no hazardous materials are left behind. Having all necessary tools on hand minimizes risks and improves the efficiency of your shingle removal process.

Preparing Your Property for Shingle Removal

An illustration depicting the preparation of a property for shingle removal.

Prepare your property to prevent damage before you start tearing shingles off your roof. Covering your property and securing items will protect them from falling debris during the shingle removal process. For instance, placing plywood over your air conditioner and boarding up any windows you’re worried about damaging will safeguard these vulnerable areas.

Protecting your landscaping is also essential. Cover bushes and shrubbery with tarps to shield them from roofing debris. Renting a trash container is a practical solution for managing debris disposal efficiently during roof shingle removal.

Taking these precautions ensures your shingle removal project proceeds smoothly without causing unnecessary damage to your property.

Step-by-Step Guide to Removing Roof Shingles

Now that you’re prepared, it’s time to dive into the step-by-step guide to removing roof shingles. This guide will cover everything from starting at the peak of the roof and working downward to removing flashing and nails, and finally, cleaning the roof deck.

Following these steps ensures a thorough and efficient shingle removal process.

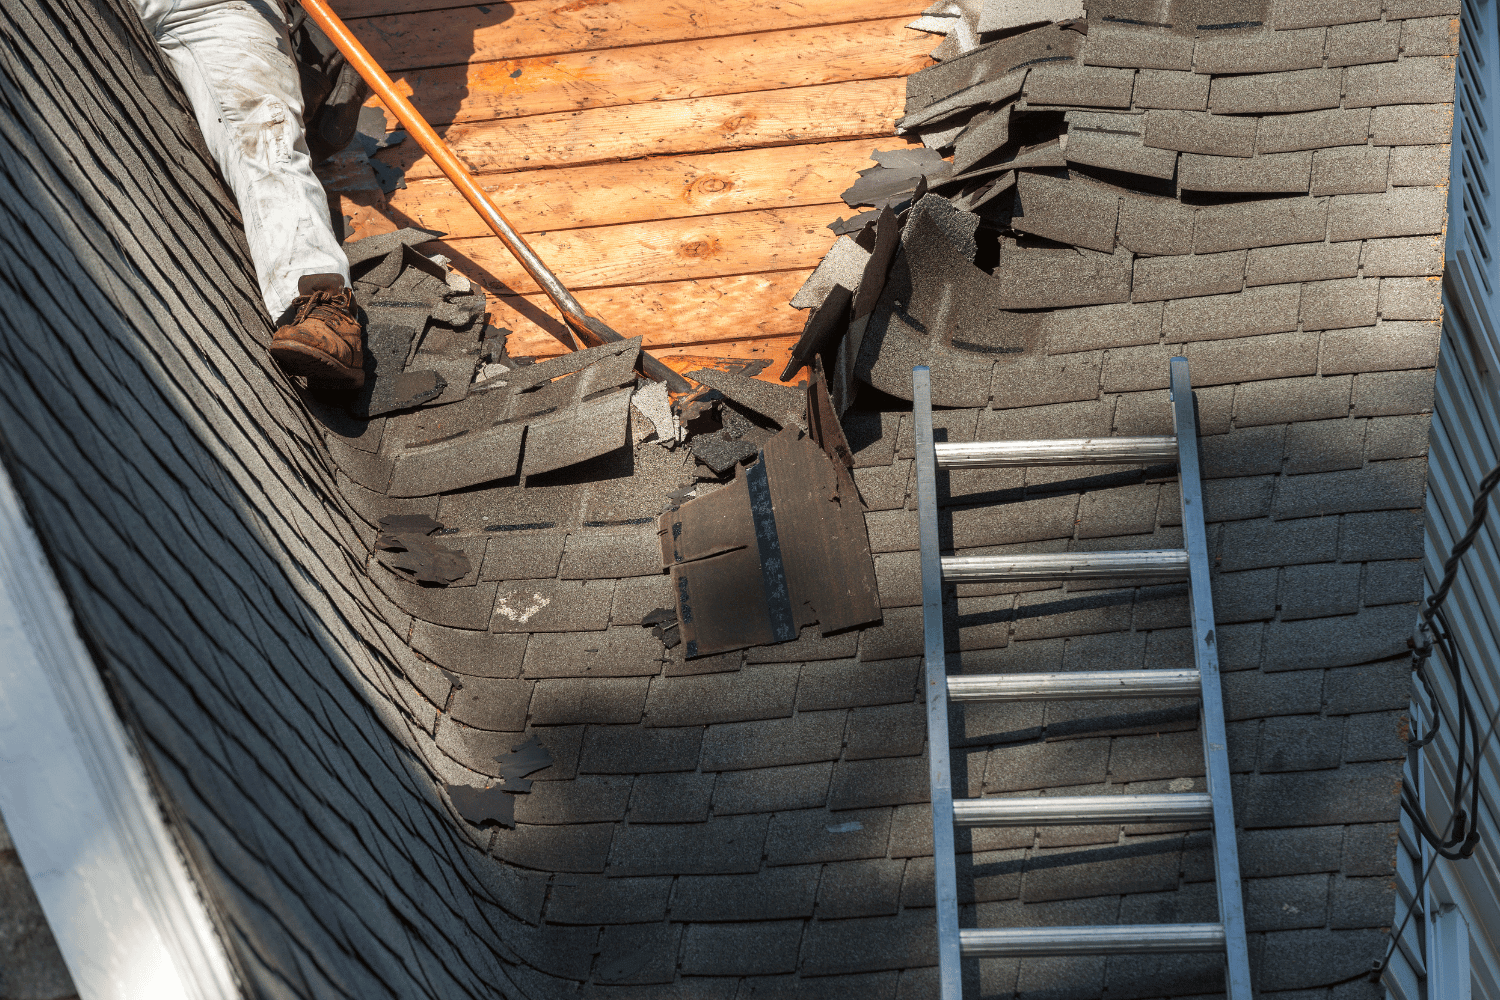
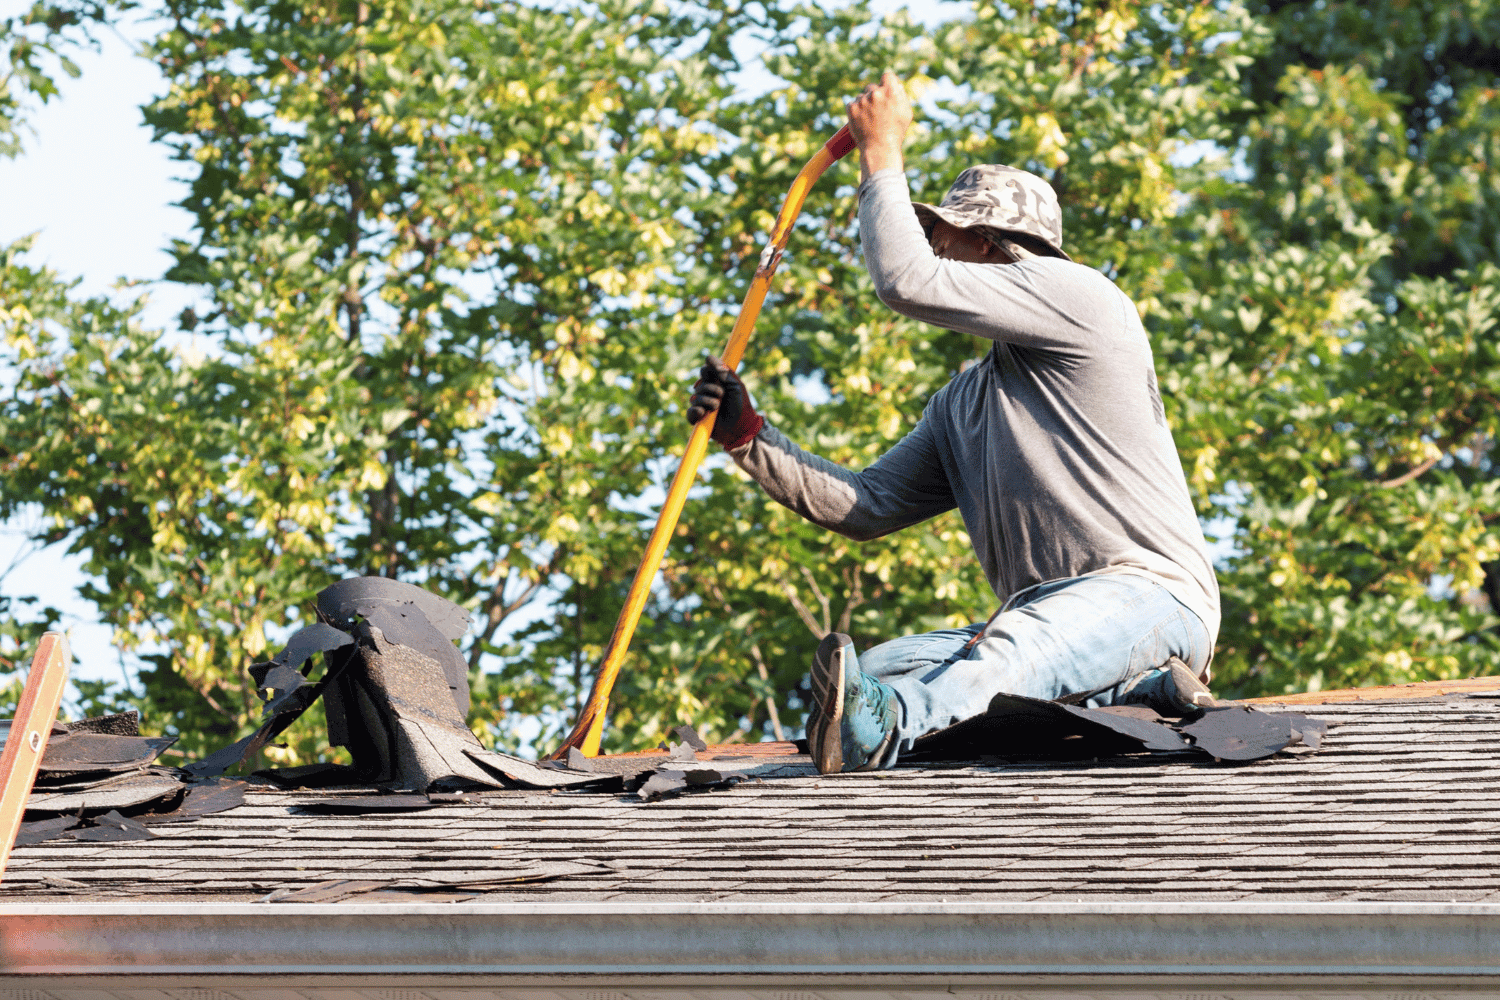
Start at the Peak and Work Downward

Begin the shingle removal process at the peak of the roof farthest from your disposal method. This ensures that as you remove the shingles, you won’t be walking over loosened shingles, which can be hazardous. Start by removing the ridge caps and work your way down in manageable sections, typically 2.5 to 3 feet wide.

Start by listing some forbidden forms of the keyword “remove shingles” according to the rule 5. Remove the shingles in the reverse order of how they were laid down, progressing layer by layer. This method helps in systematically removing all the shingles without missing any spots.

A garden fork can make this process easier by effectively prying off the shingles. Remember to wear long pants and proper protective gear to avoid injuries from stray shingles and debris.

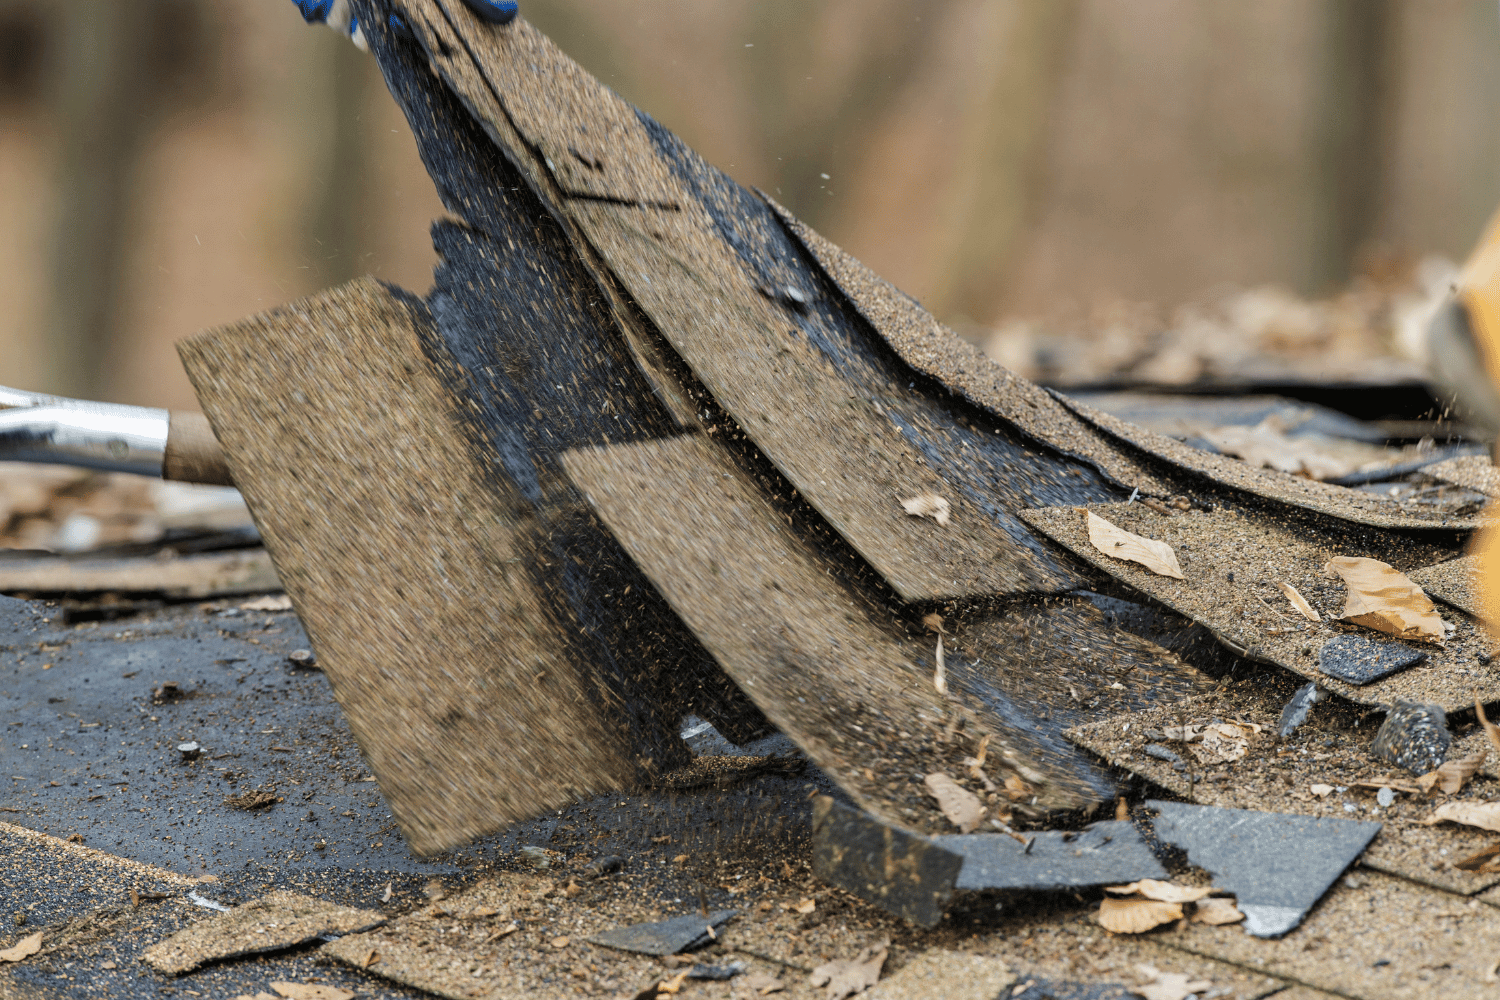
Remove Flashing and Remaining Nails

After removing the shingles, the next step is to remove the flashing and any remaining nails. If the flashing shows signs of wear, such as rust or cracks, it should be removed and discarded. Start at the top of a valley when removing valley and vent flashing to ensure you remove it systematically.

The final step of the shingle removal process involves pulling out the remaining nails. Use a pry bar and a carpenter’s apron to collect the nails as you go, preventing them from falling into the yard and becoming a hazard. Ensuring that all nails are removed will make the roof deck clean and ready for the new shingles.

Clean the Roof Deck

After removing all the shingles and nails, clean the roof deck. Sweep the roof clean with a push broom to remove all the roofing debris. Pull out any protruding nails and inspect the roof deck for damaged sheathing that may need repairs.

Cleaning the roof deck thoroughly is crucial for the new roofing materials to adhere properly. Make sure the surface is smooth and free of any debris or loose materials. This will provide a solid foundation for the next steps in the roofing process, ensuring the longevity and effectiveness of your new shingles.

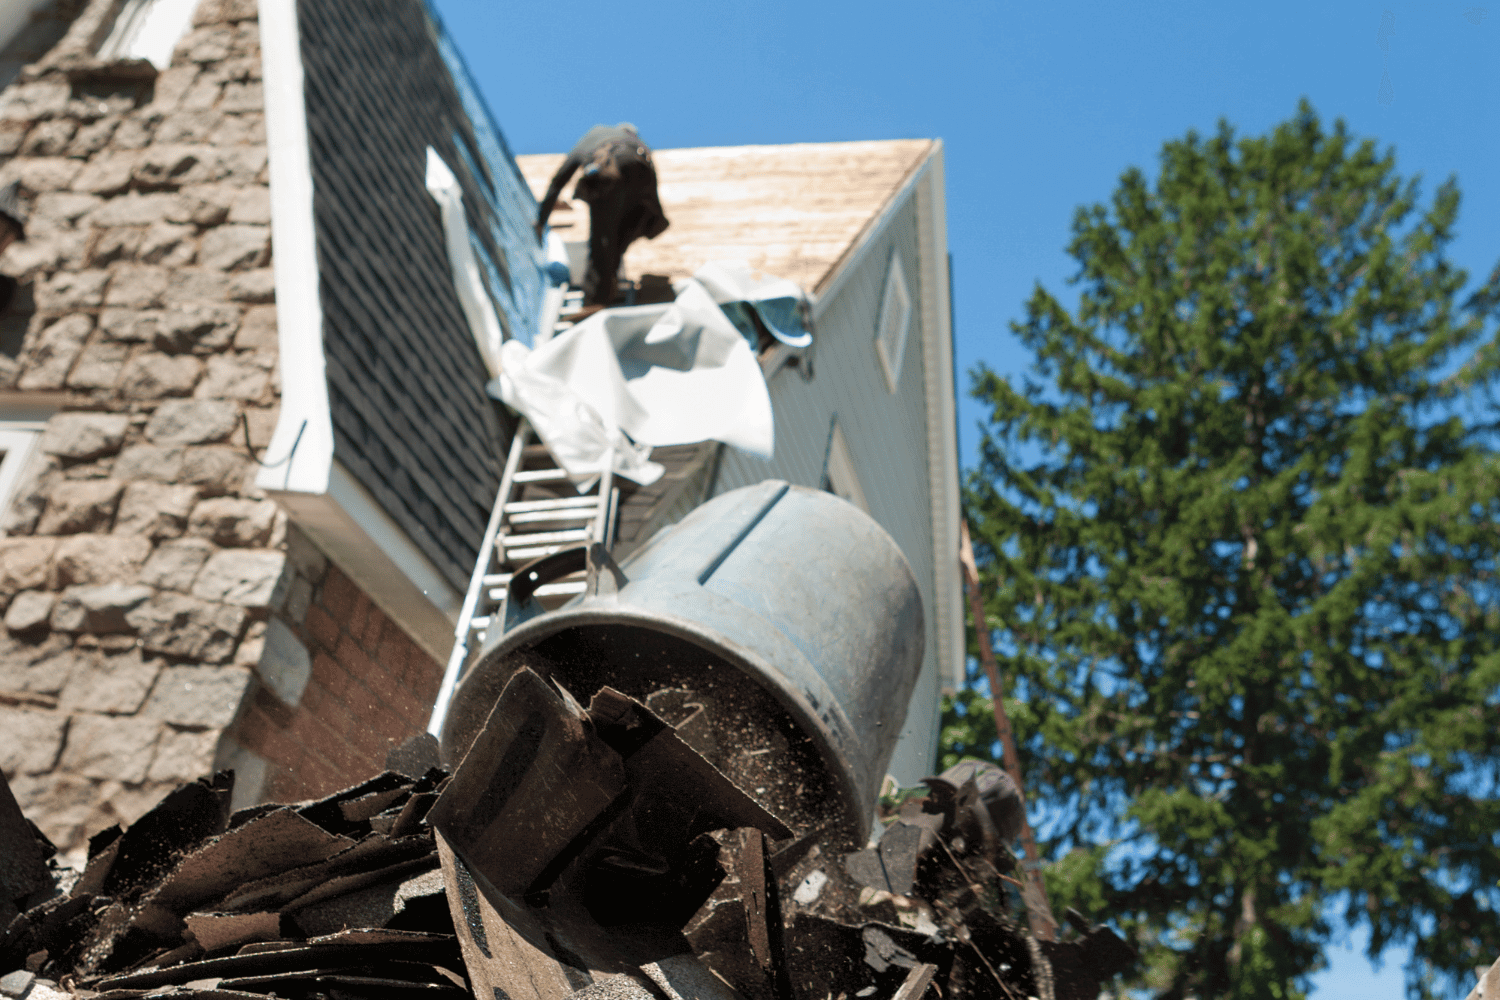
Disposal of Old Shingles and Roofing Debris

An illustration of the disposal process for old shingles and roofing debris.

Properly disposing of old shingles and roofing debris is crucial during the shingle removal process. Renting a dumpster is a convenient method for disposing of old shingles and other roofing debris. During the removal process, toss the old shingles into the trash container below or the designated dump area.

A magnetic broom helps sweep the lawn for stray nails, ensuring no hazardous materials are left behind. Additionally, self-propelled dump trailers can facilitate efficient collection of debris, preventing the accumulation of materials and keeping the work area clean.

Proper disposal ensures a safe and organized work environment.

Installing Ice & Water Barriers and Felt Paper

After the shingle removal process, installing ice and water barriers is crucial for protecting your roof. These barriers are applied to vulnerable areas such as eaves, rake edges, and valleys to prevent damage from ice dams and wind-driven rain. The adhesive backing of these protectors helps create a watertight seal around nail penetrations during shingle installation.

Once the ice and water barriers are in place, the next step is to install the felt paper. Roll out the felt paper in sections and staple it down flat without bumps or ripples to ensure a smooth surface for the new shingles. Avoid installing these materials in rainy conditions, as moisture can hinder adhesion.

This preparation step ensures the longevity and effectiveness of your new roof.

Tips for Ensuring Safety During Shingle Removal

An illustration showing safety measures during shingle removal.

Safety should always be the top priority during the shingle removal process. Investing in a good safety harness with hooks is crucial to prevent falls, especially when working at height. Additionally, wearing work gloves and goggles will protect your hands and eyes from sharp edges and debris.

Monitor weather conditions closely, as rain or wind can create slippery surfaces and increase safety risks. Shoes with soft rubber soles provide better traction, and wearing long pants can protect your legs from debris. Make sure your ladder is stable and placed on a flat surface to prevent falls during the roofing job.

Following these safety precautions minimizes risks and ensures a safe working environment.

The Benefits of Hiring a Roofing Professional

While DIY shingle removal can be rewarding, hiring a professional roofing contractor offers several benefits. Professionals bring expertise and experience, ensuring the roofing job is done correctly and adheres to industry standards. Licensed and insured professionals also protect homeowners from potential liabilities associated with accidents during the roofing process.

Professional disposal services ensure compliant and environmentally friendly removal of roofing materials, streamlining the process. Hiring a professional roofing contractor ensures a safer, more efficient, and expertly executed shingle removal and installation process.

For high or challenging roofs, calling a professional is generally safer.

Post-Removal Inspection and Preparation for New Shingles

After removing the old shingles, inspect the roof deck for any hidden damage that might not have been visible initially. Rotted decking beneath the shingles can lead to loose nails and eventual leaks, so it’s important to check for and repair any compromised areas.

During the inspection, also check the flashing for signs of wear, cracks, and rust. Repair or replace any damaged materials to ensure a sturdy foundation for the new shingles.

Once the inspection and repairs are complete, remove stray nails and sweep the area clean. This preparation step is essential for the successful installation of new shingles.

Summary

In summary, removing old roof shingles is a necessary task to extend the life of your roof and protect your home from water damage. By understanding the signs that indicate it’s time for a roofing tear off, having the right tools, and following a systematic removal process, you can ensure a successful project. Preparing your property and ensuring safety throughout the process are also crucial steps.

Hiring a professional roofing contractor offers expertise, efficiency, and peace of mind, especially for challenging roofing jobs. Whether you choose to tackle the project yourself or seek professional help, thorough inspection and preparation of the roof deck are essential for the longevity and effectiveness of your new shingles. We hope this guide has provided valuable insights and practical tips for your shingle removal project.

Frequently Asked Questions

What are the signs that it’s time to remove my roof shingles?

If you notice water damage, curled or cracked shingles, missing granules, or extensive moss growth, it’s definitely time to consider removing your roof shingles. These signs can lead to bigger problems if not addressed soon!

What tools do I need for shingle removal?

You’ll need a roofing shovel, pry bar, and adjustable roof jacks, along with safety gear like a harness and gloves. Don’t forget a trash container for easy cleanup!

How should I prepare my property for shingle removal?

To prepare your property for shingle removal, make sure to cover and secure any items and protect your landscaping with tarps. Renting a trash container for debris disposal is also a smart move.

Why should I hire a roofing professional?

Hiring a roofing professional guarantees that the job is done right and safely, thanks to their expertise and efficiency. Plus, they handle proper disposal, giving you peace of mind.

What should I do after removing the old shingles?

Make sure to inspect the roof deck for any damage and repair it if needed. Clean the surface thoroughly to ensure the new shingles adhere properly.


An image of a well maintained roof with new shingles illustrating preventive measures

What to Do When a Shingle Falls Off Your Roof: Tips and Solutions

When a shingle falls off your roof, it’s crucial to act quickly. The immediate concern is to prevent water damage, and you need to decide whether to fix it yourself or call a professional. This article will guide you through the causes of shingle loss, immediate actions to take, and whether to DIY or hire a professional.

Key Takeaways

  • Shingles often fall off due to factors like aging, improper installation, and severe weather conditions, highlighting the need for regular maintenance.

  • Promptly addressing missing shingles is crucial to prevent water damage, mold growth, and escalating repair costs, necessitating immediate action when shingles are lost.

  • When choosing between DIY repairs and professional services, the latter offers quality, safety, and expertise, reducing long-term risks and costs associated with improper installations.

Common Causes of Shingles Falling Off

An image showing a damaged roof with missing shingles.

Understanding why shingles fall off your roof is the first step to preventing it. One of the most common reasons is the natural aging process. As shingles age, they can dry out, crack, and curl, making them more susceptible to falling off. Even high-quality shingles like asphalt shingles wear out over time, increasing the likelihood of shingle loss. Older shingles become brittle, which not only makes them prone to cracking but also means they can be easily blown off by strong winds.

Improper installation is another significant cause of shingles falling off. If roof shingles are not installed correctly, they may not adhere properly to the roof. This can be due to not following manufacturer instructions or using incorrect materials during installation. In some cases, new shingles falling off without any extreme weather conditions can be a clear sign of installation problems. Proper installation is necessary for shingles to withstand various weather conditions.

Weather conditions themselves also play a major role in shingle damage and loss. Wind gusts, especially at the edges and ridges of the roof, can dislodge shingles. Heavy rain, hailstorms, and other extreme weather conditions can weaken shingles by causing bruises and cracks, leading to damaged shingles falling off. Even high winds can be enough to blow shingles off a roof if they are not securely fastened.

Being aware of these common causes can help you take preventative measures to protect your roof.

Immediate Steps to Take When a Shingle Falls Off

When you notice a missing shingle, it’s essential to act quickly to prevent further damage. The first step is to contact a roofing contractor to perform an inspection of your roof. This will help identify any additional missing shingles or potential damage that needs to be addressed. While waiting for professional assistance, take steps to secure any exposed areas to prevent water damage. Covering the area with a tarp or using roofing tar can provide a temporary barrier until repairs are made.

If you find that multiple shingles are missing, it’s crucial to replace them promptly to prevent leaks and further damage to your roof. If the shingles were poorly installed, it might be necessary to request a re-inspection from the contractor or pursue a new roofing inspection if the warranty has expired.

These immediate actions can help mitigate damage and maintain your roof’s condition.

Inspecting for Roof Damage

Inspecting your roof for damage can be risky, so it’s best to start by looking for signs from the ground. Look for additional missing shingles, exposed nail heads, or dark patches that indicate potential issues. After significant weather events, perform visual inspections to assess for any damage.

Regular checks can help identify problems early and extend the lifespan of just a few shingles.

Temporary Fixes

Temporary fixes can prevent further damage until professional help arrives. Applying roofing tar to exposed areas can create a temporary barrier against water. Covering the damaged section with a tarp is another short-term solution to protect your roof from potential roof leak and water damage.

Though not permanent, these measures are essential for preventing immediate damage.

Potential Consequences of Ignoring Missing Shingles

A visual representation of the consequences of ignoring missing shingles, showing a damaged roof.

Neglecting missing shingles can have serious consequences for your home. One of the most immediate risks is water penetration, which can cause significant structural damage. When rainwater seeps into your roof through the gaps left by missing shingles, it can lead to leaks, especially above open seams. These leaks can result in new issues in your attic, such as mold growth and wood rot, which can compromise the structural integrity of your home.

 Here are some immediate risks:

  1. Water penetration, which can cause significant structural damage.

  2. Rainwater seeping into your roof through the gaps left by missing shingles, leading to leaks, especially above open seams.

  3. New issues in your attic, such as mold growth and wood rot, which can compromise the structural integrity of your home.

The damage doesn’t stop at leaks and water penetration. Missing shingles can also lead to increased energy costs as conditioned air escapes, making your HVAC system work harder. Over time, the compounded damage from ignoring shingle loss can lead to extensive and costly repairs. In severe cases, the damage can extend to wall breakage, foundation cracking, and even roof caving, all of which dramatically increase repair costs.

Another critical consequence of ignoring missing shingles is the potential for mold growth. As water enters through the gaps, it creates a damp environment that is ideal for mold to thrive. Mold not only damages the structure of your home but also poses health risks to the occupants. Additionally, prolonged exposure to moisture can exacerbate dry rot, leading to further structural damage and potential leaks.

Promptly addressing missing shingles is essential to avoid severe consequences and ensure home safety.

DIY vs. Professional Roof Repair

A comparison image showing DIY roof repair vs professional roofing service.

When it comes to roof repair, homeowners often face the decision of whether to attempt a DIY fix or hire professional help. While DIY repairs might seem cost-effective initially, they come with significant risks and potential downsides. Repairing loose shingles is a complex and dangerous job that requires proper knowledge and safety precautions. Climbing onto a roof without the necessary experience can lead to severe injuries or even death. Additionally, DIY repairs might not address underlying issues, leading to more expensive repairs down the line.

On the other hand, hiring a professional roofing company ensures that the job is done correctly and safely. Professional roofers have the expertise and equipment to diagnose and address roofing issues accurately. They follow industry standards and use proper techniques to ensure the long-term performance and durability of the roof. If you lack confidence or the proper safety equipment, it’s advisable to call a professional roofer.

Before deciding on a DIY repair, homeowners should weigh the pros and cons of each approach. While patching a few shingles might seem like a simple task, it can lead to discoloration and further problems if not done correctly. Companies like Waddle Exteriors conduct thorough inspections post-installation to ensure roof integrity. Ultimately, calling an expert is recommended to avoid compromising the roof’s integrity.

Safety Concerns

Roofing work poses significant safety risks, particularly falls, which are common injuries in home repairs. Falls are a leading cause of injury during roof repairs, making the work particularly hazardous without proper precautions. Without proper expertise, DIY repair attempts may result in costly mistakes or failure to identify serious issues.

Shingles should be installed with proper techniques to ensure they remain secure during storms and to prevent issues like curling shingles.

Cost Considerations

While DIY roof repairs may initially seem cheaper, they can lead to higher costs if issues arise. Lack of experience can also increase the time it takes to complete repairs, further adding to overall costs.

Professional roof repair services provide expertise and efficiency, which can save money in the long run despite higher upfront costs. Homeowners should weigh the risks and potential additional costs of DIY repairs against the reliability of professional services to make an informed decision.

Quality of Repair

Quality in roof repairs is crucial to ensuring long-term performance and durability. Professional roofers have specialized training to diagnose and address roofing issues accurately, ensuring compliance with industry standards. Waddle Exteriors conducts thorough quality inspections post-installation to guarantee the integrity of the roof.

This level of expertise and attention to detail may not be achieved in DIY repairs, making professional services a worthy investment.

How to Prevent Future Shingle Loss

An image of a well-maintained roof with new shingles, illustrating preventive measures.

Preventing future shingle loss starts with regular inspections and maintenance. Routine roof inspections are essential for identifying issues that could lead to shingle loss before they become significant problems. Selecting shingles designed for high winds can enhance resistance against weather-related damage. Promptly replacing missing shingles is crucial to prevent water damage and maintain the integrity of the roof. Exposed areas on a roof are at a higher risk of damage from environmental factors like wind and UV rays.

Ensuring proper installation and ongoing maintenance can also significantly reduce the risk of shingles falling off. Following manufacturer guidelines and using weather-resistant installation methods can help secure shingles more effectively. Regular maintenance, such as cleaning gutters and removing debris from the roof, can prevent damage and prolong the lifespan of your shingles.

Adequate attic ventilation is another critical factor, as it helps maintain the right temperature and moisture levels, preventing shingle deterioration.

Regular Inspections

Engaging a professional for regular roof inspections helps in detecting damage and providing maintenance recommendations. Professional assessments can uncover hidden damage or wear that homeowners might miss. Regular cleaning of gutters and ensuring proper drainage can prevent water accumulation that may loosen shingles. Maintaining clear gutters helps prevent water accumulation that can damage shingles.

Adequate attic ventilation is crucial for extending the lifespan of roof shingles. Removing debris from the roof regularly prevents damage to the shingles and leaks. Regular professional inspections and maintenance significantly enhance roof lifespan and performance.

Proper Installation

Correctly installed shingles are essential to withstand harsh weather conditions, such as high winds. Using nails instead of staples for attaching shingles improves their hold against windy conditions. Ensuring shingles are installed according to weather-resistant guidelines can significantly reduce their risk of being dislodged.

Proper installation methods help to prevent shingles from blowing off during storms and high winds.

Maintenance Tips

Knowing where to nail shingles is crucial for their secure attachment, which extends the life of the roof. Homeowners often need to use roofing tar to ensure shingles stick down effectively in colder weather. Proper nailing and use of roofing tar in the right conditions are practical tips for maintaining the integrity of your roof shingles.

Regular maintenance and care of your roof can prevent many issues and extend the life of your shingles.

When to Consider a Full Roof Replacement

An image depicting the extent of roof damage due to weather, with missing shingles and debris.

There are times when a full roof replacement is the best option for ensuring the safety and integrity of your home. Most roofs are designed to last around 20 years, so age is a critically important factor in deciding if a full replacement is necessary. If your roof is nearing or has surpassed this age, it might be time to consider a replacement to avoid future problems. Signs that shingles are nearing the end of their lifespan include curling or cracking, and if shingles blow off a roof that is under 10 years old, this often indicates bad installation or damage from a strong storm.

The extent of damage is another key consideration. If the damage extends beyond a few missing shingles, a complete roof replacement might be necessary to prevent further issues. Assessing the extent of roof damage is crucial to determine whether a repair will suffice or if a full roof replacement is necessary.

Understanding the cause of shingle loss helps in deciding if the existing roof can be repaired effectively or requires a complete overhaul.

Age of the Roof

Asphalt shingles typically last around 12-15 years. Signs that shingles are nearing the end of their lifespan include curling or cracking. If shingles blow off a roof that is under 10 years old, this often indicates bad installation or damage from a strong storm.

If shingles are ripped off a roof that is 15 years old or older, it suggests that the roof should have already been replaced. Roofs tend to deteriorate at different rates based on materials, climate, and maintenance, influencing replacement timing.

Extent of Damage

Assessing the extent of roof damage is crucial to determine whether a repair will suffice or if a full replacement is necessary. A common reason for roof shingle blowing off after installation is that the adhesive had not finished curing.

Understanding the cause of shingle loss helps in deciding if the existing roof can be repaired effectively or requires a complete overhaul.

Benefits of Roof Replacement

Replacing a roof can enhance home value, improve protection against elements, and reduce insurance costs. A new roof can significantly increase a home’s market value, making it more appealing to potential buyers.

Older roofs may leave homes vulnerable to leaks and damage; a new roof ensures better protection against severe weather conditions. Homeowners often find that new roofs may lower their homeowners insurance premiums due to improved safety and reliability.

Insurance and Financing Options

Navigating insurance and financing options for roof repairs and replacements can be daunting, but understanding your options can make the process smoother. Homeowners should understand the importance of filing claims and that assistance is available. Waddle Exteriors assists clients with the insurance process and maintains communication throughout the project. Payment plans and loans are available for homeowners needing financial assistance for roof repairs or replacements. If funds are lacking for a roof replacement, exploring available financing options is crucial.

Filing an insurance claim for roof damage begins with understanding your homeowners policy regarding roof coverage, including potential exclusions for wear and tear. Some policies may include an endorsement that changes the settlement from replacement cost to actual cash value. Prepare documentation for damage assessment and file a claim with your home insurance.

Waddle Exteriors helps work with your insurance provider and paperwork, ensuring you get the coverage you deserve. Financing options allow homeowners to spread costs over time, making property maintenance more affordable.

Filing an Insurance Claim

Understand your homeowners policy regarding roof coverage, including potential exclusions for wear and tear. Some policies may include an endorsement that changes the settlement from replacement cost to actual cash value.

File a claim with your home insurance and prepare documentation for damage assessment. Waddle Exteriors helps work with your insurance provider and paperwork. Contact the contractors to check if the warranty applies.

Financing Solutions

Low-interest loans and payment plans are available to help manage the cost of roof repairs or replacements. Homeowners often face significant costs when repairing or replacing their roofs, making financing solutions critical for budget management.

Financing options allow homeowners to spread costs over time, making property maintenance more affordable. Homeowners should take the time to explore all financing options available to them to ensure they can address roof needs promptly and effectively.

Why Choose Waddle Exteriors for Your Roofing Needs

Choosing the right roofing company is essential for ensuring quality and reliability. Waddle Exteriors has over 40 years of experience in the industry, offering a wealth of knowledge and expertise. The company emphasizes a customer-centric approach, focusing on communication and satisfaction throughout the roofing project. As an accredited member of the Better Business Bureau, Waddle Exteriors has a strong commitment to quality and customer service.

With a customer satisfaction rating of 4.9 based on 465 reviews, Waddle Exteriors is highly trusted by its clients. Whether you need a full roof replacement or minor repairs, Waddle Exteriors provides reliable and professional services that you can count on.

Summary

In summary, addressing missing shingles promptly is crucial to prevent further damage and maintain the integrity of your roof. Understanding the common causes of shingle loss, such as aging, improper installation, and weather conditions, can help you take preventative measures. Immediate actions, such as contacting a roofing contractor and securing exposed areas, are essential to mitigate damage.

Considering the risks and benefits of DIY repairs versus professional services is important for ensuring quality and safety. Regular inspections, proper installation, and ongoing maintenance are key to preventing future shingle loss. When significant damage or an aging roof necessitates a full replacement, understanding your insurance and financing options can make the process more manageable. Choosing a reputable company like Waddle Exteriors ensures that your roofing needs are met with expertise and professionalism.

Frequently Asked Questions

What should I do immediately when a shingle falls off my roof?

Immediately contact a roofing contractor for an inspection and ensure any exposed areas are secured to prevent further damage.

How can I prevent shingles from falling off in the future?

To prevent shingles from falling off in the future, ensure regular inspections, proper installation, and consistent maintenance of your roofing. Taking these steps will help maintain your roof’s integrity and longevity.

What are the potential consequences of ignoring missing shingles?

Ignoring missing shingles can result in water penetration and structural damage, which may lead to increased energy costs and mold growth. Addressing the issue promptly is essential to avoid these severe consequences.

When should I consider a full roof replacement?

You should consider a full roof replacement if your roof is over 20 years old or if the damage is extensive and cannot be repaired. This proactive approach can save you from costlier issues in the future.

Why should I choose Waddle Exteriors for my roofing needs?

Choosing Waddle Exteriors for your roofing needs ensures you benefit from over 40 years of experience and a commitment to customer satisfaction. Your roofing project will be handled with professionalism and expertise, guaranteeing quality results.


Illustration of a house with a damaged roof after a storm

Essential Roof Storm Damage Tips for Homeowners

After a storm, your roof might have suffered damage that needs immediate attention. Inspecting for storm damage promptly can prevent further issues like leaks or structural problems. This article covers how to spot damage, what steps to take, and when to call a professional.

Key Takeaways

  • Conduct a thorough inspection of your roof and attic after a storm to identify visible and hidden damage. This includes checking for shingle concerns, leaks, and other signs of wear.

  • Filing an insurance claim promptly and documenting all storm damage with photos and videos can streamline the claims process and ensure coverage for necessary repair.

  • Hiring a licensed and insured roofing contractor with a strong reputation and good warranty is crucial for ensuring quality repairs and maintaining your roof’s integrity.

Essential Roof Storm Damage Tips for Homeowners

Illustration of a house with a damaged roof after a storm

Post-storm, begin by visually inspecting your roof for any damage. This can be done by walking around the perimeter of your house. Be on the lookout for apparent signs such as missing or damaged shingles. Additionally, scrutinize gutters, vents, and windows for any dents, cracks, or broken glass. High winds can remove or tear shingles, leaving the underlayment or roof deck exposed, which can lead to more severe issues if not addressed.

Examine your attic and ceilings for leaks and water spots, as they may reveal concealed damage that isn’t immediately obvious from the outside. Ignoring small issues like shingles that are missing can lead to major problems like leaks or even roof collapse. Routine inspections and timely repairs contribute significantly to maintaining a sturdy roof.

Introduction

Storms can severely damage your home’s roof, leading to an array of issues, ranging from minor to serious structural damage. Addressing storm damage promptly with storm damage roof repair is not just about fixing a few broken shingles; it’s about ensuring the structural integrity of your home and preventing water infiltration that can lead to interior damage, mold, and rot. The roof, after all, is your home’s primary defense against the elements.

Maintaining a well-kept roof is essential for preserving your home’s curb appeal and resale value. By understanding the types of storm damage, knowing how to identify them, and taking prompt action, you can protect your investment and avoid costly repairs down the line. This guide will help you navigate the complexities of storm damage and equip you with the knowledge to keep your home safe and secure.

Identifying Roof Storm Damage

Illustration of a roof with missing shingles and water damage

Post-storm, it’s vital to carry out a comprehensive inspection of your roof to spot any apparent signs of damage like missing or shingles that are damaged. Walk around the perimeter of your house and visually assess the roof. Look for any signs of roof damage, including dents and cracks in the gutters, vents, and windows.

Don’t limit your inspection to the exterior; also examine your attic and ceilings for leaks and water spots, which might suggest concealed damage that’s not immediately noticeable. Ignoring small roof issues like missing shingles can lead to major problems like leaks or even roof collapse. Addressing these issues without delay is crucial to averting further damage.

In addition, some roofing companies now perform drone roof inspections along with property evaluations to detect storm-related damage that might be missed during a traditional inspection. Utilizing technology can provide a more comprehensive assessment of your roof’s condition, ensuring that no damage goes unnoticed.

Types of Storm Damage

Illustration of various types of storm damage on a roof

Different types of damage can be inflicted on your roof by storms, each demanding unique repair strategies. High winds can cause wind damage, such as removing or tearing shingles, leaving the underlayment or roof deck exposed and susceptible to further damage. Strong winds can also pull apart loose roof shingles or break overhanging tree limbs, causing debris to fall onto the roof.

Hailstorms can be particularly damaging, as hailstones can cause hail damage by cracking asphalt shingles, puncturing metal roofs, and leaving dents in shingles. Heavy rains can wash away granules on the surface of roof shingles, reducing their effectiveness and leading to water damage. Standing water due to improper drainage can also cause significant issues, especially in uneven areas.

Snow and ice present their own set of challenges, including:

  • Snow buildup can penetrate through leaks in the roof as it melts, causing moisture damage.

  • Ice can form along irregular roofing material, allowing meltwater to seep into the home’s interior.

  • Debris like branches can dent or impact shingles, making the roof vulnerable to moisture.

Understanding these different types of storm damage is crucial for effective roof maintenance and storm damage repair.

Immediate Actions to Take After a Storm

Illustration of a homeowner documenting storm damage for insurance claim

After the storm subsides, prioritize the following steps:

  1. Contact an expert for an onsite inspection.

  2. Reach out to your insurance company if you suspect storm damage.

  3. Take detailed photographs or videos of the damage from multiple angles to use as documentation for insurance claims and repair assessments.

  4. If possible, use drone footage as additional proof of the storm damage when filing an insurance claim.

Implement temporary repairs like:

  • Covering damaged areas with tarps to prevent further water infiltration

  • Spreading a waterproof tarp over the damage

These temporary fixes can help mitigate further damage. 

Even in the absence of visible damage, it’s advisable to get a professional to inspect your roof and siding. Some damage may not be immediately apparent but can cause significant issues over time. Addressing these problems early can save you from more extensive and costly repairs later.

Temporary Repairs You Can Do Yourself

Illustration of temporary roof repairs being performed by a homeowner

While waiting for professional repairs, there are several temporary measures you can take to protect your roof from further damage. Here are some steps you can follow:

  1. Stock up on emergency repair materials like tarps 

  2. Spread a waterproof tarp over the damaged area.

  3. Secure the edges of the tarp to prevent rainwater from getting underneath.

  4. This can provide a temporary barrier against water infiltration.

When to Consider Roof Repair vs. Replacement

Determining whether to opt for roof repair or replacement can be a difficult decision. Here are some factors to consider:

  • If the storm damage is minor and localized to a single section, consider roof repair.

  • If the damage is severe and affects multiple areas, roof replacement might be advisable.

  • The age of your roof is also a significant factor; most shingle roofs last between 15-20 years, so replacing is recommended if the roof is over 20 years old.

If your roof is less than 10 years old, you might prefer to repair rather than replace. Roof replacement is more expensive upfront compared to repairs, but it can be more cost-effective in the long run if your roof requires frequent repairs. Weighing these factors can help you make an informed decision about your roof’s future.

The need for a roof replacement can be indicated by the frequency of repairs over a short time span. If you find yourself constantly patching up your roof, it might be time to invest in a new one. A professional roofing contractor can provide a thorough assessment and recommend the best course of action based on your roof’s condition.

Navigating the Insurance Claim Process

While filing an insurance claim for storm damage may seem overwhelming, comprehending the steps involved can simplify the process. Here are the steps to follow:

  1. Contact your homeowners insurance provider immediately if significant damage is found.

  2. Familiarize yourself with your policy and rights before filing a claim.

  3. Document the damage by recording the date of the storm and taking photos of any visible damage.

  4. Search online for news stories about the storm for additional proof if required.

Request an insurance adjuster to inspect the damage and ensure your chosen contractor is present during the inspection. The adjuster will evaluate the damage and approve or deny the claim based on their findings. Once a claim is approved, insurance companies typically send two payments: one for materials and one after repairs are complete. No additional payment should be made until all repairs are completed and a city inspection is passed.

Preparing for the Insurance Adjuster’s Visit

To ensure a hassle-free claims process, it’s vital to prepare well for the insurance adjuster’s visit. Here are some steps to follow:

  1. Record the date of the storm.

  2. Take photos of visible damage to help during the adjuster’s visit.

  3. The adjuster will inspect the damage and approve or deny the claim based on the findings.

  4. Having thorough documentation ready can make the inspection process more efficient and increase the likelihood of your claim being approved.

It’s also beneficial to have your chosen contractor present during the adjuster’s inspection to provide an expert opinion and ensure that all damage is accurately assessed. This collaborative approach can help avoid any discrepancies and ensure that you receive the appropriate coverage for the repairs needed.

Common Mistakes to Avoid During the Claims Process

The claims process can be complex, with certain common pitfalls that homeowners should beware of. Timely action is crucial when filing an insurance claim for storm damage. Delaying the claim process can result in the insurance company denying the claim due to time limits. Make sure to contact your insurance provider promptly and provide all necessary documentation to support your claim.

If your storm damage claim is denied, don’t hesitate to ask for a second insurance adjuster to inspect the roof or have an engineer provide proof to the insurance company. Seeking a second opinion can often lead to a different outcome, ensuring that you receive the coverage you deserve.

Choosing a Professional Roofing Contractor

For quality repairs and a seamless process, choosing the right roofing contractor is imperative. Here are some tips to help you make the right choice:

  1. Hire a licensed, insured roofing company with a strong warranty for any repair work.

  2. Check if the contractor is licensed and insured, and inquire about their safety measures and insurance coverage.

  3. It’s also recommended to get quotes from at least three certified roofing contractors to compare pricing and services.

Ask for references from past customers to gauge the contractor’s reliability and ensure they provide a clear written estimate that includes materials, labor, and tax. A reputable roofing contractor should offer a solid warranty on their work and have a portfolio of past projects with positive reviews. This due diligence can help you find a trustworthy professional who will deliver high-quality repairs.

The Importance of Regular Roof Inspections

Routine roof inspections are a preventative step to detect potential issues before they escalate into major problems. Inspections can help uncover problems such as loose shingles, damaged flashing, or clogged gutters. Conducting inspections twice a year can prevent 95% of roofing issues, saving homeowners from costly repairs.

Professional roof inspections can also reveal hidden problems that untrained eyes might miss. Maintaining proper roof inspections ensures the compliance of roofing material warranties and enhances energy efficiency by assessing both insulation and ventilation. Regular inspections, especially for older roofs, are key to extending the lifespan of your roofing system.

Summary

In summary, addressing storm damage promptly is crucial to maintaining the integrity of your roof and protecting your home from further damage. Conduct thorough inspections, understand the types of storm damage, and take immediate action to prevent issues from worsening. Temporary repairs can provide a quick fix until professional help arrives, and knowing when to repair versus replace your roof can save you money in the long run.

Navigating the insurance claim process and choosing a professional roofing contractor are essential steps to ensure quality repairs and appropriate coverage. Regular roof inspections play a vital role in identifying potential issues early and maintaining the effectiveness of your roofing system. By following these guidelines, you can keep your home safe and secure, come rain or shine.

Frequently Asked Questions

What should I do immediately after a storm to check for roof damage?

After a storm, conduct a visual inspection of your roof by walking around your house and checking for missing or damaged shingles, as well as inspecting gutters, vents, and windows for dents or cracks. Also, inspect your attic and ceilings for leaks and water spots.

How can I temporarily repair my roof after a storm?

You can temporarily repair your roof after a storm by using a waterproof tarp to cover damaged areas. This will help prevent further damage to your home.

When should I consider replacing my roof instead of repairing it?

You should consider replacing your roof instead of repairing it if the damage is severe and affects multiple areas, or if your roof is over 20 years old. Frequent repairs over a short period may also indicate the need for a new roof.

How can I prepare for the insurance adjuster’s visit?

Make sure to document the date of the storm, take photos of any damage, and prepare thorough documentation. It’s also helpful to have your chosen contractor present during the inspection.

Why are regular roof inspections important?

Regular roof inspections are important because they can help identify potential issues early, prevent major problems, maintain warranty compliance, and enhance energy efficiency by assessing insulation and ventilation.


roof shingles flapping in wind

Roof Shingles Flapping in Wind

Roof Shingles Flapping in Wind

Roof shingles are an important structure responsible for protecting your property from rain, snow, hail, strong winds, and debris carried with it. However, these shingles also take the hit every single time harsh weather conditions affect your area. While your shingles may be able to keep your home in sound condition, you’ll notice that eventually, the roof itself will show some major signs of damage. When your roof shingles start flapping in the wing, this is a sign that your roof has probably taken in much damage over time and are now susceptible to the harsh effects of horizontally-propelled winds and rain which can usually happen during storms.

Before this happens, it is best to set up preventive measures to avoid having to repair damages. However, repair and roof replacement is inevitable. The best way to prevent it, however, is to do regular maintenance checks on your roof, especially 

after storms, strong winds, snowfall, or other events that could potentially damage your roof. This will help you and your roofer identify and fix minor damage


s and prevent them from turning into larger problems.

Aside from prevention, you will also have to first identify the tell-tale signs of wind damage and the long-term effects of it.

roof shingles flapping in wind

How to Spot Wind Damage on Roof Shingles

The first thing to look out for is any sign of loose nailings. These are the primary reason to why your roof shingles are flapping. When shingles are not nailed down securely, they are bound to loosen even further, making it easy to spot a shingle flapping. If not fixed soon, the shingles will likely fall off. Along with this, improper installation can also lead to water leaks because water can easily seep down into the underside and damage the roof.

An even more obvious sign that your roof has taken a major hit is when you start to see shingles missing. During high winds and updrafts, any roof shingles that aren’t installed securely will likely be wiped away by the wind. Broken and missing shingles are easy to spot and can be replaced by a roofer. However, aside from just replacing the shingles, it is important to also have the surrounding area checked. If these spots have been left barren for a while, there is a high chance that rain water and other things have seeped into the edges of the surrounding shingles. This could potentially damage the rest of the roof.

Flapping shingles are harder to spot and fix than missing shingles since they are still in place, but when subjected to high winds, they will flap and settle back down. When shingles start to flap, this is often caused by loose nails or damaged shingles. 

What are the Long-term Effects of Wind Damage?

When you start noticing these signs of wind damage, you might not be alarmed by it. Most people don’t see it as a major problem. However, when damage is not addressed as soon as possible, it could end up damaging your roof along with the rest of your home’s structure.

When you have flapping shingles, which turn into missing shingles over time, you are bound to experience roof leaks and ceiling stains. Flapping shingles can also inadvertently damage your roof by creating holes on the roof sheathing that is exposed to the flapping shingle. Rood leaks end up creating even more moisture inside the roof’s interior, causing even more damage over time.

When moisture starts to buildup inside the roof, other things start to grow as well. Mold and mildew also start to form and when this happens, further fungal and organic growth will start to grow inside the foundation of your roof, ceiling, and home. This becomes a growing problem that could affect hard to reach interiors where you would have to tear off the whole roof and ceiling to thoroughly assess damage and make necessary repairs. If you do begin to spot any fungal growth on your roof or any part of your property, it is best to contact a skilled roofer or contractor to address the problem.

Overall, any assessments, repairs, or replacements necessary for your roofing caused by wind or water damage can be done by our team of experts at Waddle Exteriors. The best step towards a long-lasting roof is to have a professional roofing contractor do an extensive inspection of your roof because, oftentimes, damages are quite subtle and cannot be spotted easily.

Related Articles