Tag Archive for: Des Moines

Illustration depicting the concerns of ponding water on flat roofs. 1

Top Strategies to Mitigate Ponding Water on Flat Roofs

Ponding water on flat roofs can cause structural damage and leaks if not addressed. This guide details what ponding is, why it’s problematic, and practical strategies to mitigate it effectively.

Key Takeaways

  • Ponding water on flat roofs poses significant risks such as leaks, structural damage, and reduced roof lifespan; prompt mitigation is essential.

  • Effective strategies to combat ponding include using tapered insulation, installing additional drains, and applying reflective coatings to improve drainage and durability.

  • Regular maintenance and professional inspections are crucial for early detection and resolution of ponding issues, minimizing future costly repairs.

Top Strategies to Mitigate Ponding Water on Flat Roofs

A flat roof with visible ponding water.

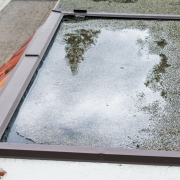
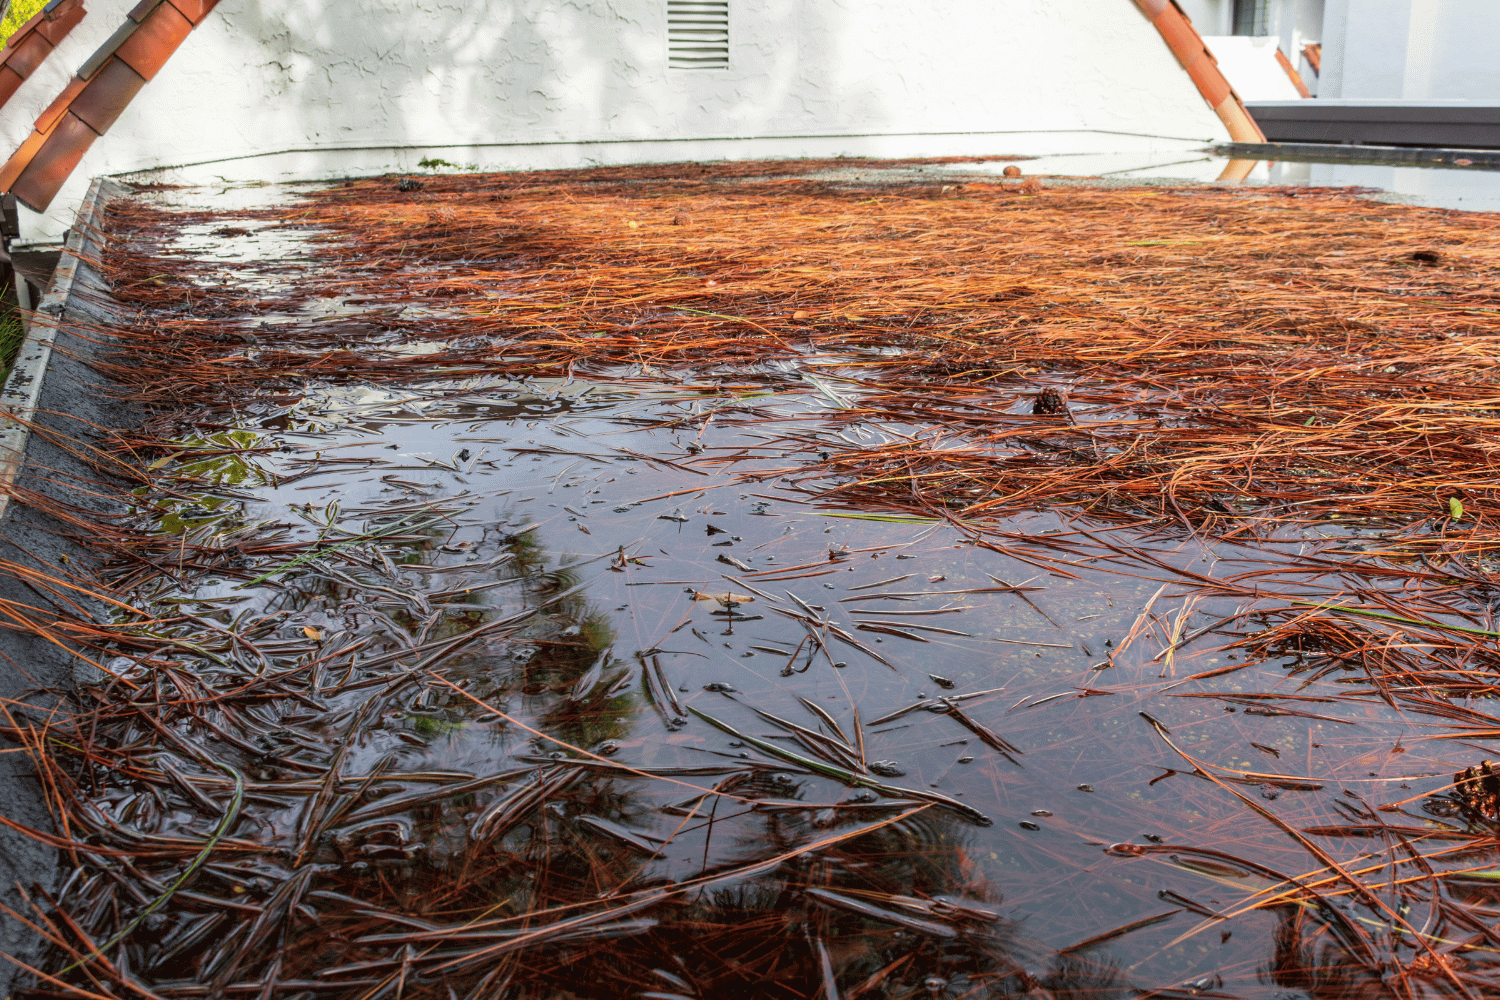
Ponding water on flat roofs, which accumulates and remains stagnant for over 48 hours, poses a significant concern for property owners. It can lead to extensive long-term damage, compromising the building’s structural integrity and the durability of the roof membrane. Addressing and mitigating ponding water issues promptly is crucial for maintaining the health of flat roof systems.

Using sprayed insulation foam can create a proper slope on flat roofs, facilitating drainage and reducing water accumulation. Products like Gaco’s insulation foam are effective in correcting low areas, preventing ponding. Additionally, applying roof coatings such as acrylic, silicone, or urethane can enhance the roof surface’s durability and mitigate the impact of ponding water.

Protecting the flat roof system against water penetration helps maintain property value and avoid costly repairs. Regular maintenance, professional inspections, and the strategies mentioned can help property owners manage and prevent water ponding on flat roofs.

Introduction

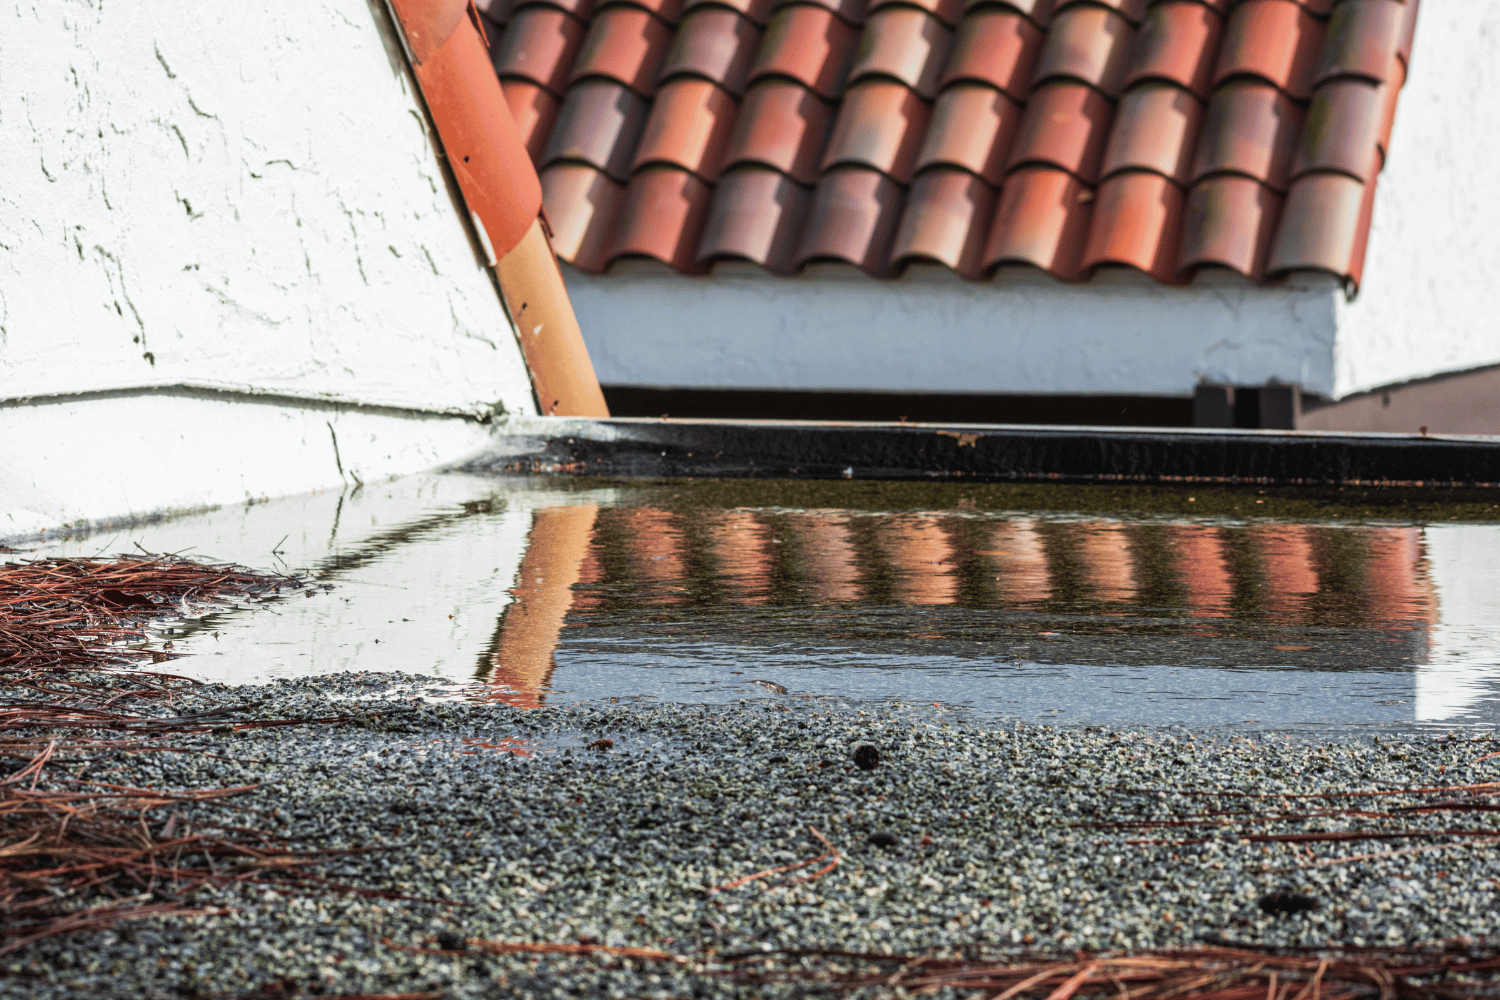
Ponding water, or incidental water, refers to rainwater that collects in puddles on flat roof surfaces and fails to drain effectively. Regular inspection and timely intervention are crucial as ponding water occurs, signaling potential risks to a building’s roofing integrity.

Silicone coatings can help mitigate the effects of ponding water on flat roofs, ensuring the longevity and durability of the roof system.

Why Ponding Water is a Concern for Flat Roof Systems

Illustration depicting the concerns of ponding water on flat roofs.

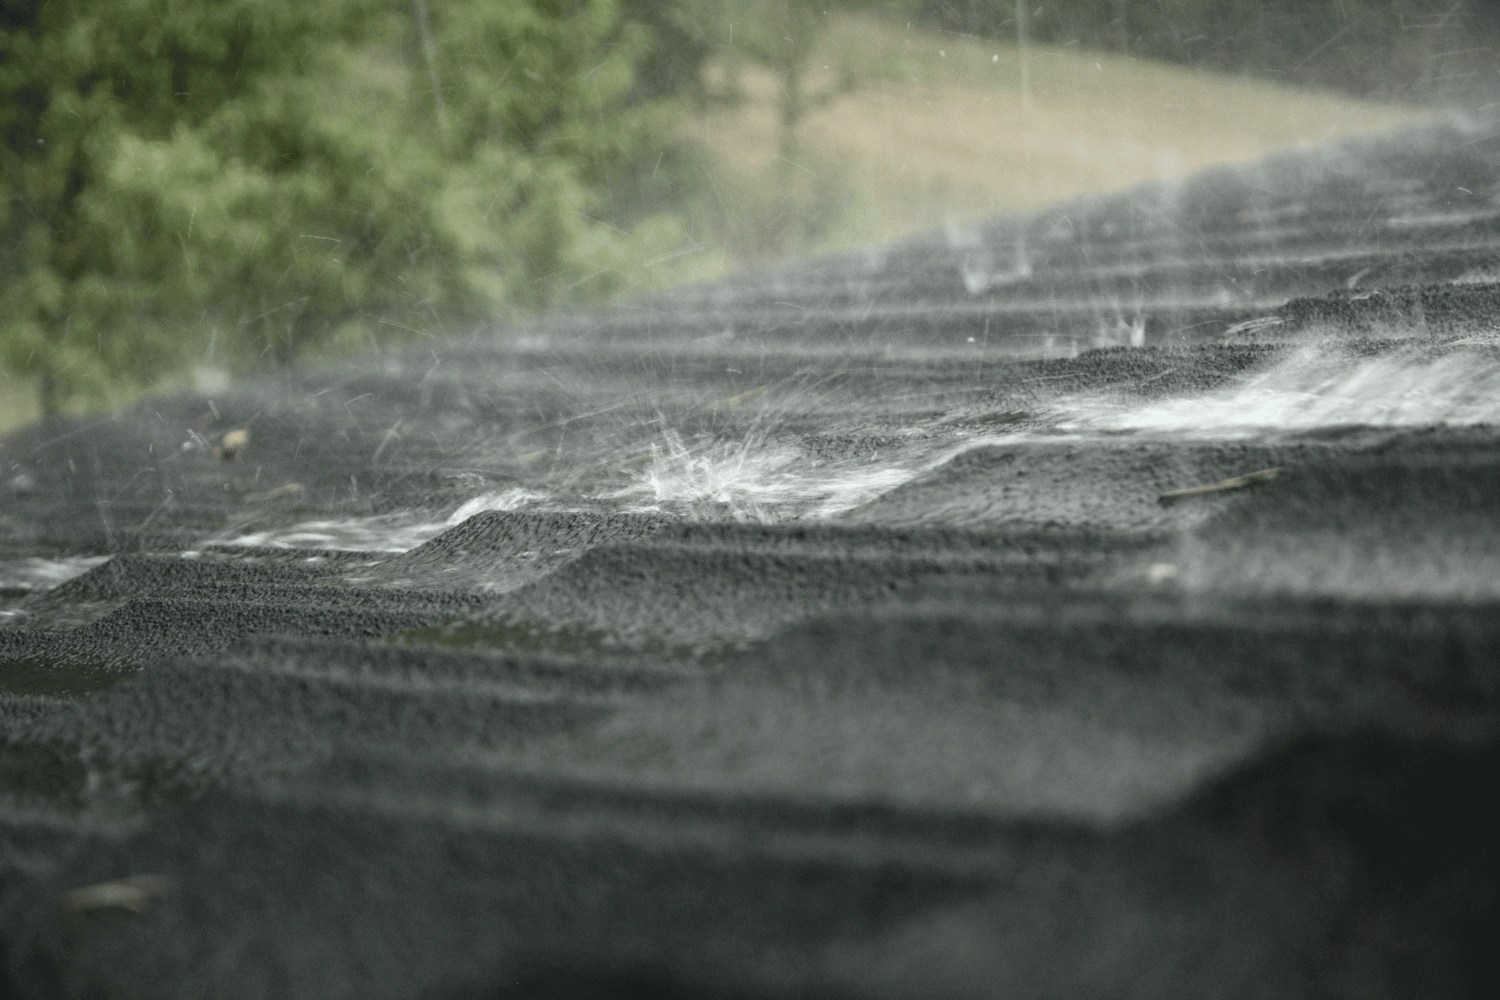
Ponding water on flat roofs presents several significant risks that should not be ignored. Prolonged exposure to stagnant water can lead to severe leaks and structural damage, threatening the overall integrity of the building. Water accumulation can cause the sagging roof deck, increasing the risk of a complete roof collapse. The continuous wetting and drying cycle can also cause roofing materials to crack and degrade over time, further compromising the roof system.

Monitoring ponding water issues and addressing them promptly is essential. Water that remains on the roof for more than 48 hours after rainfall indicates a problem requiring professional examination. If left unaddressed, these issues can void warranties and lead to more extensive and expensive repairs.

Reflective roof coatings, such as acrylic, can reduce cooling demands and mitigate the urban heat island effect, providing protection against the sun’s harmful UV rays. These coatings enhance the roof’s energy efficiency and durability, making them valuable in combating ponding water.

Common Causes of Ponding Water on Flat Roofs

Diagram showing common causes of ponding water on flat roofs.

Understanding the common causes of ponding water on flat roofs is crucial for prevention. Poor roof design is a primary factor, leading to inadequate slopes and drainage systems. Even well-constructed roofs can experience ponding due to structural sagging or insufficient drainage.

Blocked drains and gutters, preventing water from flowing off the roof, and crushed insulation, creating low spots that trap water, are other contributing factors. These issues can lead to significant water accumulation and potential damage if not addressed promptly.

Poor Roof Design

Poor roof design is a leading cause of ponding water on flat roof systems. Structural irregularities, such as deformed joists or beams, and incompatible architectural plans can result in inadequate slopes and poor drainage. A proper drainage system with the correct number and placement of drains is essential to prevent standing water.

Building owners should have a structural engineer examine the roof design for irregularities and recommend necessary adjustments to ensure adequate slope and drainage. Addressing these design flaws early can prevent future water accumulation and extend the roof’s lifespan.

Blocked Roof Drains and Gutters

Blocked roof drains and gutters are another common cause of ponding water on flat roofs. Debris such as leaves, twigs, and other objects can obstruct drains, preventing rainwater from flowing off the roof. Additionally, roof modifications like skylights or smoke hatches can impede drainage, exacerbating the problem.

Regular maintenance is essential to keep drain areas clear of debris and ensure proper drainage. Keeping drains and gutters clean can prevent water from pooling near low points and potentially leaking into the building.

Crushed Insulation

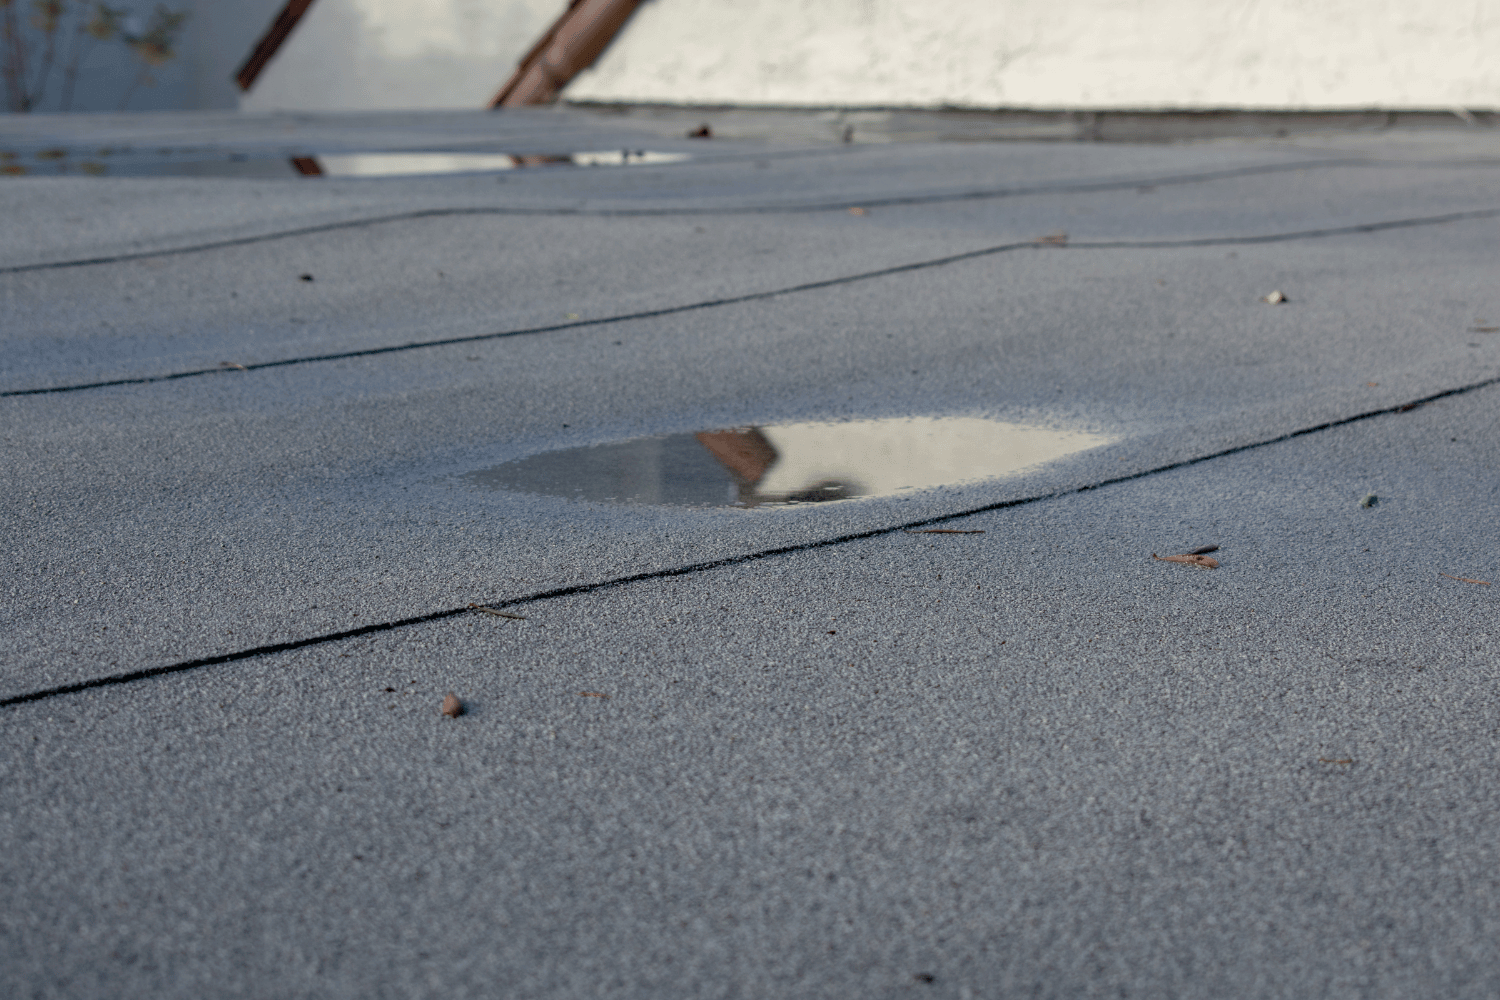
Crushed insulation significantly contributes to ponding water on flat roofs. High foot traffic and heavy rooftop equipment can compress insulation, creating indentations that trap water. These low spots can hold water during rainstorms, leading to prolonged accumulation and potential damage to the roof structure.

Property owners can address this issue by adding more insulation underneath or changing their insulation strategy to promote better water flow and prevent ponding. Ensuring the roof surface remains even and well-insulated is key to mitigating this problem.

The Impact of Ponding Water on Roofing Materials
Visual representation of the impact of ponding water on roofing materials.

Ponding water can devastate roofing materials. Prolonged exposure to standing water can lead to leaks, cracks, and overall degradation. The added weight of ponding water can also weaken the roof’s structural components, leading to sagging or even collapse.

The continuous cycle of wetting and drying can cause roofing materials to deteriorate prematurely, reducing their lifespan and increasing the risk of leaks and structural damage. Addressing ponding water issues promptly is crucial for maintaining the roof system’s integrity.
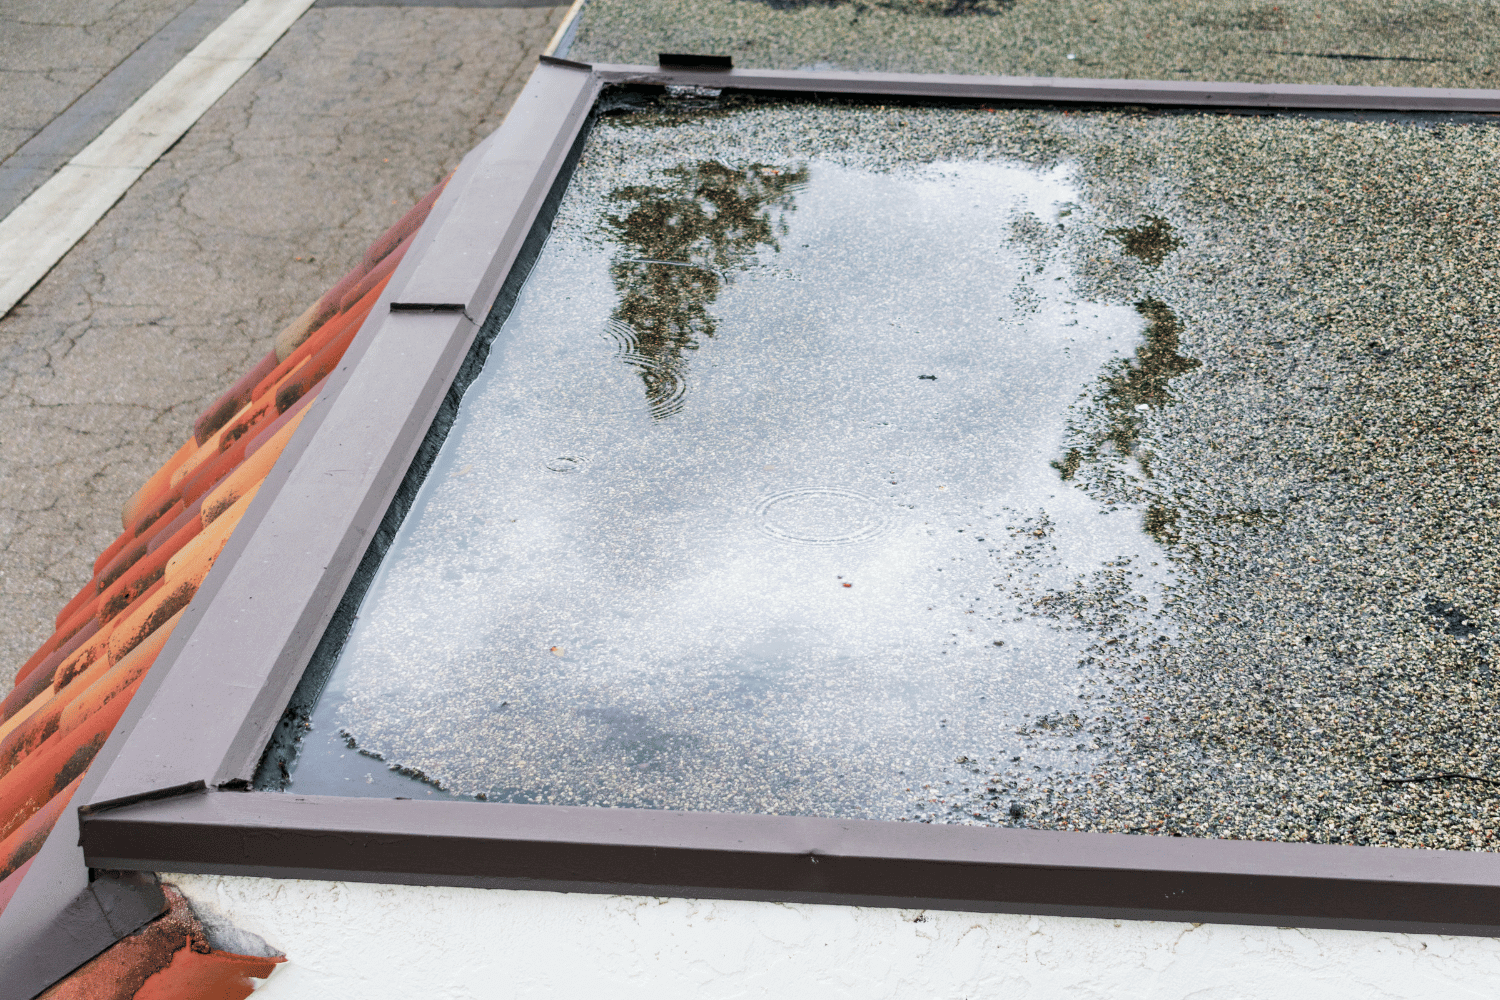
Vegetation Growth

Vegetation growth is a common consequence of ponding water on flat roofs. Stagnant water provides an ideal environment for plant growth, which can damage the roof system and lead to costly repairs. If left unchecked, vegetation can embed roots into roofing materials, causing further deterioration and compromising the roof’s structural integrity.

Regular inspections and maintenance can help identify and remove unwanted vegetation, preventing further damage and ensuring the roof remains in good condition.

Algae and Mold Development

Stagnant water on flat roofs is a breeding ground for mold and algae, compromising the roofing system’s integrity. Algae growth can further weaken the roof structure, leading to additional damage and potentially costly repairs.

Addressing ponding water issues promptly and ensuring proper drainage can prevent algae and mold development. Regular inspections and cleaning help maintain the roof’s health and prevent these problems from escalating.

Effective Solutions to Fix Ponding Water Issues

An illustration of effective solutions to fix ponding water issues.

Addressing ponding water issues promptly is crucial to prevent leaks, mold, and other costly damages. Effective solutions include installing additional roof drains, using tapered insulation, and performing regular maintenance to ensure proper drainage and reduce the risk of water accumulation.

Implementing these strategies can help property owners extend the lifespan of their flat roofs and maintain their structural integrity. The team at Waddle Exteriors emphasizes the importance of prompt action and offers long-lasting, tailored solutions.

Installing Additional Roof Drains

Installing additional roof drains enhances the drainage capacity, helping to prevent water from pooling and reducing the risk of damage to roofing materials.

Ensuring proper positive drainage can extend the lifespan of roofs and maintain their structural integrity. This simple yet effective solution can make a significant difference in preventing ponding water issues related to roof drainage.

Tapered Insulation

Tapered insulation promotes effective water flow toward drains, mitigating ponding issues and ensuring proper drainage.

Common slopes for tapered insulation are typically 1% and 2% grades, which help redirect water flow and reduce the risk of water accumulation near drains and scuppers. This solution not only prevents ponding water but also extends the roof’s lifespan by maintaining its structural integrity.

Regular Maintenance

Regular maintenance is vital to prevent ponding water on flat roofs. Inspecting and cleaning drain areas regularly ensures proper drainage and reduces the risk of water pooling near low points.

Even the best materials can fail without proper maintenance, so vigilance and prompt issue resolution are essential. Regular maintenance helps maintain the roof’s health and prevent costly repairs down the line.

Professional Help for Persistent Ponding Water Problems

Persistent ponding water problems require professional intervention. Building owners should monitor and analyze any water build-up that remains after 48 hours, indicating a need for professional help.

Professional contractors can identify the source of ponding water issues and prescribe effective solutions. Choosing a skilled roofer minimizes future ponding risks and ensures the roof system’s longevity.

How Waddle Exteriors Can Assist You

Waddle Exteriors offers specialized solutions to effectively address and resolve ponding water issues on flat roofs. With over 40 years of experience, their team provides comprehensive services, including roof inspection, repair, replacement, and installation.

Customer reviews highlight Waddle Exteriors’ helpful assistance, efficient communication, and quality workmanship, making projects seamless and smooth. Collaborating with GAF, a top US industry leader in roofing materials, they ensure quality and durability in all their roofing projects.

Summary

Addressing ponding water on flat roofs is crucial for maintaining the structural integrity and longevity of the roof system. Understanding the causes, impacts, and effective solutions for ponding water can help property owners take proactive measures to mitigate this issue.

By implementing strategies such as installing additional drains, using tapered insulation, and maintaining regular roof inspections, property owners can prevent water accumulation and extend the lifespan of their roofs. Remember, prompt action and professional help are key to resolving persistent ponding water problems and ensuring a healthy roof system.

Frequently Asked Questions

What is ponding water on flat roofs?

Ponding water is the accumulation of stagnant water on flat roofs for over 48 hours, which can jeopardize the roof’s integrity and structural stability. It is essential to address this issue promptly to prevent potential damage.

What causes ponding water on flat roofs?

Ponding water on flat roofs is primarily caused by poor roof design, blocked drains and gutters, and crushed insulation. Addressing these issues is essential to prevent water accumulation and potential damage.

How can I prevent ponding water on my flat roof?

To prevent ponding water on your flat roof, install additional roof drains, utilize tapered insulation to facilitate proper water flow, and conduct regular maintenance to ensure that drains remain clear.

What are the risks of ignoring ponding water on flat roofs?

Ignoring ponding water poses significant risks, including leaks, structural damage, material deterioration, and even roof collapse, leading to expensive repairs and a shortened roof lifespan. It is crucial to address these issues promptly to ensure the longevity and safety of the roof.

How can Waddle Exteriors assist with ponding water issues?

Waddle Exteriors can assist with ponding water issues through comprehensive roof inspection, repair, replacement, and installation services, ensuring a durable roofing solution. Their specialized approach guarantees effective resolution of such water concerns.


An illustration showing maintenance activities for a new roof emphasizing regular inspections. 1

Top Tips for Efficient Installation of Roof

Need to install a new roof? This guide provides clear steps to help you navigate the entire installation of roof process, from preparation to the final inspection.

Key Takeaways

  • Start with a thorough evaluation of your existing roof to determine if it needs repair or full replacement before installation.

  • Set a realistic budget considering the costs of new roofing materials, installation, and potential repairs to avoid surprises later.

  • Prioritize safety by using proper gear and consider hiring professional contractors for expertise, efficiency, and post-installation support.

Preparing for Your Roof Installation

An illustration depicting the preparation for roof installation, showcasing tools and materials.

Before commencing the roof installation, laying the groundwork is essential. Effective planning and preparation underpin a successful roofing project. Begin by evaluating whether your current roof requires a full replacement or just repairs. Understanding its current state will clarify the steps ahead.

Next, set a realistic budget for your new roof. Knowing the costs involved can help avoid unexpected financial strain.

Finally, select roofing materials that suit your needs and local climate for durability and efficiency. Here are the preparatory steps in detail.

Evaluating Your Existing Roof

Start by thoroughly inspecting your existing old roof. Look for signs of water damage, discoloration, mold, and check for damaged or missing shingles. Extensive damage or leaks may indicate the need for a replacement, but some issues can be resolved with targeted repairs.

Also, consider the age of your roof. Most roofing materials, such as asphalt shingles, last about 20-30 years. If your roof is aging or shows significant wear, consult a professional roofing contractor for a detailed assessment and advice on the best course of action.

Finally, verify with local authorities if a permit is required for your project to avoid legal complications later.

Budgeting for Your New Roof

Budgeting is vital when preparing for a new roof. The average replacement cost is around $8,000, but this varies based on home size, roofing material, and labor costs. Obtain multiple estimates from different contractors to ensure a fair price.

Also, consider the return on investment. A new roof can increase your home’s resale value, often recouping about 60% of its cost, making it a valuable investment.

Remember, repair costs can range from $400 to $2,000 depending on damage extent. Include these potential expenses in your budget to avoid surprises.

Choosing the Right Roofing Materials

Selecting the right roofing materials is crucial for your roof’s success and longevity. Consider your budget, location, and style preferences. Asphalt shingles are popular for their affordability and ease of replacement, making them ideal for many homeowners.

Clay tile roofs offer durable protection and can extend your roof’s lifespan significantly, although they are more expensive. Metal roofs are known for their durability and energy efficiency but also come at a higher cost.

Assess your specific needs and local climate to make an informed decision. The right material can significantly impact your roof’s performance and longevity.

The Roof Installation Process Explained

A cartoon illustrating the roof installation process, highlighting different stages.

Familiarizing yourself with the roof installation process helps manage expectations and ensures smooth progress. For an average-sized home (around 3,000 sq ft), this process typically takes two days to one week, depending on complexity and underlying issues.

The process starts with removing old roofing materials, then inspecting and repairing the roof decking. Next, install the drip edge and underlayment to protect against water infiltration. Install new roofing materials from the bottom up. Finally, add flashing and vents, followed by a thorough inspection and cleanup.

Let’s delve into each of these steps to provide a clear understanding of what happens during a roof installation.

Removing Old Roofing Material

The first step is to remove all old roofing materials, known as a roof tear-off, to ensure a clean, solid foundation for the new roof. Tools like a roofing tear-off shovel or shingle fork can make this process more efficient.

For metal roofs, a pry bar or drill is typically used for removal. Ensure all old shingles and debris are completely cleared before moving on.

Inspecting and Repairing the Roof Decking

After removing the old roofing material, inspect the roof decking to ensure structural integrity. Address any water damage or rot immediately. Replace damaged decking with materials like CDX plywood or OSB of the same thickness, typically 1/2 inch.

Ensure the roof decking is clean and free of debris to provide a solid base for the new roof after necessary repairs.

Installing the Drip Edge

Install a drip edge to protect the fascia and ensure proper water drainage. On the lower portion of the roof, it should be installed before the underlayment; on the sides, after the underlayment.

Secure the drip edge by driving nails through its top into the decking every few feet. Proper installation ensures water is diverted away from your home, preventing potential damage.

Laying Down Underlayment

Underlayment acts as a barrier to prevent water infiltration and protect the roof decking. It should cover the entire surface, be nailed or stapled in place, and overlap at the edges by at least two inches.

On warm days, the underlayment may stick to the clean decking without fasteners. Ensure it lies flat to avoid ripples or lumps that could affect the final appearance of the roofing shingles.

Installing New Roofing Material

Install the new roofing materials, starting from the bottom and working upwards to ensure proper alignment and water flow. Seal each nail head with roof sealant to prevent leaks.

For added protection, install shingles up to the front wall to align with dormer flashing. Finalize ridge caps to ensure a waterproof finish and complete the roofing process.

Adding Flashing and Vents

Flashing protects areas where the roof intersects with vertical structures, preventing water leaks. Proper installation and sealing around vents are essential to ensure no water infiltration.

Seal each nail head when installing new shingles around vents to prevent potential leaks, ensuring your new roof’s durability and efficiency.

Final Inspection and Cleanup

Conduct a thorough final inspection to ensure all elements of the roof installation are correctly completed. Verify installation accuracy, check for defective materials, and seal all exposed nails on vents and stack flashing to prevent leaks.

After the inspection, clean up all old roofing materials, stray nails, and debris from the roof and surrounding areas, leaving your property in pristine condition.

Safety Precautions During Roof Installation

An illustration of safety precautions during roof installation, showing a professional roofer in safety gear.

Safety should always be prioritized during roof installation. Implementing guardrails or safety netting can reduce the hazards of falls and falling materials. Additionally, securing and marking skylights can prevent accidents.

Hiring skilled roofers ensures effective risk management due to their expertise and use of proper safety equipment. Here are specific safety measures to take during a roofing project.

Using Proper Safety Gear

Using proper safety gear is crucial during roof installation. Recommended safety gear includes gloves, protective eyewear, safety harnesses, and kneepads.

Personal protective equipment (PPE) such as hard hats, safety glasses, and slip-resistant shoes are also essential.

Managing Risks of Falling Debris

Managing risks of falling debris is crucial for safety during roof installation. Vibrations from roofing work can dislodge items on walls or ceilings, so remove fragile decorations beforehand.

Prioritize safety precautions to protect yourself and your property.

Benefits of Hiring Professional Roofing Contractors

Hiring professional roofing contractors offers numerous benefits, making your project smoother and more efficient. Professionals bring expertise, experience, and the right equipment for a high-quality installation. They also provide convenience, increased safety, and peace of mind.

They handle complex structures with steep angles, dormers, pitch changes, or chimneys, making them invaluable for challenging projects. Here are the specific benefits of hiring professionals.

Expertise and Experience

Waddle Exteriors, with over 40 years of experience, collaborates with top manufacturers like GAF to deliver high-quality installations. This blend of expertise and partnerships greatly enhances customer satisfaction.

Warranty and Post-Installation Support

Understanding warranty details and post-installation support is essential before signing a contract. Waddle Exteriors ensures homeowners register their warranties to guarantee coverage.

They also conduct thorough post-completion inspections to ensure proper execution of their work.

How to Maintain Your New Roof

An illustration showing maintenance activities for a new roof, emphasizing regular inspections.

Maintenance is key to prolonging your new roof’s lifespan and preventing costly repairs. Proper upkeep can significantly extend its life and prevent minor issues from escalating.

Many roofing services offer workmanship warranties covering installation-related issues, providing ongoing support to keep roofs in optimal condition through regular inspections.

Here are the specific steps to maintain your new roof.

Regular Inspections

Regular inspections are vital for maintaining your roof’s integrity. Inspect your roof at least twice a year to identify wear and tear early, such as damaged shingles or rusted flashing. If you’re uncomfortable with this task, hiring a professional can ensure a thorough assessment.

Regular inspections prevent costly repairs by catching potential problems early. Look for issues like cracked caulk, missing shingles, or signs of decay such as moss or algae. Using binoculars can help inspect from the ground, minimizing risks.

Cleaning and Debris Removal

Keeping the roof clean and free from debris prevents water accumulation and associated damage. Regularly clearing leaves and debris prevents moss and algae growth, protecting the roof’s integrity.

Using soft washing techniques is recommended for cleaning roofs to avoid damage while effectively removing algae and moss. Proper drainage is crucial for roof performance, and regular cleaning helps maintain this.

Summary

Installing a new roof is a significant undertaking that requires careful planning and execution. From evaluating your existing roof and budgeting for the project to choosing the right materials and understanding the installation process, each step is crucial to ensure a successful outcome. By following the detailed guide provided, homeowners can navigate the complexities of roof installation with confidence and ease.

The benefits of hiring professional roofing contractors, coupled with proper maintenance practices, can extend the lifespan of your roof and safeguard your investment. Regular inspections and debris removal are simple yet effective ways to keep your roof in top condition. With the knowledge gained from this guide, you’re well-equipped to undertake your roofing project and maintain your new roof for years to come.

Frequently Asked Questions

What are the key steps in the roof installation process?

The key steps in installing a roof are removing the old materials, repairing the decking, and then laying down new underlayment and roofing material. Don’t forget the flashing and vents, followed by a thorough final inspection and cleanup to ensure everything’s in top shape!

How often should I inspect my roof?

You should inspect your roof at least twice a year to catch any issues like damaged shingles or rusted flashing before they turn into bigger problems. Staying proactive can save you a lot of headaches down the line!

What are the benefits of hiring a professional roofing contractor?

Hiring a professional roofing contractor guarantees quality workmanship and safety, plus you get warranties and support after the job is done. It’s a smart choice for peace of mind!

How can I maintain my new roof?

To keep your new roof in top shape, make sure to inspect it regularly and clear away any debris. Keeping an eye out for things like missing shingles or moss can save you from bigger problems down the line.

What types of roofing materials should I consider?

When considering roofing materials, asphalt shingles, clay tiles, and metal roofs are great options. Your choice should reflect your budget, location, and personal style.