Uncategorized

A comparison of different siding materials, including James Hardie siding.

Top Benefits of James Hardie Siding for Your Home

Why choose James Hardie siding? This article explains its durability, style options, and low maintenance to help you decide if it’s the best choice for your home.

Key Takeaways

  • James Hardie siding is renowned for its exceptional durability, fire resistance, and low maintenance, making it a superior choice compared to traditional wood and vinyl siding.

  • The product’s aesthetic versatility allows homeowners to select from a wide range of styles and colors, enhancing curb appeal and property value.

  • Investing in James Hardie siding offers long-term benefits, including a lifespan of 50 years or more and minimal upkeep, ensuring lasting protection and beauty for homes.

Top Benefits of James Hardie Siding for Your Home

A beautiful home showcasing James Hardie siding, highlighting its benefits.

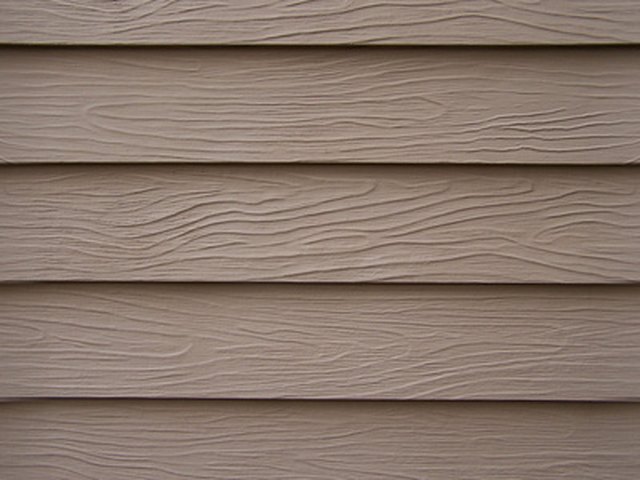
James Hardie siding stands out in the home improvement industry for its remarkable blend of beauty and durability. Made from a unique combination of cement, sand, and cellulose fibers, this fiber cement siding offers homeowners a robust and aesthetically pleasing option for their homes’ exteriors. One of the most lauded benefits is its long-lasting durability and resistance to moisture, which ensures that your home remains protected against the elements for years to come. Additionally, fiber cement products provide an excellent choice for those seeking quality and longevity in their siding materials.

In addition to its durability, James Hardie siding offers enhanced safety features, including fire resistance and pest defense. Unlike traditional wood siding, which can attract termites and other pests, James Hardie siding is impervious to such threats, providing peace of mind to homeowners. Furthermore, its fire-resistant properties make it a safer alternative, giving you added protection against potential fire hazards.

Homeowners and professionals alike trust James Hardie products for their superior performance and innovative design. Installing James Hardie siding has been shown to significantly improve curb appeal and property value, making it a wise investment for any homeowner.

With a wide range of styles and colors available, it’s easy to see why James Hardie siding is a popular choice for those looking to enhance both the appearance and durability of their homes.

Introduction

Choosing the right siding for your home is a decision that impacts the entire project, from the initial installation to long-term maintenance. At Waddle Exteriors, we understand the importance of selecting a siding material that not only looks great but also stands the test of time. James Hardie siding, with its innovative features like ColorPlus® Technology, offers a solution that combines aesthetic appeal with durability.

One of the standout features of James Hardie siding is its engineering for specific climates. This means that whether you live in a region with harsh winters, blazing summers, or frequent storms, James Hardie siding is designed to perform optimally in your environment. This tailored approach ensures that your home’s exterior remains protected and looking its best, no matter the weather conditions.

Moreover, James Hardie siding is known for its low maintenance requirements. Unlike wood siding, which can rot, crack, and require frequent repainting, James Hardie siding is designed to resist these common issues. Its long-lasting color and minimal upkeep make it an attractive option for homeowners looking to reduce their maintenance workload while enjoying the benefits of a beautiful and durable exterior.

Why Choose James Hardie Siding?

A comparison of different siding materials, including James Hardie siding.

James Hardie siding is renowned for its long-lasting durability and resistance to moisture, making it a preferred choice for homeowners seeking reliable protection against the elements. This fiber cement siding is crafted from a blend of cement, sand, and cellulose fibers, offering a combination of beauty and strength that is hard to match.

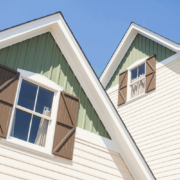
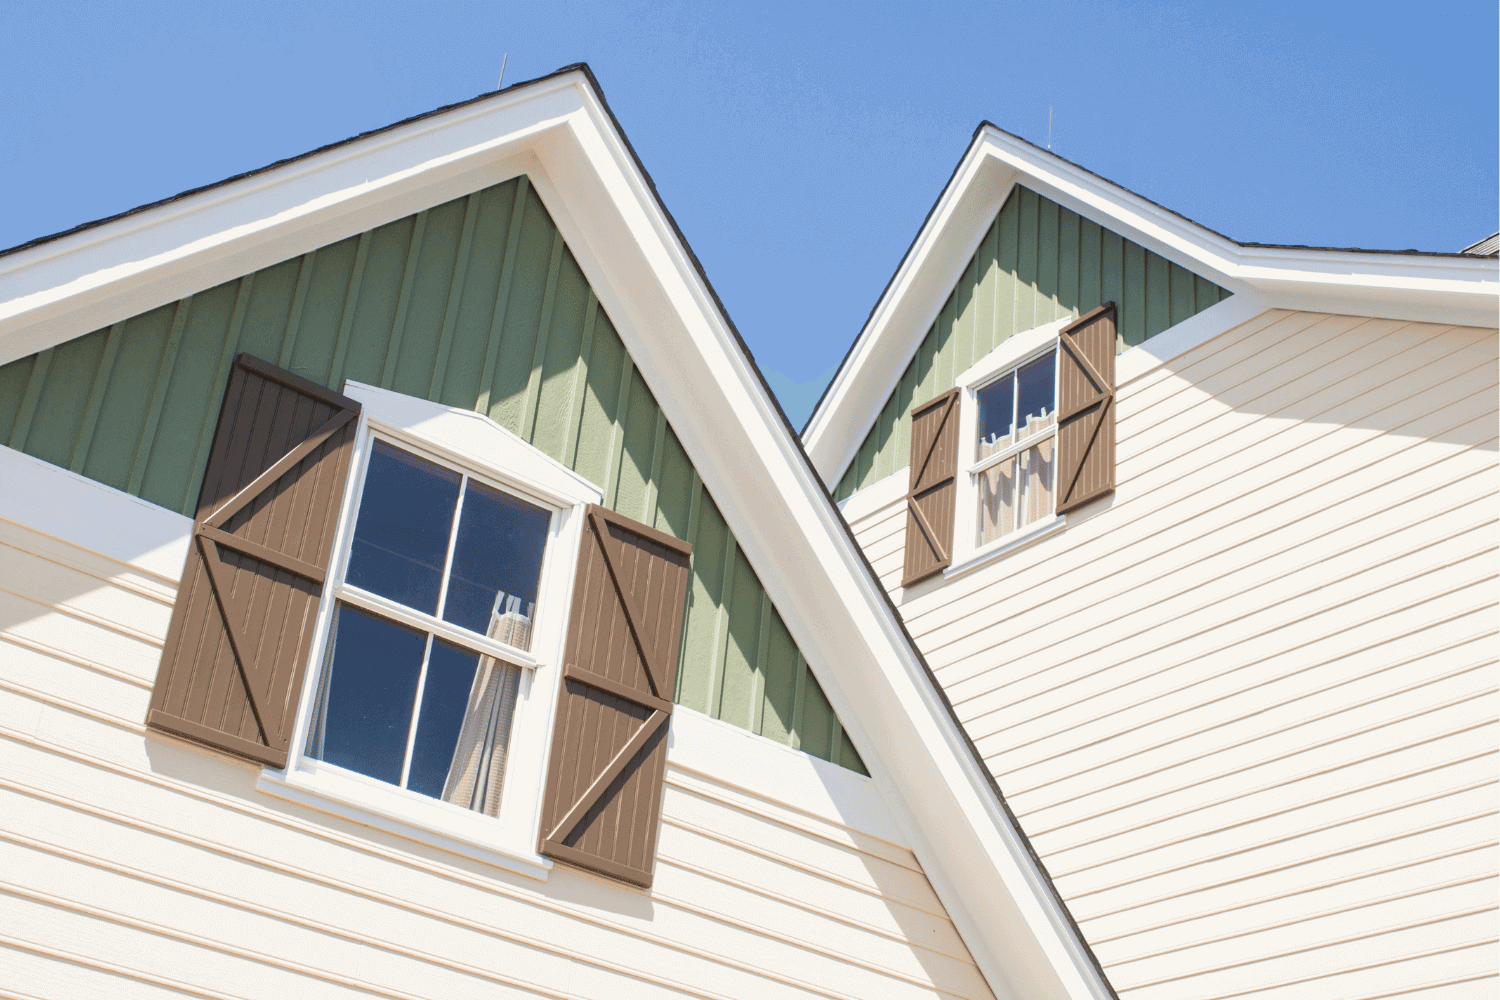
In addition to its durability, James Hardie siding is celebrated for its aesthetic versatility. With a variety of styles, colors, and textures available, homeowners can customize their home’s exterior to match their personal taste and architectural style. This flexibility, combined with the significant improvements in curb appeal and property value reported by homeowners, makes James Hardie siding a smart investment for any home.

Key Features of James Hardie Siding

Key features of James Hardie siding illustrated, showcasing its durability.

James Hardie siding boasts several key features that set it apart from other siding options. Engineered to withstand extreme weather conditions, this siding offers protection against hurricanes, snow, and UV rays. It is designed for climate resilience, ensuring optimal performance tailored to specific environmental conditions.

Durability and Longevity

One of the most compelling reasons to choose James Hardie siding is its exceptional durability and longevity. Designed to withstand extreme weather conditions, this siding can endure strong winds of up to 150 mph, making it an ideal choice for homes in hurricane-prone areas. Its robust composition protects it from impacts without sustaining damage, ensuring that your home’s exterior remains intact even in harsh weather.

James Hardie siding is also highly resistant to common issues like rotting, warping, and pest damage, which are prevalent with traditional wood siding. With a lifespan of 50 years or more, James Hardie siding offers long-term value and peace of mind for homeowners.

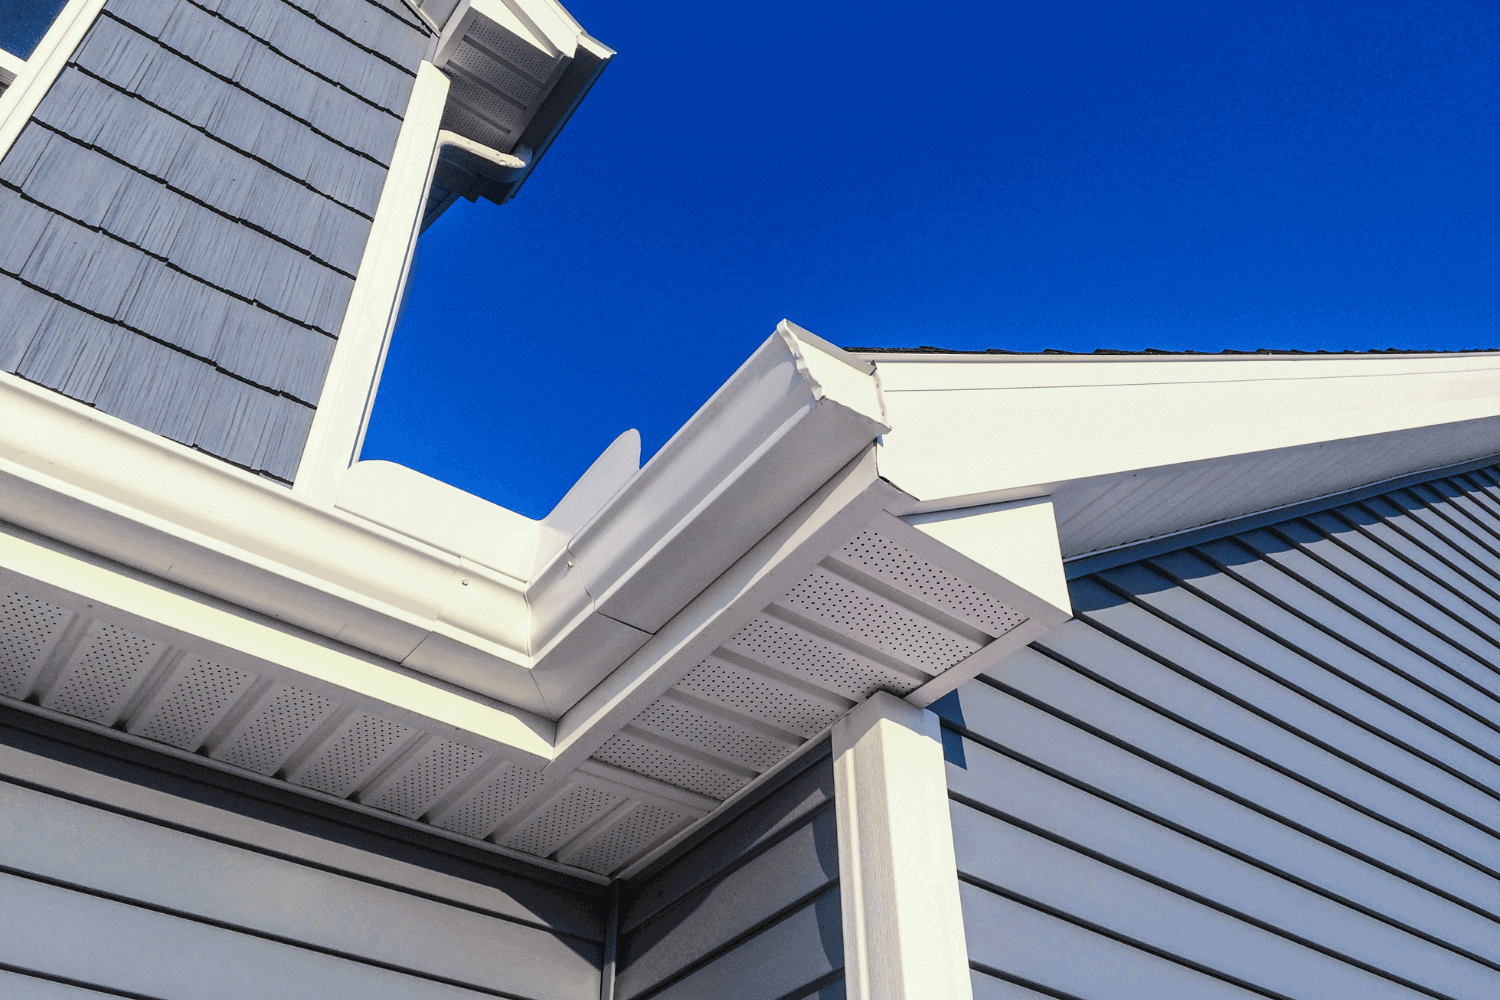
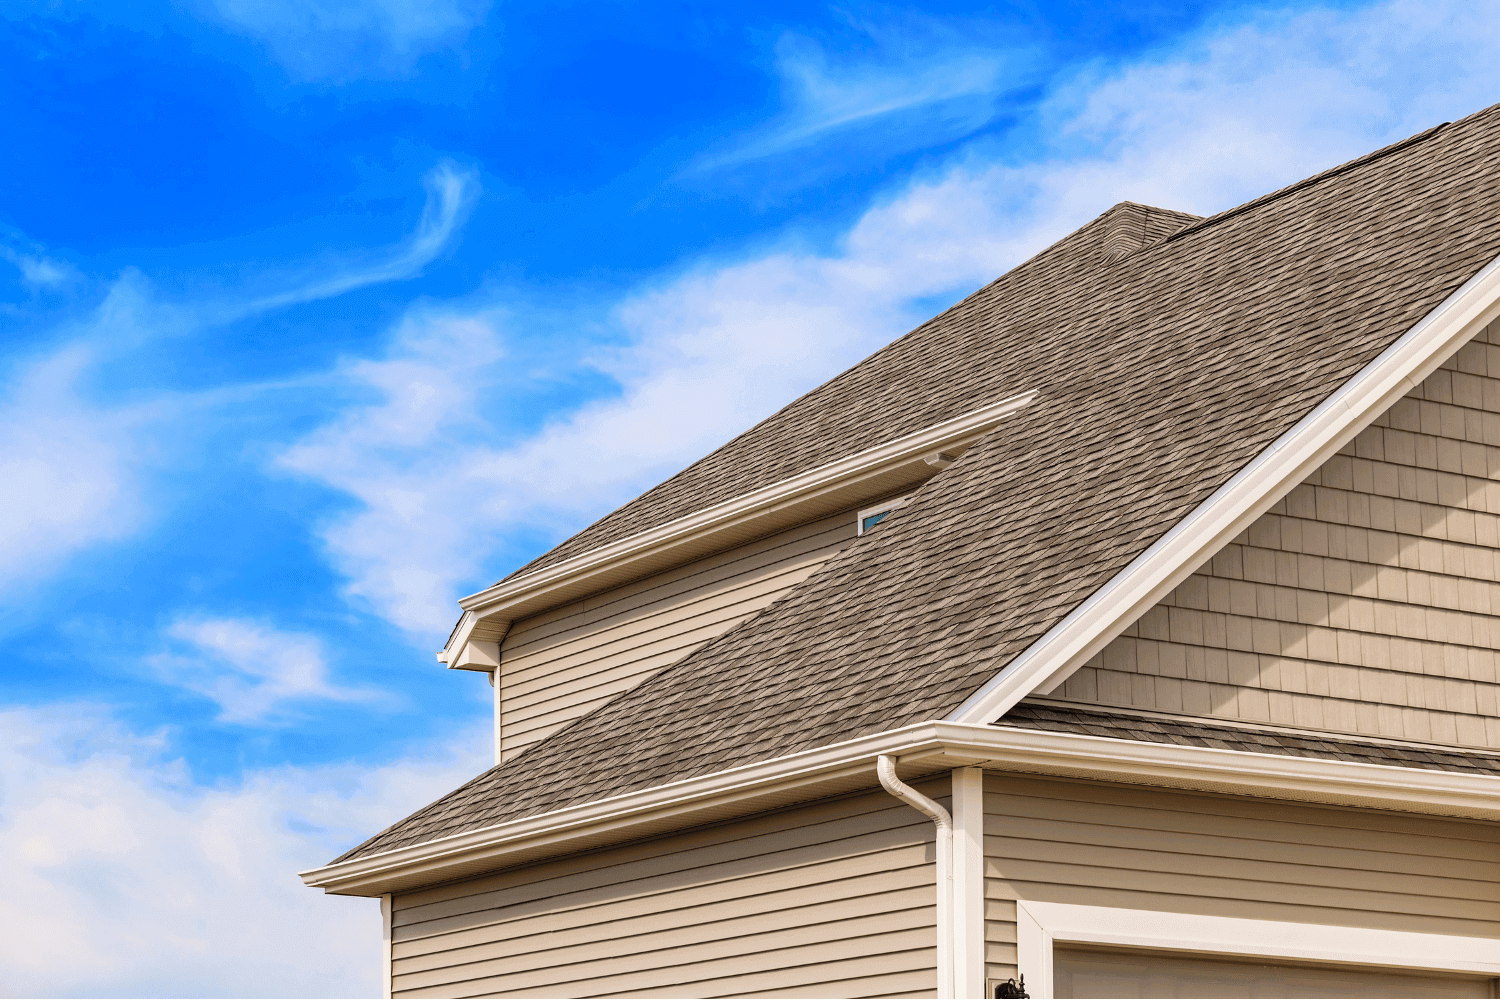
Aesthetic Versatility

When it comes to enhancing the beauty of your home’s exterior, James Hardie siding offers unparalleled aesthetic versatility. Homeowners can choose from a wide range of styles and colors, allowing for extensive customization to match any architectural design or personal preference. Whether you prefer the classic look of cedar or the sleek appearance of modern clean lines, James Hardie siding can achieve the desired effect while maintaining superior durability.

The ColorPlus® Technology used in James Hardie products provides factory-applied finishes that resist fading and chipping, ensuring that your home retains its vibrant appearance for years. Testimonials from homeowners consistently highlight their satisfaction with the aesthetic and protective qualities of James Hardie siding, making it a top choice for those looking to enhance both the beauty and longevity of their home’s exterior.

Fire Resistance

Safety is a paramount concern for any homeowner, and James Hardie siding excels in this area with its exceptional fire resistance. Classified as non-combustible, James Hardie Fiber Cement Siding does not ignite when exposed to flames, significantly reducing the risk of fire spreading. This feature makes it a superior choice compared to traditional wood siding, which can easily catch fire and contribute to the spread of flames.

For homeowners looking to enhance the safety of their homes, James Hardie siding offers a reliable solution. Its fire-resistant properties provide peace of mind, knowing that your home is better protected against potential fire hazards. This added layer of safety, combined with its other durable features, makes James Hardie siding a smart investment for any home.

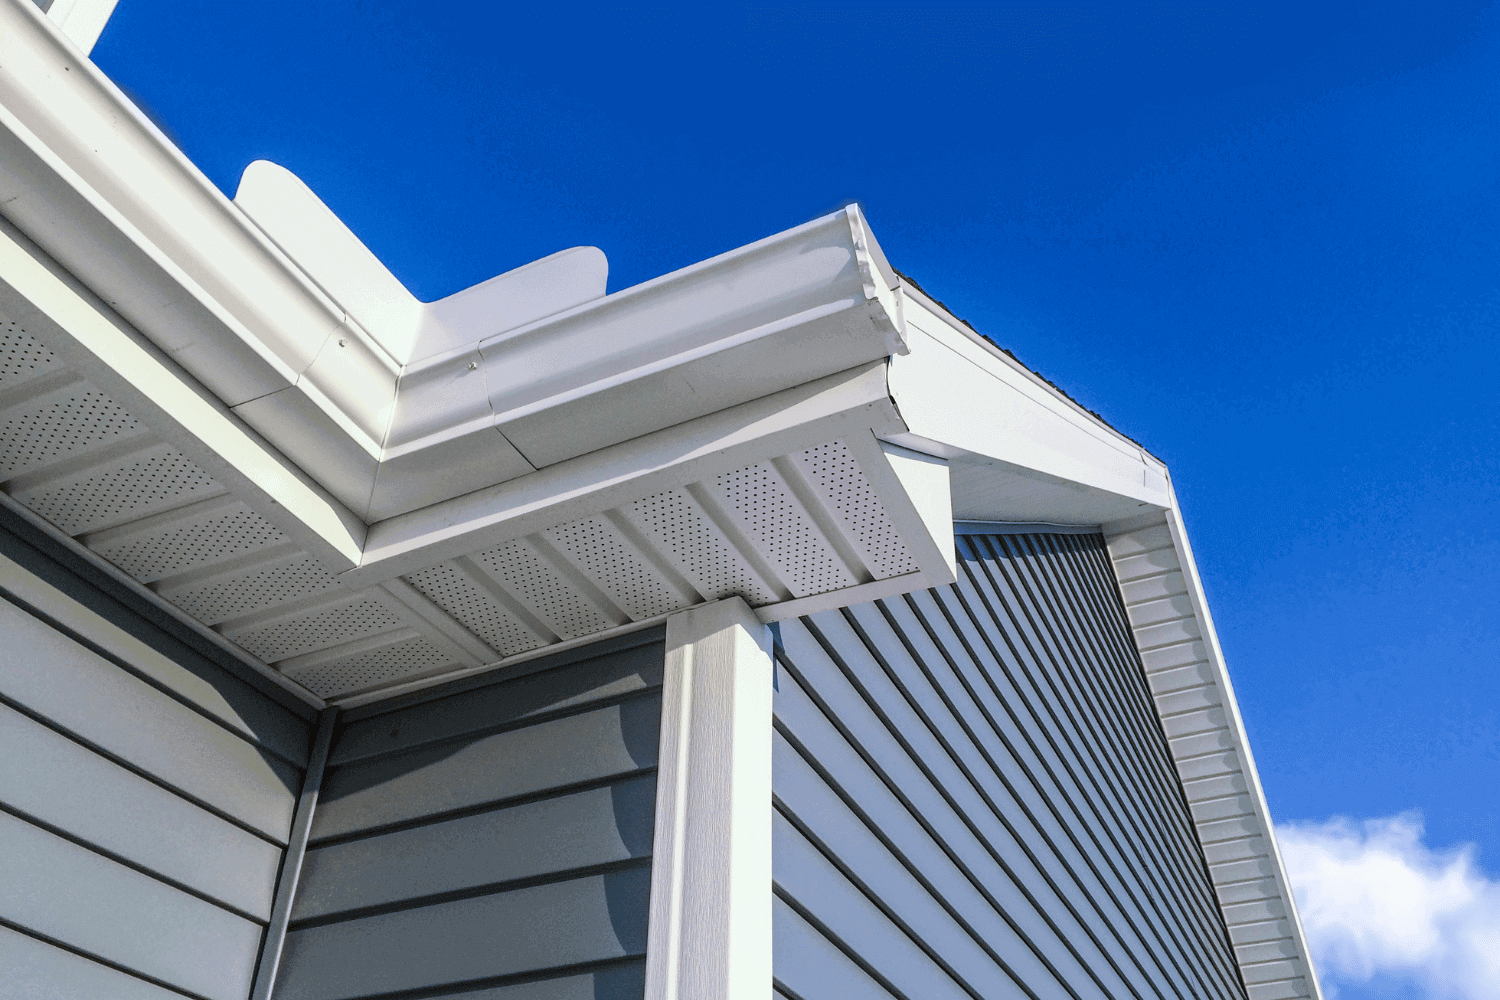
Installation Process of James Hardie Siding

A step-by-step illustration of the installation process for James Hardie siding.

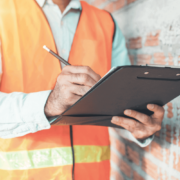
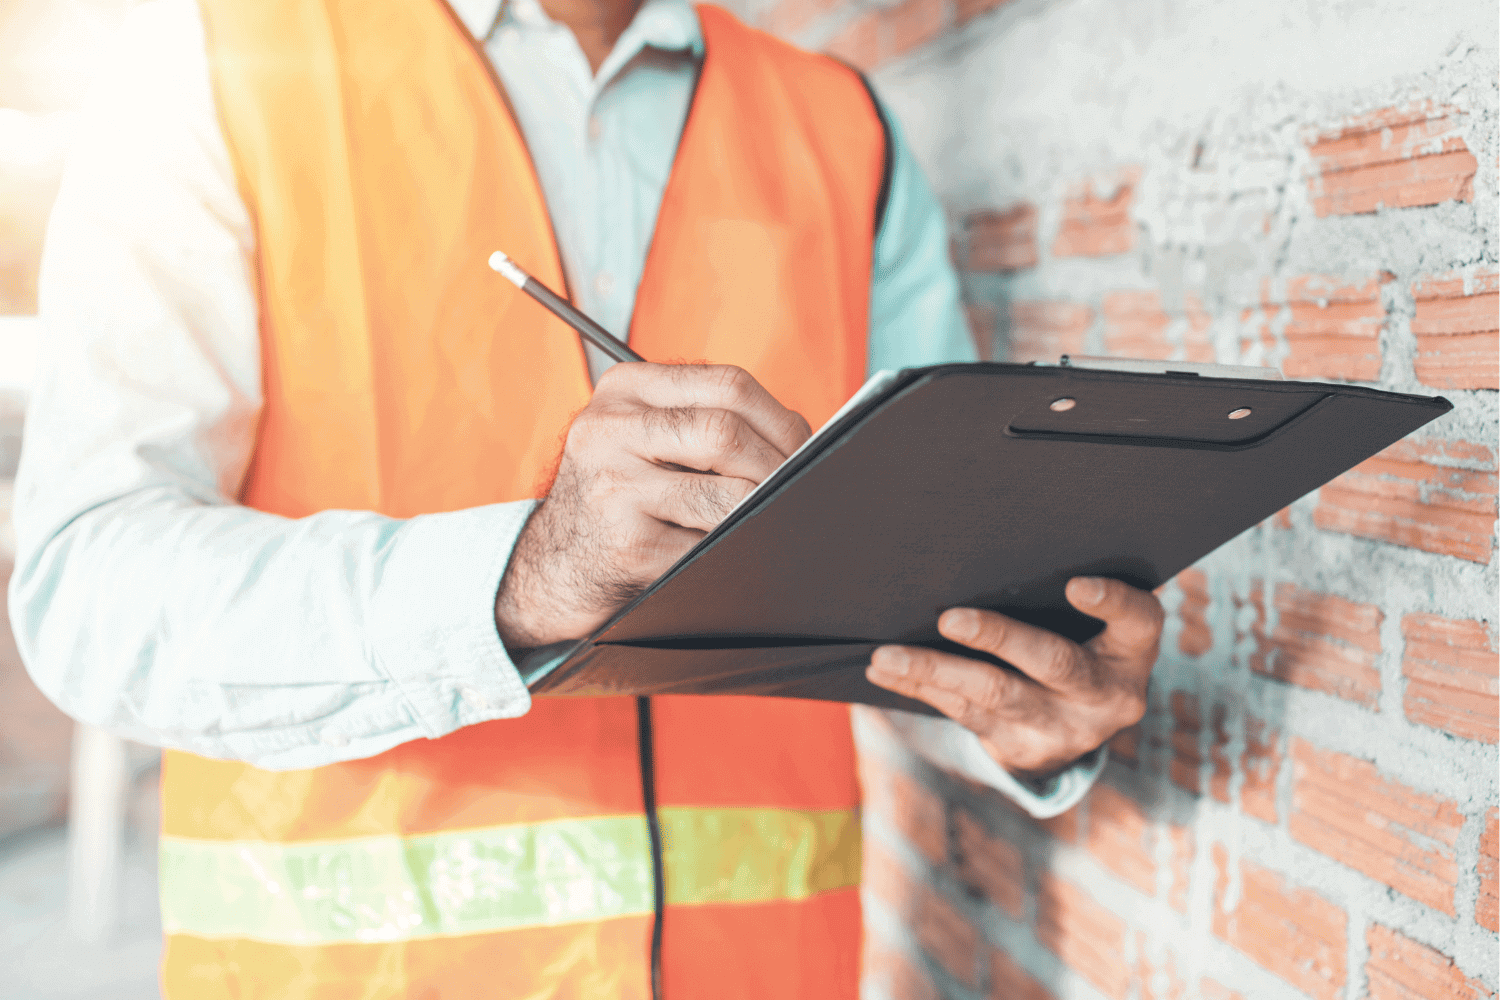
Proper installation is crucial for ensuring the optimal performance and longevity of James Hardie siding. While it is possible for experienced DIYers to undertake the installation, hiring a certified contractor is highly recommended.

Certified contractors have undergone specialized training to ensure that the installation meets the high standards set by James Hardie, preventing issues like moisture problems and premature damage to the siding. Let’s explore the steps involved in preparing your home’s exterior and the detailed installation process.

Preparing Your Home’s Exterior

The first step in the installation process is preparing your home’s exterior. This involves removing the old siding and installing moisture barriers to protect against water damage. Approximately 70% of customers require a tear-off of old siding when installing new siding, making this an essential part of the process.

After removing the old siding, it’s important to inspect the underlying materials for any signs of pest damage or moisture issues that need to be addressed.

Once the old siding is removed and the necessary inspections are completed, a house wrap should be applied over the sheathing. This house wrap acts as a moisture barrier, providing an additional layer of protection against water infiltration before the new siding is installed. Proper preparation is key to ensuring a successful siding installation and the long-term performance of James Hardie siding.

Step-by-Step Installation Guide

The installation process begins with attaching a bottom starter strip, which serves as the foundation for the siding panels. The starter strip should be 1.25 inches wide and maintained at a clearance of 6 inches from the ground. Once the starter strip is in place, the trim is installed first to create clean lines for the horizontal panels.

When it comes to attaching the siding panels, it’s important to use the blind nailing technique, which involves nailing each panel approximately 1 inch from the top and at least once every 24 inches. The spacing between nails should be 6 to 10 inches to ensure a secure attachment. It’s also essential to stagger the joints between each siding panel for a professional appearance and to nail both sides of corners at least once per 16 inches.

Once the siding panels are installed from the bottom up, the final step is to caulk the seams to seal the edges and check for any gaps or missed edges. Ensuring that the last nail is placed approximately 1/25 inch from the top when securing corners will provide a finished look and additional stability.

Following these steps meticulously will result in a professional and long-lasting installation of James Hardie siding.

Safety Considerations

Safety is a critical aspect of the siding installation process. When handling James Hardie siding, it’s essential to wear appropriate personal protective equipment, including gloves and goggles, to prevent injuries. Additionally, using a dust collection system while cutting the siding minimizes exposure to airborne particles and dust, ensuring a safer working environment.

Adhering to these safety considerations and following the installation instructions will help prevent accidents and ensure a smooth installation process.

Maintenance Tips for James Hardie Siding

One of the key benefits of James Hardie siding is its low maintenance requirements. Unlike wood siding, which is prone to rotting and insect damage, James Hardie siding is impervious to these issues, offering significant savings on repairs and upkeep over time.

Regular cleaning of James Hardie siding is recommended every 6 to 12 months to remove dirt and organic contaminants, using low-pressure water and a soft brush to avoid damaging the siding.

In the event of minor damages like chips or cracks, these can be easily repaired using a cementitious patching compound. It’s also important to avoid using de-icing salts near James Hardie siding, as they may cause premature damage. By following these simple maintenance tips, homeowners can ensure that their James Hardie siding remains in excellent condition for many years to come.

Comparing James Hardie Siding to Other Options

When considering siding options for your home, it’s essential to compare James Hardie siding to other popular choices like vinyl and wood siding. Each material has its unique benefits and drawbacks, impacting the overall lifespan, maintenance requirements, and aesthetic appeal of your home’s exterior.

Let’s delve into the specific comparisons between James Hardie siding and these other materials.

James Hardie vs. Vinyl Siding

James Hardie siding offers several advantages over vinyl siding, particularly in terms of durability and aesthetic versatility. While vinyl siding is known for its affordability and ease of installation, it can sustain cracks in cold weather and has limited design variations.

In contrast, James Hardie siding can mimic the look of wood while providing greater longevity and resistance to moisture, ensuring that your home remains protected and visually appealing.

Additionally, James Hardie siding offers a wider range of styles and textures, allowing homeowners to achieve their desired look with more options than vinyl siding. Although the initial cost of James Hardie siding is higher, its superior durability and longer lifespan often justify the investment, making it a more economical choice in the long run.

James Hardie vs. Wood Siding

When compared to wood siding, James Hardie siding significantly outperforms in terms of durability and maintenance. Wood siding requires regular painting or staining to maintain its aesthetics, leading to higher maintenance costs over time. In contrast, James Hardie siding is engineered to resist decay, insects, and weather elements, requiring minimal upkeep and only occasional cleaning.

James Hardie siding also offers superior resistance to wind, hail, and moisture damage, which are common issues with wood siding. This enhanced durability ensures that your home’s exterior remains intact and visually appealing for decades, providing long-term value and peace of mind for homeowners.

Cost Considerations for James Hardie Siding

Understanding the cost considerations for James Hardie siding is essential for homeowners planning a siding project. While the initial investment may be higher than other siding options, the long-term benefits and durability of James Hardie siding often justify the expense.

Let’s explore the initial investment and the long-term value that James Hardie siding offers.

Initial Investment

The cost for installing James Hardie siding typically ranges from $6 to $15 per square foot, which includes both materials and labor. This price range can vary depending on factors like the complexity of the project and the need for additional components such as insulation or moisture barriers. Removing old siding can also incur additional fees, averaging around $2,000 or $0.70 to $2.00 per square foot.

While vinyl siding offers a more affordable initial cost, James Hardie siding tends to have a longer lifespan and better resistance to environmental damage, making it a more economical choice in the long run.

With a typical lifespan of 40-50 years, James Hardie siding provides lasting value and reduces the need for frequent replacements.

Long-Term Value

Investing in James Hardie siding offers exceptional long-term value due to its durability and low maintenance requirements. With a lifespan of 50 years or more and a 30-year warranty, James Hardie siding ensures lasting protection and aesthetic appeal for your home. This durability reduces ongoing costs and efforts for homeowners, making it a cost-effective choice over time.

The minimal maintenance needs further enhance the long-term value, as homeowners can enjoy the benefits of a beautiful and durable exterior without the hassle and expense of regular upkeep. By choosing James Hardie siding, homeowners can make a big decision that pays off in the long run with lasting protection and increased property value.

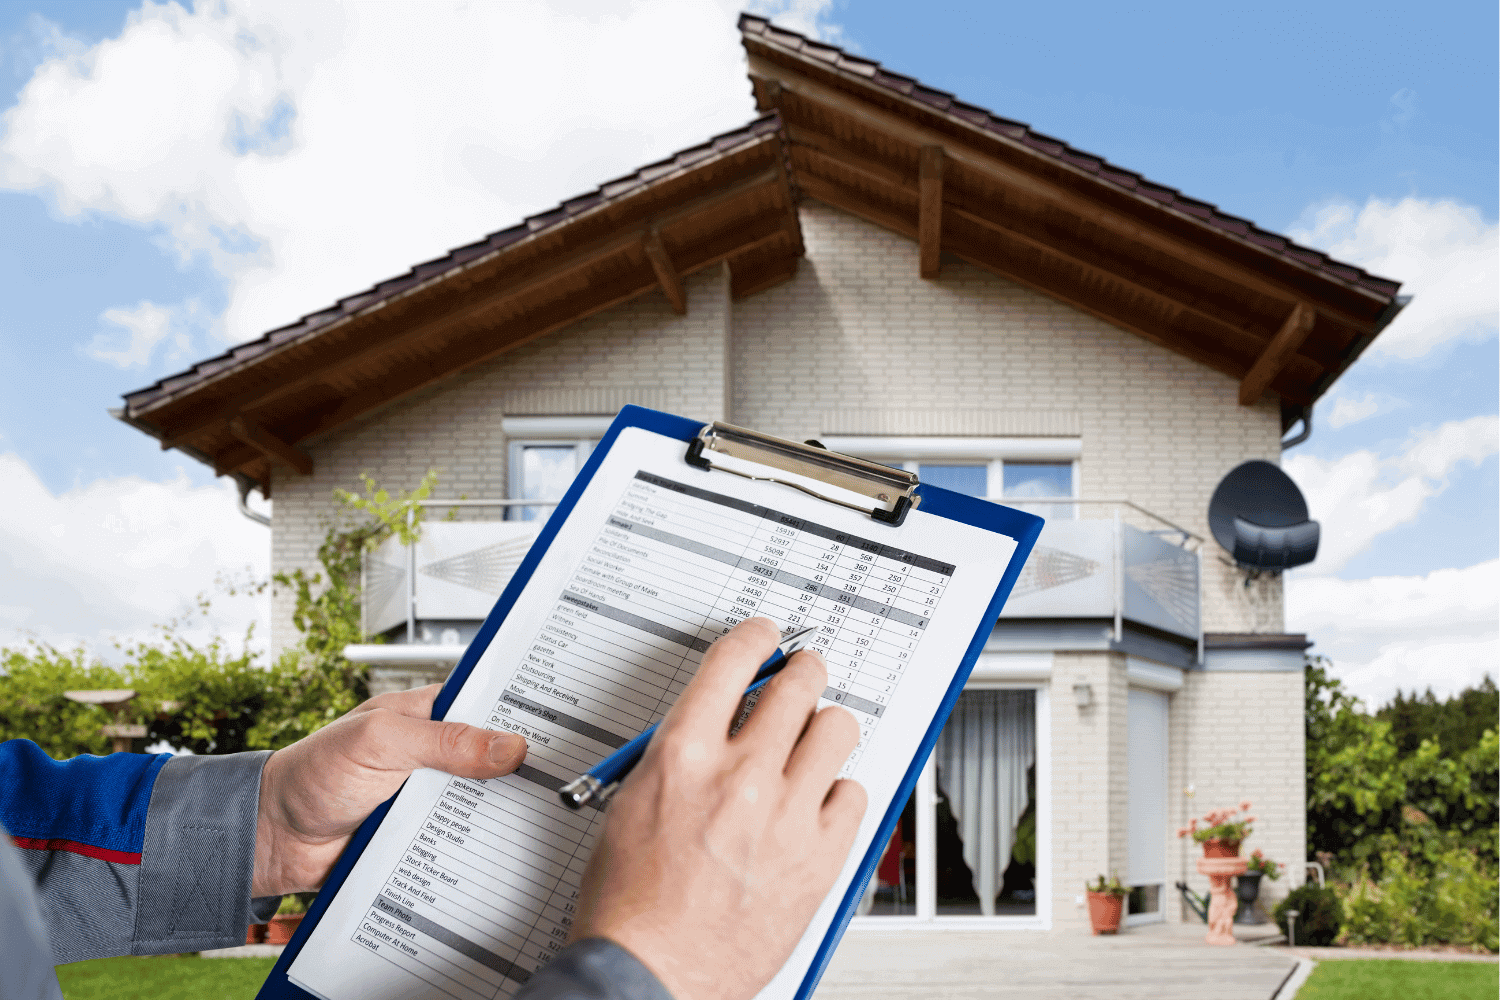
When to Hire Professionals for Installation

While some homeowners may feel confident in their DIY skills, hiring professionals for the installation of James Hardie siding is often the best choice. Improper installation by non-certified contractors can lead to significant issues like moisture problems and premature damage to the siding, potentially invalidating the manufacturer’s warranty. Certified contractors have the necessary training and experience to ensure a high-quality installation that meets James Hardie’s standards.

It’s advisable to contact at least three contractors to find the best fit for your siding installation needs. Professional installation ensures that the siding is properly installed, providing optimal performance and longevity.

By hiring certified professionals, homeowners can have peace of mind knowing that their investment in James Hardie siding is protected and their home’s exterior is in good hands.

Summary

In summary, James Hardie siding stands out as a premier choice for homeowners looking to enhance their home’s exterior with a durable, aesthetically pleasing, and low-maintenance solution. Its blend of cement, sand, and cellulose fibers provides exceptional protection against extreme weather, pests, and fire, ensuring long-lasting performance and peace of mind. The wide range of styles and colors, along with the innovative ColorPlus® Technology, allows homeowners to customize their homes to match their personal taste and architectural style.

Investing in James Hardie siding offers significant long-term value, with a lifespan of 50 years or more and minimal maintenance requirements. By choosing James Hardie siding and hiring certified professionals for installation, homeowners can enjoy a beautiful, durable, and safe exterior that enhances curb appeal and property value. At Waddle Exteriors, we are proud to offer James Hardie siding as part of our comprehensive exterior solutions, ensuring that our customers receive the best in quality and satisfaction.

Frequently Asked Questions

What makes James Hardie siding so durable?

James Hardie siding is highly durable due to its composition of cement, sand, and cellulose fibers, which offers exceptional resistance to extreme weather conditions, pests, and fire. This unique formulation ensures long-lasting protection for your home.

How does James Hardie siding compare to vinyl siding?

James Hardie siding surpasses vinyl siding in terms of durability, aesthetic options, and resilience against environmental factors, despite its higher initial price. Thus, it is a worthwhile investment for long-term quality.

What maintenance does James Hardie siding require?

James Hardie siding requires minimal maintenance, with regular cleaning every 6 to 12 months and occasional minor repairs using a cementitious patching compound as needed.

Is professional installation necessary for James Hardie siding?

Professional installation of James Hardie siding is highly recommended to ensure proper installation, adherence to warranty requirements, and optimal performance. This careful approach can help avoid potential issues that may arise from a DIY installation.

What is the cost of installing James Hardie siding?

The cost of installing James Hardie siding generally ranges from $6 to $15 per square foot, which includes materials and labor; additional charges may apply for the removal of old siding and the installation of insulation or moisture barriers.


A breakdown of the cost of roof inspections.

Top Tips for a Thorough Roof Inspection

Why is a roof inspection important? It helps catch small issues before they turn into costly repairs. In this article, we cover what a roof inspection involves and how often you should do it. Learn how to maintain your roof and avoid unexpected expenses.

Key Takeaways

  • Regular professional roof inspections are crucial for identifying hidden issues, preventing costly repairs, and extending the lifespan of your roofing system.

  • Roof inspections should be conducted at least annually and after severe weather events to assess damage and maintain the roof’s integrity.

  • Understanding the details provided in the inspection report helps homeowners make informed decisions about necessary repairs or maintenance.

Top Tips for a Thorough Roof Inspection

A professional conducting a thorough roof inspection.

A thorough roof inspection ensures your roofing system performs optimally. Here are some top tips to maximize the effectiveness of your inspection.

First, schedule a roof inspection with a professional roof inspection contractor. A professional inspection is far more detailed and can identify issues that an untrained eye might miss. Using advanced tools and techniques, professional inspectors thoroughly assess your roof’s condition. Regular inspections can prevent minor issues from escalating into major problems, ultimately saving you time and money.

Don’t wait for obvious signs of damage like leaks. Make regular roof inspections part of your home’s maintenance routine. Ideally, inspect your roof at least once a year and after severe weather events. This proactive approach helps identify potential problems early and ensures your roof’s longevity.

Review the inspection report carefully. These reports often include details about the roof’s age, type, and slope, along with visual documentation like diagrams and photographs to illustrate findings.

Introduction

Roof inspections are an integral part of maintaining your home’s roof, ensuring it remains in good condition and continues to protect your home effectively. They provide invaluable insights into the current state of your roof, highlighting any potential issues that need addressing before they become major problems.

Understanding the importance of regular roof inspections allows you to take proactive steps to maintain your roofing system, avoid costly repairs, and extend its lifespan. Whether you’re a homeowner or involved in real estate transactions, knowing when and how to get your roof inspected can save you hassle and expense in the long run.

This guide helps you navigate the various aspects of roof inspections, from understanding what they entail to knowing when to schedule them. You’ll also learn about the different types of inspections available and how to choose between a DIY approach and hiring a professional. Explore the world of roof inspections and uncover the best practices to keep your home’s roof in top shape.

Understanding Roof Inspections

Roof inspections are comprehensive evaluations of your roof’s condition, performed by skilled inspectors. They assess the performance of various roofing components and identify necessary repairs or maintenance.

Regular roof inspections detect damage early, preventing moisture accumulation, mold growth, and other issues that could compromise your roof’s integrity. Conducted after severe weather events, as part of annual maintenance, or before a real estate transaction, they play a vital role in maintaining your home’s safety and value, including necessary roof repairs.

What Is a Roof Inspection?

A roof inspection involves a detailed evaluation of the roof’s condition by a trained inspector. It examines various roofing components, assesses their performance, and identifies necessary corrections.

Both the interior and exterior elements of the roof are evaluated during a thorough inspection. Inspectors examine the roof deck, frame, and surface materials, accessing areas like attics for comprehensive assessments. They use advanced diagnostic tools and techniques to identify all potential issues, providing a detailed report reflecting their findings.

Why Are Roof Inspections Important?

Regular roof inspections extend your roofing system’s lifespan. Identifying issues early helps prevent costly damage and ensures your roof remains in good condition. Early detection of roof damage during regular inspections prevents moisture accumulation and mold growth. Timely inspections also contribute to the roof’s overall lifespan by allowing minor repairs to prevent more significant, expensive issues.

Many roofing warranties require annual inspections to remain valid, protecting homeowners from future complications. Regular inspections also ensure proper drainage by identifying debris and other issues that could cause water stagnation, safeguarding your roofing system.

Key Elements Checked During a Roof Inspection

Key elements being checked during a roof inspection.

During a roof inspection, several key elements are checked to ensure overall health and performance by a roof inspector. These include structural integrity, material condition, interior components, and workmanship quality. Inspectors examine fascia boards, soffits, skylight windows, and chimneys for signs of rot, cracks, and warping.

They check for blistered, curled, or split shingles and loose or exposed nails, which can compromise the roof’s integrity. Assessing these critical components allows inspectors to provide a comprehensive evaluation and recommend necessary repairs.

Structural Inspection

A structural inspection assesses the overall stability and condition of the roof’s framework. Inspectors look for signs of sagging ridges and uneven roof planes, which can indicate structural failures. The condition of key components such as rafters, joists, soffits, fascia, and gutters is evaluated to ensure structural integrity. This meticulous approach identifies any weak spots or damage that could compromise the roof’s safety and functionality.

Material Inspection

Material inspection identifies damage to the roofing materials. Inspectors check for cracks, splits, curling, missing granules, water damage, moss, and algae. They also look for missing materials, rust, and other indicators of deterioration, especially in asphalt shingle roofs where curling, loose or missing shingles, moss, stains, and rust are common problems.

Properly installed flashing prevents roof leaks, so inspectors pay close attention to its condition. They closely examine the roofing material, often from on the roof, to determine its overall health and identify any signs of water infiltration behind fascias and drip edges. Drones can inspect high-risk areas, offering detailed insights through high-resolution images.

Interior Inspection

Interior inspection examines areas such as the attic, ceilings, and walls for potential issues. Inspectors look for signs of leaks, such as water stains, mold, and wet insulation, which can indicate roof problems.

Inspecting the attic allows roofers to discover water stains or other damage that may not be visible from the outside. They also check key components of the roof structure, including rafters, joists, and decking, to ensure their integrity and identify any underlying issues.

Workmanship Inspection

Workmanship inspection evaluates the quality of installation and repair work. Inspectors look for common issues, such as improper nailing techniques and shingle placement. Proper workmanship is crucial for the roof’s longevity and performance. Inspectors ensure all components are installed correctly and securely. This thorough evaluation helps in identifying any issues that could compromise the roof’s integrity.

Types of Roof Inspections

Different types of roof inspections being performed.

Roof inspections vary to meet specific needs and situations, ranging from traditional physical checks to advanced methods like drone and infrared technology. Understanding the different types of roof inspections helps homeowners choose the most appropriate method based on their requirements and roof condition. Explore each type in detail.

Physical Roof Inspection

Physical roof inspections involve inspectors accessing the roof directly for a comprehensive assessment. Climbing onto the roof allows them to thoroughly examine its condition and identify any signs of damage or wear.

Drone Roof Inspection

Drone roof inspections use drones to take photos and videos of the roofing system, providing a safe and efficient way to assess hard-to-reach areas. This method is useful when inspectors cannot physically access the roof due to safety concerns, poor roof condition, or adverse weather.

Drone inspections typically cost between $150 and $400, offering a cost-effective option for detailed roof assessments. The high-resolution images captured by drones provide detailed insights, helping inspectors identify potential issues without the risks of physical inspections.

Infrared Roof Inspection

Infrared roof inspections use advanced technology to detect hidden roof issues invisible to the naked eye. This method is effective in identifying small cracks, leaks, and other problems that might not be apparent during a standard inspection.

Infrared inspections cost more, typically ranging from $400 to $600. Despite the higher price, the detailed analysis provided by infrared technology can help prevent significant damage and costly repairs in the long run.

When to Schedule a Roof Inspection

Schedule roof inspections regularly, especially as roofs age or after severe weather events. Regular inspections help identify potential issues early, ensuring the roof remains in good condition and functions effectively.

The best times to schedule a roof inspection are late spring and early fall, when weather conditions are moderate. Additionally, inspections are crucial after severe weather events to assess any damage and plan necessary repairs or replacements.

Annual Roof Inspection

Homeowners should schedule a roof inspection yearly to maintain their roof’s integrity. If your roof is more than five years old, ensure you have an inspection at least once a year, particularly in the fall when weather conditions are favorable.

An annual roof inspection helps catch problems before they escalate into significant and costly repairs. For larger homes, an inspection can take up to two hours, while smaller homes may take less time.

Post-Severe Weather Inspection

Have your roof inspected after a storm to assess potential damage and maintain the integrity of your roofing system. Severe weather events like heavy downpours, wind gusts, hail, or snow should prompt immediate inspections.

Homeowner’s insurance often covers roof inspections following severe weather incidents, so contact your insurance company first. Before scheduling an inspection, understand your coverage options and claims process.

Pre-Sale or Purchase Inspection

A roof inspection before selling or purchasing a home identifies necessary repairs and ensures the roof is functioning properly. An official report on the roof’s condition is often needed while selling or refinancing a home to document its value. In addition to a home inspection, hire a roofing contractor for a separate roof inspection. This ensures a thorough evaluation and provides peace of mind for both buyers and sellers.

Cost of Roof Inspections

A breakdown of the cost of roof inspections.

The cost of roof inspections can vary widely based on the type of inspection and the size of the roof. Generally, the national average for a standard roof inspection falls between $250 and $300.

Factors influencing the roof inspection cost include the complexity of the inspection, the tools used, and the specific needs of the roof. Let’s break down the typical costs associated with different types of roof inspections.

Average Roof Inspection Costs

The typical cost range for roof inspections is between $75 and $800, with an average cost of approximately $225. A basic visual roof inspection generally costs between $120 and $250, while more detailed inspections using advanced tools like infrared cameras can cost between $400 and $600.

Drone inspections, which provide comprehensive assessments with high-resolution images, typically range from $250 to $500. Professional roofing contractors provide detailed estimates for repairs or replacement based on the inspection findings.

Free Roof Inspections

Some roofing companies offer free roof inspections, often tied to estimates for repairs. While these can be a great way to get an initial assessment, it’s advisable to be cautious to avoid unnecessary repairs.

Free roof inspections can provide valuable insights, but always ensure you’re working with a reputable roofing company. This way, you can trust the findings and recommendations provided.

DIY vs. Professional Roof Inspections

A professional roof inspector assessing a roof.

Conducting your own roof inspection may save you money, but it comes with safety risks and the possibility of missing hidden issues. Professional roof inspectors bring expertise and use advanced tools, enabling them to uncover problems that might not be visible to homeowners.

Benefits of Hiring a Professional Inspector

Qualified professional inspectors have the necessary experience to identify roof issues that an untrained homeowner might overlook. Not all home inspectors are qualified to perform a thorough roof inspection, making it vital to choose experienced professionals.

Hiring insured roofing contractors protects homeowners from liability if any accidents occur during the roof inspection. Additionally, an official report from a professional inspector is often required by insurance companies for claims related to roof issues.

DIY Roof Inspection Tips

If you decide to conduct your own roof inspection, prioritize safety. The safest way to perform a visual inspection is from the safety of a ladder, and if you need to inspect a flat roof, use proper safety equipment like a harness. It’s best to perform your own roof inspection during the first half of the roof’s expected lifespan.

How Waddle Exteriors Conducts Roof Inspections

Waddle Exteriors employs a thorough approach during roof inspections to ensure all aspects are carefully evaluated. The inspection process begins with scheduling an appointment that accommodates the client’s availability and specific concerns.

After the inspection, a detailed report outlining the roof’s condition and problem areas is provided. This report may include photographs to support the findings, illustrating Waddle Exteriors’ commitment to providing high-quality and transparent roofing services.

Our Inspection Process

The roof inspection process at Waddle Exteriors starts with a personal consultation where the team discusses the roofing project details with the homeowner. A comprehensive examination of the roof includes inspecting shingles, flashing, gutters, and vents to detect any signs of damage or wear.

Waddle Exteriors employs cutting-edge equipment, such as drones and infrared cameras, to uncover issues that may not be visible to the naked eye. This advanced technology ensures a thorough and accurate assessment of the roof’s condition.

What Happens After a Roof Inspection?

After a roof inspection, a detailed report is provided that outlines any damage or potential issues along with recommendations. This report includes findings, photographs, and recommendations for repairs or maintenance.

Having a detailed inspection report simplifies the process of filing insurance claims after severe weather events. The report also impacts the timeline, scope, and cost of necessary work, helping homeowners plan for future maintenance or replacement.

Interpreting the Inspection Report

A roof inspection report includes a detailed analysis of the roof’s condition, problem areas, and supporting pictures. Typically, the report outlines the roof’s condition, recommended repairs, concerns about roof failure, and expected lifespan.

Homeowners should carefully review the report to understand necessary repairs and the overall health of their roof. Different roofing companies may present inspection reports in various formats, so it’s essential to understand the key points and recommendations.

Scheduling Repairs or Replacement

After the inspection, it’s essential to determine if repairs can be made or if a complete roof replacement is needed. Professional roofing contractors typically offer the possibility of repair or need for a new roof, along with estimates.

Acting on the report’s recommendations promptly ensures that minor issues do not escalate into major problems. Scheduling repairs or replacement in a timely manner helps maintain the roof’s integrity and prolongs its lifespan.

Summary

In summary, regular roof inspections are crucial for maintaining the health and integrity of your roofing system. They help identify and address potential issues early, preventing costly repairs and extending the roof’s lifespan. Whether you’re a homeowner or involved in real estate transactions, understanding the importance of roof inspections and knowing when to schedule them can save you a lot of hassle and expense.

By following the tips provided in this guide, you can ensure your roof remains in top condition. Don’t wait for visible signs of damage—schedule regular inspections and act on the findings promptly. Remember, a well-maintained roof is key to a safe and comfortable home.

Frequently Asked Questions

What are the methods of roof inspection?

The most common method of roof inspection involves physical inspection by an inspector who examines roofing components like shingles, flashing, and vents while searching for damage or irregularities. They often document their findings with photographs for a comprehensive report.

What is included in a roof inspection report?

A roof inspection report generally includes a comprehensive assessment of the roof’s condition, identification of problem areas, supporting photographs, recommended repairs, potential concerns regarding roof failure, and an estimate of the roof’s expected lifespan. This thorough documentation helps you make informed decisions regarding maintenance and repairs.

How often should I schedule a roof inspection?

You should schedule a roof inspection at least once a year, ideally in the spring or fall, and additionally after any severe weather events. Regular inspections help ensure your roof remains in good condition and can prevent costly repairs.

What are the benefits of hiring a professional roof inspector?

Hiring a professional roof inspector ensures a comprehensive evaluation of your roof, identifying potential issues that you may miss. Their expertise and advanced tools provide you with peace of mind and a clearer understanding of your roof’s condition.

What are the costs associated with different types of roof inspections?

The costs for roof inspections vary depending on the type, with basic visual inspections averaging $120 to $250, infrared inspections ranging from $400 to $600, and drone inspections typically costing between $250 and $500. Understanding these costs can help you choose the right inspection for your needs.


A comparison of different roofing options, including a second layer and full roof replacement.

2 Layer Roof: Pros, Cons, and Solutions

Thinking about a 2 layer roof? Adding a second layer of shingles can be a quick and cost-effective option compared to a full replacement. But is it the right choice for your home? This article dives into the pros, cons, and key considerations to help you decide.

Key Takeaways

  • Adding a second layer of shingles can save costs and time for homeowners, but it poses risks such as structural concerns, aesthetic issues, and complicated inspections.

  • The addition of a second layer can reduce a roof’s lifespan, complicate leak detection, and create conditions favorable for mold growth, leading to increased long-term costs.

  • Homeowners should consider alternatives like full roof replacement or restoration, and carefully evaluate the financial and legal implications of adding a second layer before proceeding.

Why Homeowners Consider Adding a Second Layer of Shingles

A roof with two layers of shingles, showcasing the existing shingles and the new layer.

For many homeowners, adding a second layer of shingles over the existing ones is attractive due to cost savings. Rather than a full roof replacement, which requires tearing off old materials, new shingles can be placed directly over the old ones. This method saves significant time and reduces labor costs, making it appealing for budget-conscious individuals.

This method also reduces waste by avoiding the removal of old roofing materials, contributing to less environmental impact. Additionally, it allows for a quicker installation process since the time-consuming task of removing old shingles is bypassed. These factors make adding a second layer of shingles an appealing option for many.

The Downsides of Two Layers of Shingles

However, despite the initial appeal, adding a second layer of shingles comes with its own set of challenges and risks. These can range from weight concerns and aesthetic issues to complicated inspections and increased future costs. Weigh these downsides carefully before making a decision.

Weight Concerns

One of the most significant drawbacks of adding a second layer of shingles is the additional weight it places on your roof. This extra weight can double the roof’s load, potentially leading to structural failure or sagging.

In fact, a second layer of roof layers can add between 3,900 lbs and 4,800 lbs to the average roof, posing a severe risk to the rafters and overall structural integrity.

Aesthetic Issues

A second layer of shingles can negatively affect your roof’s appearance. The new shingles adopt the shape of the old ones, leading to an uneven and bumpy surface that detracts from the home’s curb appeal.

This issue is especially pronounced when architectural shingles are layered over 3-tab shingles, resulting in noticeable bumps and an unattractive finish.

Complicated Inspections

Adding a second layer complicates roof inspections, making it difficult to identify and address underlying issues like rot, leaks, and structural damage. These problems can remain hidden, worsening over time. This can negatively affect home inspection reports, reducing buyer interest and potentially lowering property value.

Impact on Roof Performance

A close-up view of roof shingles, illustrating the impact of roof performance.

The addition of a second layer of shingles can significantly impact the overall performance of your roof. Issues such as reduced lifespan, leak detection challenges, and the risk of mold and algae growth can all arise, making this option less desirable in the long run.

Reduced Lifespan

A second layer of shingles can dramatically reduce your roof’s lifespan. Increased heat absorption accelerates the deterioration of both old and new shingles, potentially halving the roof’s typical lifespan and leading to long-term problems and expenses that outweigh initial savings.

Leak Detection Challenges

Two layers of shingles make detecting a roof leak more challenging. Underlying issues are obscured, complicating repair processes and potentially leading to more extensive damage over time.

Mold and Algae Growth

Two layers of roof shingles can trap moisture, creating ideal conditions for mold and algae growth. This accelerates the deterioration of roofing materials and poses health risks to occupants.

Regular professional assessments can help identify and mitigate these issues early on.

Legal and Warranty Considerations

An image depicting a roofing contractor inspecting a roof for legal and warranty considerations.

Consider the legal and warranty implications before adding a second layer of shingles. Many warranties do not cover layered installations, and local building codes may restrict or prohibit this practice for safety and compliance.

Building Codes

Local building codes often restrict multiple layers of shingles due to increased risks of structural issues and roof blow-off. Violating these codes can result in fines and complications, so consult a knowledgeable roofing contractor before proceeding.

Warranty Voids

A second layer of shingles typically voids manufacturer warranties unless installed by certified contractors following strict guidelines. This can result in complete coverage loss, leaving homeowners financially vulnerable in the event of roof leaks or other issues.

Financial Implications

A visual representation of financial implications related to roofing choices.

The financial implications of adding a second layer of shingles go beyond the initial cost savings. Homeowners must consider the long-term expenses associated with future repairs and the potential impact on resale value.

Short-Term Savings vs Long-Term Costs

Although adding a second layer of shingles provides immediate cost savings, it often leads to higher long-term expenses due to increased labor costs for future repairs. The complexity of detecting and repairing leaks can make maintaining the roof more costly than expected.

Resale Value

Multiple layers of shingles can negatively impact the property’s resale value. Inspection reports highlighting this issue may lower the selling price or necessitate a full roof replacement before the sale, ultimately reducing the cost savings homeowners hoped to achieve.

Alternatives to Adding a Second Layer

A comparison of different roofing options, including a second layer and full roof replacement.

Homeowners have several viable alternatives to adding a second layer of shingles that provide better long-term results. Options like full roof replacement, roof restoration, and various financing methods can maintain roof integrity without the associated risks of multiple layers.

Full Roof Replacement

A full roof replacement is often the most reliable solution. This approach allows for a thorough inspection of the roof decking and ensures all underlying issues are addressed, including the need for a new roof. Although more expensive upfront, it provides a long-lasting and durable solution that avoids the complications of a second layer.

Roof Restoration

Roof restoration is another cost-effective alternative that can extend the life of your existing roof. This method involves repairing and rejuvenating the current roof, addressing issues without a complete tear-off. Waddle Exteriors offers comprehensive roof restoration services to help maintain the roof’s integrity and performance.

Financing Options

Homeowners concerned about the costs of a full roof replacement or restoration can explore various financing options, including payment plans, home equity loans, cash-out refinancing, and local government assistance. Waddle Exteriors assists customers in finding the best financing options tailored to their specific roofing project needs.

Choosing the Right Roofing Contractor

Choosing the right roofing contractor is crucial for ensuring the quality and longevity of your roof. A professional assessment can determine the best course of action and provide peace of mind that your roof is in good hands.

Importance of Professional Assessment

A thorough inspection by a professional roofing contractor is essential to identify potential issues and understand necessary repairs. Regular assessments, ideally every two years, help maintain your roof’s health and prevent costly repairs down the line. Waddle Exteriors prioritizes customer satisfaction through detailed inspections and high-quality service.

Quality Assurance with Waddle Exteriors

Waddle Exteriors is dedicated to transforming homes into sanctuaries of comfort and style, with a strong commitment to excellence and customer satisfaction. They conduct thorough post-completion inspections to ensure proper execution of their work, providing assurance of quality.

Waddle Exteriors has over 40 years of experience and a solid reputation for efficient and clean work during roof replacement projects.

Summary

In summary, while adding a second layer of shingles may seem like an appealing, cost-effective solution at first, it comes with significant downsides that can affect your roof’s performance and longevity. From weight concerns and aesthetic issues to complicated inspections and reduced lifespan, the risks often outweigh the initial savings. Legal and warranty considerations further complicate the decision. Exploring alternatives like full roof replacement and roof restoration can provide more reliable and long-lasting results. Choosing the right roofing contractor, such as Waddle Exteriors, ensures professional assessment, quality assurance, and customer satisfaction.

Frequently Asked Questions

Why do homeowners consider adding a second layer of shingles?

Homeowners consider adding a second layer of shingles because it is seen as a cost-effective and time-saving solution that avoids the labor of a full roof replacement while minimizing waste. This approach can provide a quicker way to extend the life of their roof.

What are the weight concerns associated with adding a second layer of shingles?

Adding a second layer of shingles can significantly increase the roof’s weight, potentially leading to structural failure and a shortened lifespan. It is crucial to consider these weight concerns to maintain the integrity of your roofing system.

How can a second layer of shingles affect the roof’s aesthetic appeal?

A second layer of shingles can negatively impact the roof’s aesthetic appeal by creating an uneven appearance and visible bumps, particularly when architectural shingles are placed over 3-tab shingles. This often results in a less attractive finish that can detract from the overall curb appeal.

What legal and warranty considerations should homeowners be aware of before adding a second layer of shingles?

Homeowners must ensure compliance with local building codes, as multiple shingle layers may be restricted in some areas. Furthermore, it’s essential to recognize that installing a second layer can void manufacturer warranties unless done by certified professionals.

What are the alternatives to adding a second layer of shingles?

A full roof replacement offers a more reliable and durable solution than adding a second layer of shingles, while roof restoration can effectively extend the existing roof’s life with fewer risks. Consider these alternatives to ensure long-term protection for your home.


New Roof Cost What To Expect

How Much Does A New Roof Cost?

A brand-new roof can be a significant investment for any homeowner, with the average new roof cost of a new asphalt shingle roof ranging from $5,000 to $10,000. However, the cost of a new roof cost is often offset by the increased value it provides to a home. In addition, a new roof can help to improve energy efficiency and reduce utility bills. Finally, a new roof can provide peace of mind for families with young children by ensuring their home is safe and protected from the elements. As such, the cost of a new roof is an investment that is well worth making.

When you plan to have a new roof installed, you may wonder how long the process will take from start to finish. The answer depends on several factors, including the size of your home and the type of roofing material you choose. However, the roofing process can be completed in two to three days. On the first day, the old roofing material will be removed, and the area will be prepared to install the new roof. The installation of the new roof will occur on the second day. Once the new roof is in place, it will need to be sealed and protected with a weatherproof coating. This final step can usually be completed on the third day. In some cases, however, it may be necessary to wait a few days for the coating to dry before applying it.

What type of materials will be used for the new asphalt shingle roof

An essential factor in choosing a suitable roofing material is the climate. In areas with high rainfall, for example, there may be better options than asphalt shingle roof because the weight of the water can damage them. Metal roofs are a good choice for high-rainfall areas because they can withstand the weight of water. Another factor to consider is the climate in your area. If you live in an area with severe weather conditions, such as hail or high winds, you must choose a material that can withstand these conditions. Metal roofs are a good choice for areas with severe weather conditions because they are durable and can withstand high winds and hail. Lastly, you need to consider the cost of the roofing material. Asphalt shingle roof are typically less expensive than metal roofs, but they may only last for a short time. Metal roofs are more costly than asphalt shingles, but they will last longer and provide better protection for your home.

Who is responsible for taking down the old roof

There are a few things to keep in mind when it comes to taking down an old roof. First and foremost, hiring professionals to handle the job is essential. Not only will they have the experience and expertise to take down the roof safely, but they will also be insured in case of any accidents. In addition, if you have a family member or friend who is experienced in roofing, they may also be able to help with the job. However, it is always best to err on the side of caution and hire professionals whenever possible. Additionally, be sure to check with your homeowners’ insurance policy to see if it covers any damages that may occur during the roof removal process. Taking these precautions will help ensure the job is done safely and correctly.

Can I select my color and style for the new roof?

When it comes time to replace your roof, you may wonder if you can select your color and style. The answer is yes! You will work closely with a professional roofing contractor to choose the materials that best suit your home and personal preferences. Many different roofing materials are available on the market so you will have plenty of options. Once you have selected the materials for your new roof, the contractor will install the roof according to your specifications. 

Will there be any mess or disruption during the installation process?

When professionals come to your home, will they respect your property? How long the installation takes? Will there be any mess or disruption during the installation? 

Any professional installation team will take great care to ensure no mess or disruption during the installation process. They will lay down dust sheets to protect your floors and furniture and carefully remove and dispose of any packaging. Then, once the installation is complete, they will give your room a final sweep to ensure everything is clean and tidy. So you can rest assured that your home will be left just as it was before we arrived – but with your new system up and running.

To top it up, having a new roof can be an excellent investment for your home. Not only will it provide protection from the elements, but it can also increase energy efficiency and reduce utility bills. With a bit of planning, you can have the perfect roof for your home.


How Many Layers of Shingle Are Allowed On A Roof

Shingle Roof Layers

The roof’s slope dictates the number of layers of roofing shingles allowed on roof. The steeper the slope, the fewer layers are permitted. For example, a roof with a 4:12 pitch can have up to four layers of shingles, while a roof with a 2:12 pitch can have only two layers. This is because steep roofs are more likely to experience problems with excess weight, and adding additional layers of shingles can put too much strain on the roof deck and framing. In addition, steep roofs are more likely to experience problems with wind uplift, and the additional weight of multiple layers of shingles can worsen the situation. As a result, following the recommended guidelines for the maximum number of layers of shingles based on the roof’s slope is essential.

In general, most roofs can support two or three layers of shingles

The roof is one of the essential components of your home, and it is crucial to keep it in good repair. One way to do this is to replace the shingles periodically. An asphalt shingle roof can support two or three layers of shingles, and adding a new layer can help extend your roof’s life. However, a few things to remember when adding a new layer of shingles. First, ensure that the new shingles are compatible with the existing ones. Second, be sure to seal all joints and seams to prevent leaks. And third, secure the new shingles are properly ventilated to allow moisture to escape. By following these simple guidelines, you can help to ensure that your roof will provide years of trouble-free service.

If you’re not sure how many layers of shingles your roof can support, consult with a professional contractor

The number of layers your asphalt shingle roof can support depends on the type of shingles you have. Asphalt shingles can usually support two to three layers, while wood shingle can only support one. If you’re unsure what type of shingles you have, a professional contractor can help you determine the best course of action. Adding too many layers of shingle can put unnecessary stress on your roof, which could lead to leaks or even collapse. On the other hand, removing too many layers can leave your home vulnerable to weather damage. Either way, it’s essential to consult with a professional before making any changes to your roof.

Asphalt Shingle Roof Come In A Variety Of Colors And Styles

When it comes time to replace your roof, you have a lot of choices to make. One of the most critical decisions is what type of shingle to use. Roofing shingles come in a wide range of colors and styles, so it’s essential to choose the right one for your home. If you need help figuring out where to start, consider the following factors. First, think about the overall style of your home. Are you going for a traditional or modern look? Second, take into account the climate in your area. If you live in an area with harsh weather conditions, you’ll want to choose a shingle that can withstand the elements. Third, consider your budget. There are many types of shingles on the market, so compare prices before making your final decision. By taking these factors into account, you can be sure to choose the right roofing shingle for your home.

Always follow the manufacturer’s instructions when installing roofing shingles

Always follow the manufacturer’s instructions when installing roofing shingles. Roofing shingles are designed to be installed in a specific way, and following the manufacturer’s instructions will ensure that they are correctly installed. Ignoring the instructions can void the warranty, and it could also lead to problems down the road. For example, if the shingles are not laid down in the proper order, they could come loose or blow off in high winds. In addition, improper installation can cause leaks, leading to mold and water damage. By following the manufacturer’s instructions, you can be sure that your roof will be installed correctly and will provide years of protection for your home.

These are just a few things to keep in mind when you’re shopping for roofing shingles. The most important thing is to follow the manufacturer’s instructions. Consult a professional contractor. You’ll be able to find the perfect shingles for your home.

Most Popular Roof Shingle Color

Importance of Roof Shingle Color

One of the most critical decisions regarding roof shingle is choosing the right shingle color. The color of your shingles can significantly impact the overall look of your home and can also affect energy efficiency. With so many options, it can take time to figure out where to start. However, a few colors consistently rank high in popularity surveys. Black, grey, and brown shingles are all classics that work well with various home styles. These colors also tend to be good at hiding dirt and debris, which can be a significant advantage if you live in an area with many trees. Red and green asphalt shingle are also popular choices if you’re looking for something a little more eye-catching. These colors can add a personality to your home while remaining classic enough to appeal to potential buyers. Whatever color you choose, make sure you take the time to research your options so you can find the perfect shade for your home.

Considering its style and architecture, how can you choose the right color for your home?

Choosing the right color for your home can be daunting, especially if you need clarification on your style or architecture. However, you can keep a few things in mind that will help you make the best choice. First, consider the style of your home. You might want to wear classic colors like white or beige if it’s a traditional style. You can be more adventurous with your choices if it’s a more modern style. Second, think about the architecture of your home. If it has a lot of curves and lines, you’ll want to choose colors that will complement those features. If it’s boxier and straight-lined, you’ll want to pick colors to make those features stand out. Finally, take into account the light levels in your home. If it’s a sunny room, you’ll want to go with brighter colors; if it’s a more subdued space, you can choose darker or muted tones. Keeping these factors in mind allows you to narrow down your choices and find the perfect color for your home.

What factors should you consider before deciding on a roof color?

When choosing an asphalt shingle color, there are a few factors to consider. One is the overall style of your home. If you have a traditional house, you might want to stick with a classic black or grey roof. However, if your home has more of a modern look, you should experiment with different colors. You should also take into account the climate in your area. A light-colored roof can help keep your home cooler by reflecting sunlight if you live in a hot environment.

In contrast, a dark-colored roof can help absorb heat and keep your home warmer if you live in a colder climate. Finally, you should consider maintenance requirements for different examples of different colors. For example, some darker colors can fade over time, while lighter colors may show dirt; considering all of these, you can choose a roof color that will suit your needs.

How long will a new asphalt shingle roof color last before it needs to be replaced again?

A new roof color can brighten your home and give your home an updated look. But how long will the new color last before needing to be replaced? In most cases, a new roof color will last for several years before it begins to fade. For example, the color may fade more quickly if you live in an area with high levels of ultraviolet light.

Additionally, certain types of paint are more susceptible to fading than others. When choosing a new roof color, discuss these factors with your contractor to ensure that you select a shade that will stand the test of time. With proper care and maintenance, your new roof color can last for years.

In conclusion, the most popular roof shingle colors are black, brown, gray, green, and red. While some of these colors may be more trendy than others, they all offer a variety of benefits that make them ideal for both homes and businesses. When choosing a new roof color, it’s essential to consider the style of your home or business and its architecture. You’ll also want to consider how long you’re willing to commit to a new color before replacing it again. Deciding on a new roof color can seem daunting with so many factors. However, by taking the time to weigh your options carefully, you can be sure to choose a color that will last for years to come.


What Is An Architectural Roof

An architectural roof shingle is a type of roofing material shingle that offers durability, beauty, and performance. Unlike traditional asphalt shingles, architectural roofing material shingles are designed with multiple layers of material that provide strengthened protection against the elements. In addition, the dimensional design of architectural roofing shingles can add depth and character to your home’s exterior. If you’re looking for a roofing solution that will offer lasting value and curb appeal, an architectural roof may be the right choice.

The Different Types Of Architectural Roofs

There are many different types of architectural roofs. The most common type is the pitched roof, which is usually made of asphalt shingles or metal. Pitched roofs are easy to construct and provide good protection from the elements. However, they can be susceptible to leaks and require regular maintenance. Another popular type of roof is the flat roof. Flat roofs are less likely to leak than pitched roofs, but they are less effective at shedding rain and snow. As a result, they require more frequent cleaning and inspection. Finally, there are green roofs, which are made of vegetation-covered soil. Green roofs have many benefits, including improved insulation and enhanced stormwater management. However, they can be expensive to install and require careful maintenance.

How to choose the right type of architectural roof for your home

When choosing the right type of roof for your home, there are many factors to consider. The climate in your area, the style of your home, and your budget are all critical factors that will help you narrow down your choices. However, one of the most important considerations is the function of the roof. For instance, if you live in an area with high winds, you’ll want to choose a roof that can withstand strong gusts. If you’re looking for a roof that provides insulation, you’ll want to choose one made of materials that will trap heat. And if you’re interested in a roof that will add curb appeal to your home, you’ll want to choose one with an attractive design. With so many options, it’s essential to research before making a final decision. By learning about the different types of roofs available, you can be sure to choose the one that’s right for your home.

An Architectural Roofing Materials Prices

Any home improvement project comes with a certain amount of cost and hassle, but when it’s time to replace your roof, you want to choose a material and style that will last. When it comes to selecting roofing material, price is a major factor in the decision-making process for many families. However, it’s important to also consider other criteria such as durability, energy efficiency, and aesthetics. Architectural roofing materials can provide some benefits over traditional options that could make up for the higher roofing material prices. They may be more durable and require less maintenance in addition to being aesthetically pleasing. Additionally, they often offer superior energy efficiency ratings than standard roofing materials which can result in lower utility bills in the long run. For these reasons, many families view architectural roofing material prices as an investment with potentially significant returns down the road.

An architectural roof is an excellent choice for durability and curb appeal, but the initial cost may be higher than a traditional asphalt shingle roof. However, you can be confident that an architectural roof will last for many years, providing beauty and protection for your home. In addition, an architectural roof can increase the resale value of your home, making it a wise investment in the long run. So, when it’s time to replace your roof, consider an architectural roof for its many benefits.

How to care for your architectural roof

As a homeowner, keeping your roof in good condition is essential. Not only does a well-maintained roof protect your home from the elements, but it can also improve your home’s curb appeal and add to its resale value. Regarding roof care, there are a few key things to remember. First, it’s essential to inspect your roof for signs of damage regularly. Look for missing or damaged shingles and any cracks or gaps in the roofing material. If you see any damage, be sure to have it repaired as soon as possible. Second, you’ll need to ensure that your gutters and downspouts are clean and debris-free. Clogged gutters can cause water to back up and lead to leaks, so be sure to clean them out regularly. Finally, having your roof inspected and cleaned by a professional at least once a year is a good idea. Following these simple tips, you can keep your architectural roof in top condition for years to come.

There are many benefits to having an architectural roof, including a unique and stylish look. Though more expensive than other roofs, they require little maintenance and last many years. When choosing an architectural roof, consider the climate and style of your house. 

What an Iowa Winter Can do to Your Roof?

An Iowa winter can wreak havoc on your roof. Extreme temperature changes, heavy snowfall, and high winds can all damage your roof and lead to leaks. The first step in preventing damage to your roof is to have it inspected by a professional. They will be able to identify any weak spots or potential problems. Once you know what needs to be fixed, you can take steps to repair or reinforce your roof. For example, you may need to add more insulation or replace damaged shingles. By taking proactive steps, you can help keep your roof in good condition and prevent expensive repairs down the road.

How To Protect Your Roof in the Winter?

Heavy snow and ice can cause shingles to break or even collapse, while high winds can tear off tiles or loosen gutters. As a result, it is important to take steps to protect your roof during the winter months. One way to do this is to clear away any snow or debris that has accumulated on the roof. This will help to prevent damage from weight or falling objects. You should also inspect your gutters and make sure they are free of leaves or other debris. If they are blocked, water could back up and cause damage to the roof or even leak into the home. Finally, you may want to consider investing in a weatherproof tarp or cover for your roof if you live in an area that is prone to severe winter weather. By taking these precautions, you can help to ensure that your roof will withstand the rigors of winter and keep your home safe and comfortable all season long.

What Temperature is too Cold for a Roof?

The answer to this question depends on a number of factors, including the type of roof material and the climate. In general, however, most roofs can withstand temperatures as low as -40 degrees Fahrenheit without sustaining damage. However, at these extreme temperatures, it is important to take steps to prevent ice dams from forming. Ice dams can cause water to back up under shingles and cause leaks. To prevent ice dams from forming, make sure that your attic is well-ventilated and that there is no build-up of snow or ice on the roof. In addition, consider installing a heating cable along the edge of the roof to keep snow and ice from building up. Taking these precautions will help to ensure that your roof remains in good condition during the winter months.

How Long Do Roofs Last in Iowa?

In Iowa, the average lifespan of a roof is 20 years. However, this number will vary depending on the type of roof and the weather conditions in Iowa. For example, metal roofs can last up to 50 years, while shingle roofs may only last 10-15 years. In addition, roofs in areas with severe weather conditions (such as high winds or hail) will not last as long as those in more moderate conditions. Ultimately, the best way to determine how long your roof will last is to have it inspected by a professional every few years. By catching problems early, you can extend the life of your roof and avoid expensive repairs down the road.

Common Roofing Problems in Winter

In winter, Roofing problems are common because of the extreme weather conditions. The most common problems are ice dams, leaks, and frozen pipes.

Ice dams can form when there is built-up snow and ice on the roof that then melts and refreezes. This can cause damage to the shingles and eventually lead to leaks. To prevent this, make sure that your gutters are clear of debris so that melting snow can drain properly. You may also want to install heat tape or heated coils along the edge of your roof.

Leaks can also occur in winter due to the increased precipitation or from ice dams. If you suspect a leak, it’s important to have it fixed as soon as possible as it can lead to further damage. Be sure to have a professional take a look as they will be able to properly diagnose and fix the problem.

Frozen pipes are another common issue in winter. This can happen if the temperature drops suddenly or if your pipes are not properly insulated. If your pipes do freeze, it’s important to thaw them slowly and never use an open flame. Once they are thawed, be sure to check for any leaks or cracks and have them repaired before turning the water back on.

By being aware of these common roofing problems, you can help prevent them from happening to your home this winter. If you do experience any issues, be sure to contact a professional as soon as possible so that they can be taken care of before they cause any further damage.

Roofer’s Job During Winter

When the weather outside is frightful, many people think that roofers must be taking a break. However, winter is actually one of the busiest times of year for roofing contractors. Not only are there many homes and businesses that need repairs after being damaged by winter weather, but roofers also have to contend with the challenges of working in cold temperatures. In order to keep their crews safe and productive, roofing companies take a number of precautions. First, they make sure that their workers are properly dressed for the cold weather. This includes providing them with warm clothing, gloves, and hats. Second, they use special equipment to prevent slips and falls. Finally, they closely monitor the condition of the roofs they are working on to ensure that they can safely withstand the weight of snow and ice. By taking these steps, roofers are able to continue serving their customers throughout the winter months.

Does a New Roof Add Value to Your Home?

A roof is a huge investment, and it’s one that you want to be sure is worth the cost. When it comes to adding value to your home, a new roof can be a great option. A new roof can not only add curb appeal but also increase the value of your home by as much as 10%. Not only that, but a new roof can also help to improve your home’s energy efficiency, which can save you money on your energy bills. With all of these benefits, it’s no wonder that a new roof is such a popular home improvement project. If you’re thinking about selling your home in the near future, a new roof can be a great way to increase its value. And even if you’re not planning on selling, a new roof can still be a wise investment that will pay off for years to come.

Benefits of a New Roof

A new roof is a big investment, but it’s one that can pay off in the long run. Not only will a new roof improve the appearance of your home, but it can also help to protect your family from the elements. A properly installed roof will keep out moisture, keeping your home dry and preventing the growth of mold and mildew. In addition, a new roof can help to insulate your home, keeping it cooler in the summer and warmer in the winter. As a result, you may see a reduction in your energy bills. Finally, a new roof can add value to your home, making it more attractive to potential buyers if you ever decide to sell. With all of these benefits, it’s easy to see why a new roof is worth the investment.

What is the Best Roof Type?

There are many factors to consider when choosing the best roof type for your home. The climate in your region, the style of your home, and your budget are all important considerations. In general, however, there are three main types of roofs that are commonly used: asphalt shingles, metal roofs, and tile roofs. Asphalt shingles are the most popular choice for residential roofs. They are relatively inexpensive and easy to install, and they offer good protection against weather damage. Metal roofs are another popular option, particularly in regions with high winds or heavy snowfall. Metal roofs are extremely durable and can last for decades with proper maintenance. However, they can be more expensive than asphalt shingles and may require specialized installation techniques. Tile roofs are a third option that is often used in regions with mild climates. Tile roofs are very durable and have a distinctive appearance. However, they can be quite expensive to install and repair. When choosing the best roof type for your home, it is important to weigh all of these factors carefully in order to make the best decision for your family.

Does a Roof Affect an Appraisal?

If you’re selling your home, you’re probably wondering how much it’s really worth. After all, the sale price is what will determine how much profit you walk away with. One factor that can impact your home’s value is its roof. In general, a newer roof will add to the value of your home, while an older roof may decrease its value. This is because a new roof indicates that the home is well-maintained and likely to have few problems, while an older roof may need to be replaced soon, which can be a major expense for buyers. The condition of your roof can also affect your appraisal. If your roof is in good condition, it will reflect positively on the value of your home. However, if your roof needs repairs or is in poor condition, it could lower the appraised value of your home. Ultimately, whether or not your roof affects your appraisal depends on its condition and age. But if you’re selling your home, it’s always worth considering any factors that could impact its value.

What Color Roof Adds Value to Home?

When choosing a color for your roof, there are many factors to consider. The color of your roof can affect your home’s value, energy efficiency, and curb appeal. If you’re looking to add value to your home, consider a light-colored roof. A white or light-colored roof reflects sunlight, which can help keep your home cooler in the summer. This can lead to lower energy bills and make your home more attractive to potential buyers. If you live in an area with a lot of snow, a dark-colored roof can also be a good choice. The dark color will absorb heat from the sun, helping to melt the snow and ice more quickly. However, dark-colored roofs can also be hotter in the summer, so be sure to take that into account when making your decision. Ultimately, the best color for your roof depends on your personal preferences and the climate where you live. Choose a color that you think looks best and that will work well with your home’s style.

Roof Maintenance

You’ve just had a new roof installed, and you want to make sure it lasts for years to come. Here are a few tips on how to maintain your new roof, with the help of a roofing professional:

– Inspect your roof regularly, paying special attention to any areas that may be vulnerable to leaks or damage.

– Have your roof inspected by a professional at least once a year.

– Keep trees and shrubs trimmed away from your roof, to prevent them from causing damage.

– If you notice any leaks or damage, have them repaired immediately by a professional.

– Make sure that your gutters and downspouts are clear of debris, so that water can flow freely away from your roof.

– Consider having a professional apply a protective coating to your roof, to help extend its life.

By following these simple tips, you can help ensure that your new roof will provide years of protection for your home.

Types of Hardboard Siding

Hardboard siding

Hardboard siding is a type of exterior siding made from wood fiber that has been highly compressed. It is one of the most popular types of siding due to its durability, affordability, and easy maintenance. Hardboard siding is available in a variety of colors and styles, making it a versatile option for any home. It is important to note that hardboard siding is not suitable for all climates, as it can become damaged in extreme heat or cold. However, with proper care and maintenance, hardboard siding can last for many years. Here are the 3 major types of hardboard siding:

Types of Hardboard Siding

1. Plywood

This type of siding is made from thin sheets of wood that are bonded together with adhesive. Plywood hardboard siding is strong and durable, and it is also relatively easy to install. In addition, this type of siding is often less expensive than other types of siding, making it a good option for budget-conscious homeowners. However, plywood hardboard siding is not without its drawbacks. This type of siding is not as resistant to fire as other types of siding, and it can also be susceptible to warping and cupping in humid climates.

2. Oriented Stand Board

OSB hardboard siding is an excellent choice for your home. It’s durable, easy to install, and provides a beautiful natural finish. OSB hardboard siding is also an environmentally friendly choice, as it’s made from recycled wood products. When you install OSB hardboard siding, you’re making an investment in your home that will pay off for years to come. Not only will you enjoy the beauty of the natural finish, but you’ll also have peace of mind knowing that your home is well protected from the elements. And if you ever decide to sell your home, the value of your home will increase. So if you’re looking for a durable, easy-to-install, and eco-friendly siding option, OSB hardboard siding is a perfect choice.

3. Composite

Composite hardboard siding is a popular choice for families who want the look of wood without the high maintenance costs. Unlike natural wood siding, composite hardboard is not susceptible to termites, rot, or other forms of damage. It is also more fire resistant and does not require painting or staining. Composite hardboard siding is available in a variety of colors and styles, making it easy to find a look that compliments your home. Installation is relatively simple, and most composite hardboard siding comes with a warranty for added peace of mind. If you are looking for a durable, low-maintenance option for your home, composite hardboard siding is an excellent choice.

Is Hardboard Siding Better than Vinyl?

There are many different types of siding available on the market today, and each has its own set of advantages and disadvantages. Hardboard siding is one option that is often used in homes. This type of siding is made from compressed wood fibers, and it is highly durable and easy to maintain. However, hardboard siding can be susceptible to water damage, and it does not provide as much insulation as other types of siding. Vinyl siding is another popular option for homeowners. It is made from PVC plastic, and it is very durable and easy to clean. Vinyl siding is also a good choice for homes in areas with high winds, as it will not blow off as easily as other types of siding. However, vinyl siding can fade over time, and it does not have the same aesthetic appeal as hardboard siding. When choosing a type of siding for your home, you should consider your budget, the climate in your area, and your personal preferences.

Longevity of Hardboard Siding

Hardboard siding is a reliable, durable option for your home. While it doesn’t last as long as stone or brick, it will still give you many years of service. With proper installation and maintenance, hardboard siding can last for decades. In fact, many homeowners who have hardboard siding report that it lasts just as long, if not longer, than the paint job. When it comes to deciding how long hardboard siding will last, there are a few factors to consider. First, the type of hardboard siding you choose will make a difference.  There are two main types of hardboard siding: engineered and un-engineered. Engineered hardboard siding is made with a plywood core and an exterior veneer. This type of siding is more resistant to water damage and wear and tear. Un-engineered hardboard siding is made with a fiberboard core and an exterior veneer. This type of siding is less expensive but also less durable. Second, the climate you live in will affect how long your hardboard siding lasts. If you live in an area with severe weather conditions, such as high winds or heavy rains, your siding may not last as long. Third, the quality of the installation will also play a role in how long your siding lasts. If you hire a professional installer who has experience installing hardboard siding shingles, your siding will last longer than if you try to install it yourself. Finally, the maintenance you perform on your siding will also affect its lifespan. Regular cleaning and sealing will help to prevent damage from the elements and extend the life of your siding. With proper care, your hardboard siding can last for many years.

How Do You Maintain Hardboard Siding

The first step in maintaining hardboard siding is to simply wash it down with a hose or pressure washer on a regular basis. This will help to remove any dirt or debris that has become embedded in the surface. If you notice any chipped or cracked areas, be sure to repair them as soon as possible to prevent further damage. In addition, it’s a good idea to apply a fresh coat of paint every few years to help protect the hardboard from the elements. By taking these simple steps, you can keep your hardboard siding looking new for many years to come.